

Sitecore
Ordercloud
authorizenet
Integrations

Amit Patel
Sitecore Architect
Authorize.net Integration with OrderCloud – Part 2: Credit Cards
Introduction
In the previous blog, we talked about Authorize.Net Payment Gateway solution setup that can be easily integrated with OrderCloud for payments. If you haven’t had a chance to read through it, check it out here.
Now, we will go through the implementation process for Credit Cards with OrderCloud being our eCommerce Platform.
If you are still unaware of what Sitecore OrderCloud is, you can refer to my previous blogs and get an overview about the platform here.
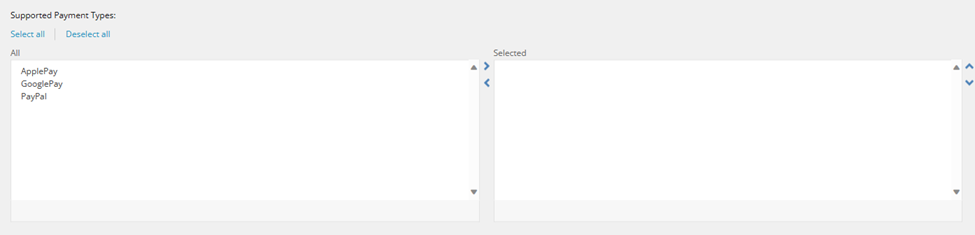
Configurable Supported Payment Types
As a general rule, it is a good idea to add some type of configuration to identify which payment types are supported. Not all eCommerce projects support all types of payments. Some may only allow Credit Cards, while others may allow PayPal as well.
First, create a Sitecore Settings in a config file to achieve this OR for easier management (especially when it involves a lot of testing on/off), add the settings in the CMS.
Implementation Options
Authorize.net offers a few different options to integrate payment forms on the page if you do not want to host it yourself. In order to be PCI compliant, I recommend using hosted forms.
Essentially you have the following 4 options:
- Integrate the form using a redirect
- Integrate the form using iframes
- Integrate the form using an embedded frame
- Accept.js
We will focus on the last option, using an Accept.js JavaScript library to send secure payment data straight to Autorize.Net.
Required Data
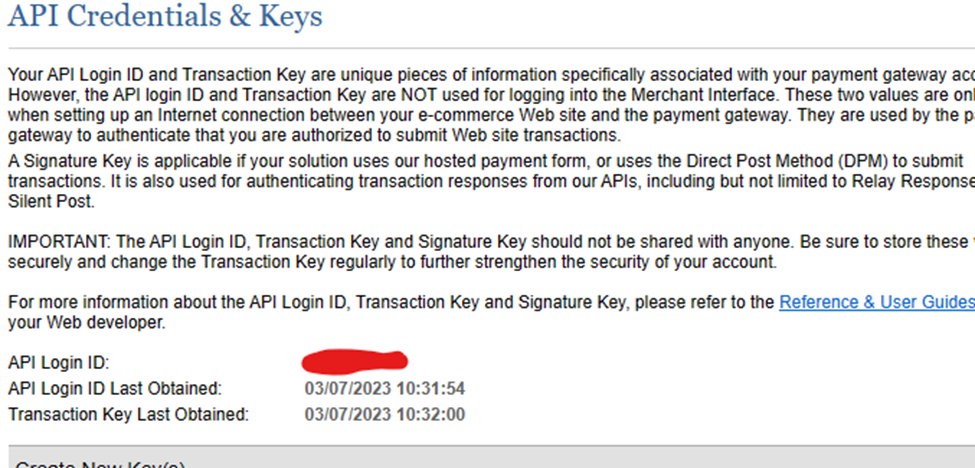
In order to use the Accept.js library, you will need the following security data from Authorize.Net.
1. Public Client Key If you do not have one, log in to the Authorize.net sandbox account and generate it. (Account > Settings > Security Settings > General Security Settings > Manage Public Client Key)
2. Login ID You can retrieve this by going to Account > Settings > Security Settings > General Security Settings > API Credentials & Keys
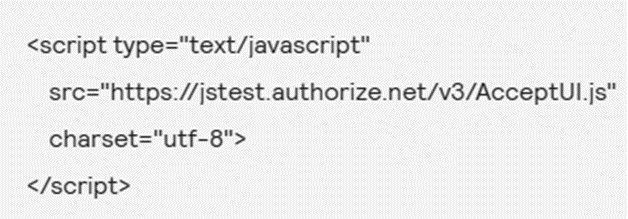
3. Library It is a good idea to keep this setting in a config file so it can easily be read based on the environment. You can view the Sandbox below.
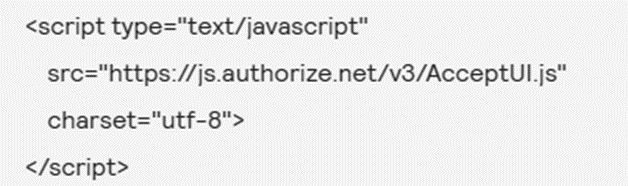
Followed by the Production.
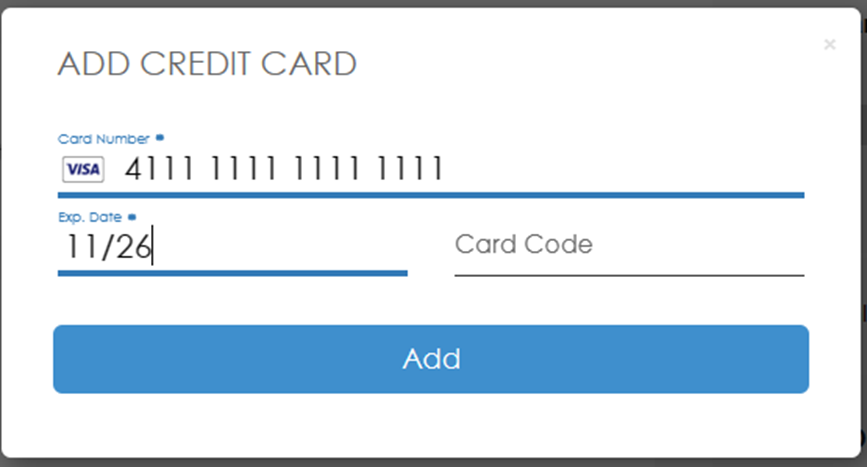
Accept UI Button – Add Credit Card
Now that we have all the required sensitive data for authentication, let’s get into implementation.
In my experience, this is probably the easiest implementation I have encountered so far. All Authroize.Net and Accept.js require is a button and a handler.
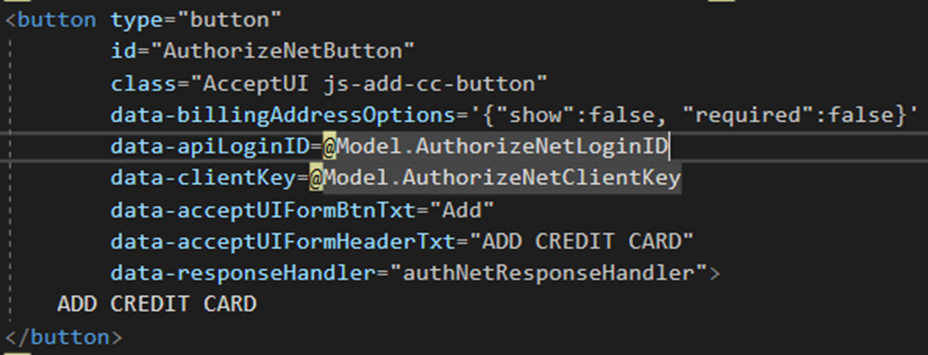
The hosted payment form can be extended to show billing data using button attributes.
You can find a full list of options and attributes here. We have implemented a separate form for billing data (Name, Address), therefore eliminating the need to show it on the payment form.
Note: “data-responseHandler” is the method name that handles the response from Authorize.Nert.
Handling Response
Handling the response from Authorize.Net is straightforward with 1 caveat. Although the Authorize.Net form recognizes the type of card being used on the form, the response data does not contain this identification.
Sample response object can be found here.
Hence, we have to add a custom method that will take the response object, evaluate the first 6 digits, and determine the type of card used.
This is a great starting point for such custom method.
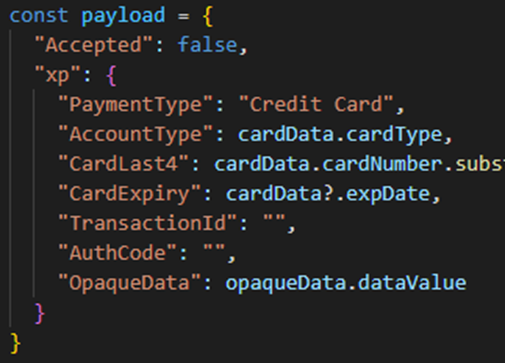
OrderCloud XP
We need to extend the OrderCloud Payment in order to save the payment token and other values returned from Authorize.Net. Here is the sample approach I have taken that includes all the payment details we may need later on.
Save Payment Info to OrderCloud
Once the payload is ready, we need to save this information to OrderCloud to be used later on if needed.
The steps are pretty simple:
-
Get existing cart payment, if any. (Not supporting partial payment at this time). If exists, remove it from the cart.
-
Create a new cart payment
-
Set the cart billing address, and we are done.
When required, simply get cart payment from OrderCloud and use extended properties (xp) to present non-sensitive data to the user.