Sitecore
XM Cloud
Insights

Gowthamaraja Eswaramoorthy
Senior Sitecore Developer
What You Need to Know about Sitecore XM Cloud Forms
Introduction
Upon its initial release, Sitecore XM Cloud lacked support for Forms. However, Sitecore has recently integrated Forms functionality into XM Cloud, empowering developers, and business users to proficiently craft engaging user experiences. To leverage Forms on your XM Cloud instance, upgrading to the latest JSS version 21.6 is required.
Features of XM Cloud forms
Some of the key features of XM Cloud form are:
- Drag and drop – Users now have the capability to easily place their forms on any page or component using the Experience Editor, thanks to the drag-and-drop functionality, facilitating the construction of interactive forms.
- Webhook – When a user submits a form, the form data can be transmitted to third-party systems using webhooks.
- Preview form – Before publishing, forms can be previewed on various devices to ensure optimal display and functionality.
- Reporting and Analytics - With XM Cloud Analytics, business users can now access performance metrics for forms, enabling informed decision-making and optimization.
- Template Library – XM Cloud forms include a template library featuring pre-configured forms. Users have the option to integrate these forms directly or modify them to suit their needs for their page or component.
- reCAPTCHA – Sitecore XM Cloud forms now have reCAPTCHA support, which helps prevent spam and keeps the information safe.
- Saving a form as template – Users can create a new form and save it as a template for future reuse, allowing for efficient and consistent form creation across multiple instances.
Creating Forms
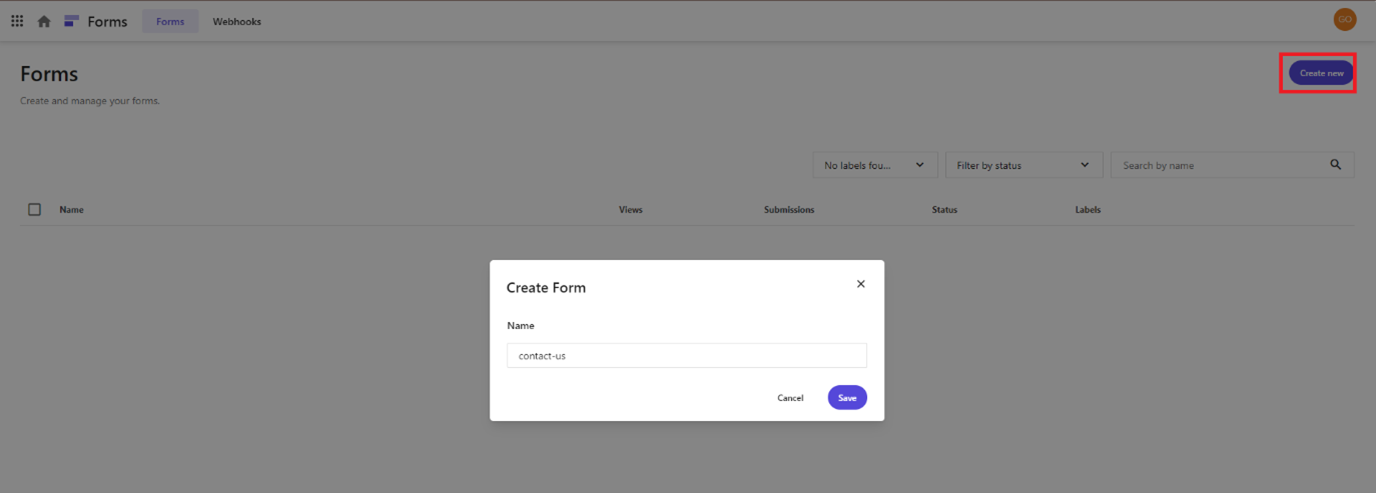
Now, within the Sitecore XM Cloud launchpad, there's a new Forms application. Clicking on it will direct you to the Forms Dashboard.

On the Forms Dashboard, click the "Create New" button to generate a new form, then provide it with a name.
After creating the form, you can design it yourself or select from the Template Library provided out of the box. You can utilize the pre-built form templates as they are or customize them to suit your needs on your page or component.
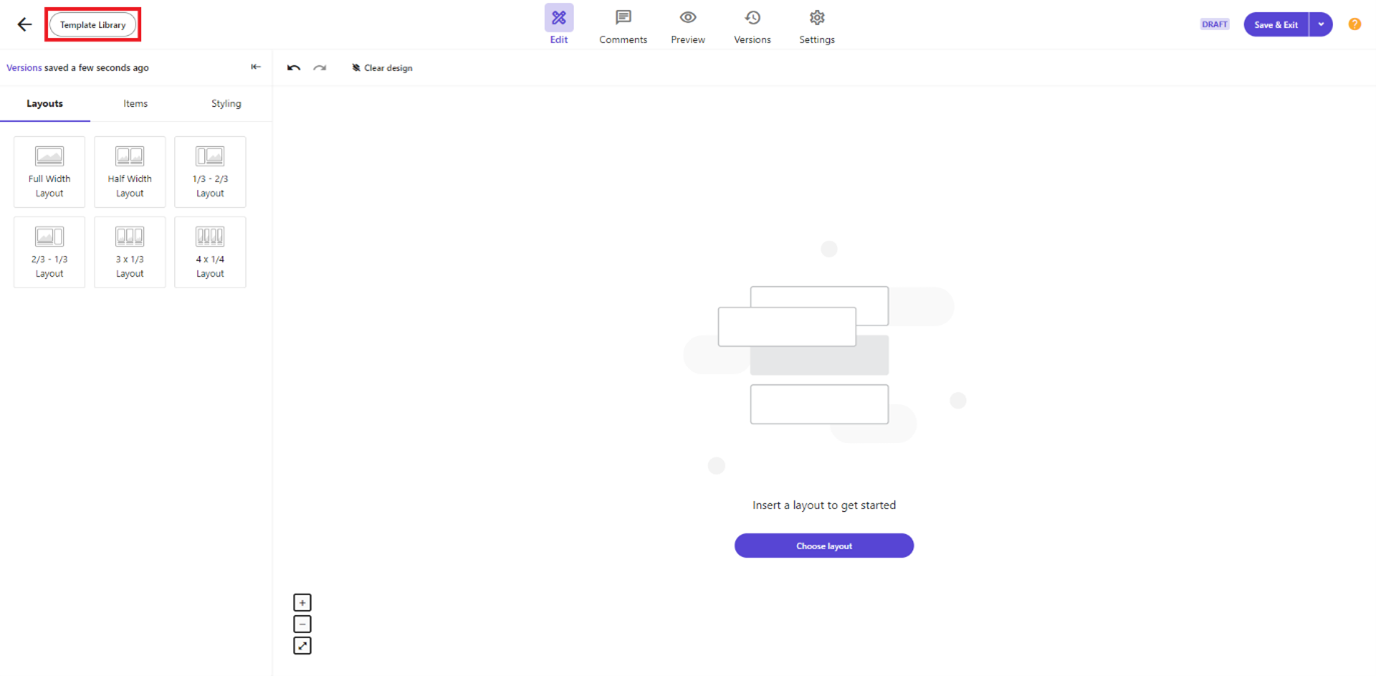
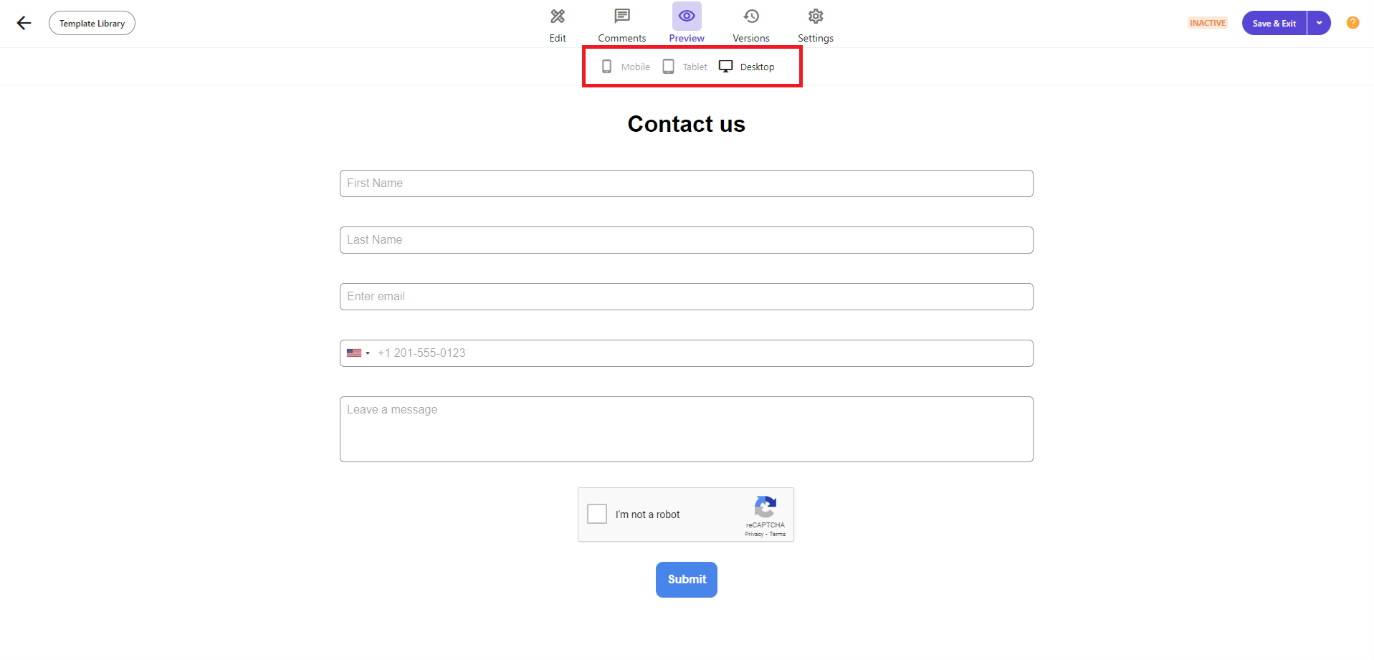
I will design a custom Contact Us form by selecting the Full Width layout. The XM Cloud form is packed with various field items like Action Button, Email, Phone, Short text, long text, Select, Multi Select, Date, Number, Radio, Checkbox, Checkbox Group. In addition to, Terms and Conditions Check, reCAPTCHA and Basic fields like Image, Text, Spacer, social media etc.
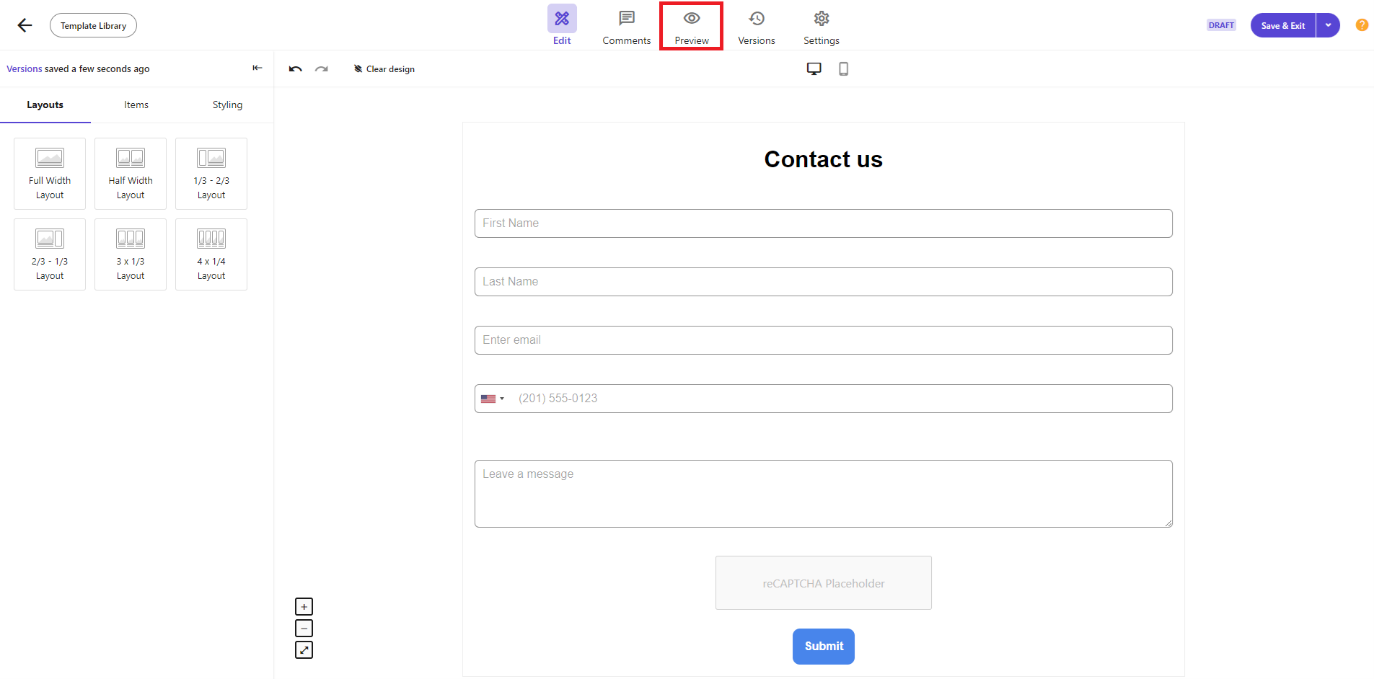
Once I'm done designing the form, I can use the Preview option from the Editor Top menu to see how my form appears on different devices and verify its appearance.
When designing the form in XM Cloud is finalized, you have several options for saving it:
- Save & Exit: This is the default option, which saves your form in draft state with the current changes and overrides all previous versions.
- Save and Activate: This saves the current version of the form and activates it, meaning the form is ready to be integrated into the connected website or any third-party platform. The form's state will be updated on the form Dashboard.
- Save a Version: This saves the current form as a version, allowing you to use the version number to rollback any changes made to the current form.
- Save as Template: You can save the form as a template for later reuse by selecting the saved template from the Template Library.

Integrating forms using Webhooks
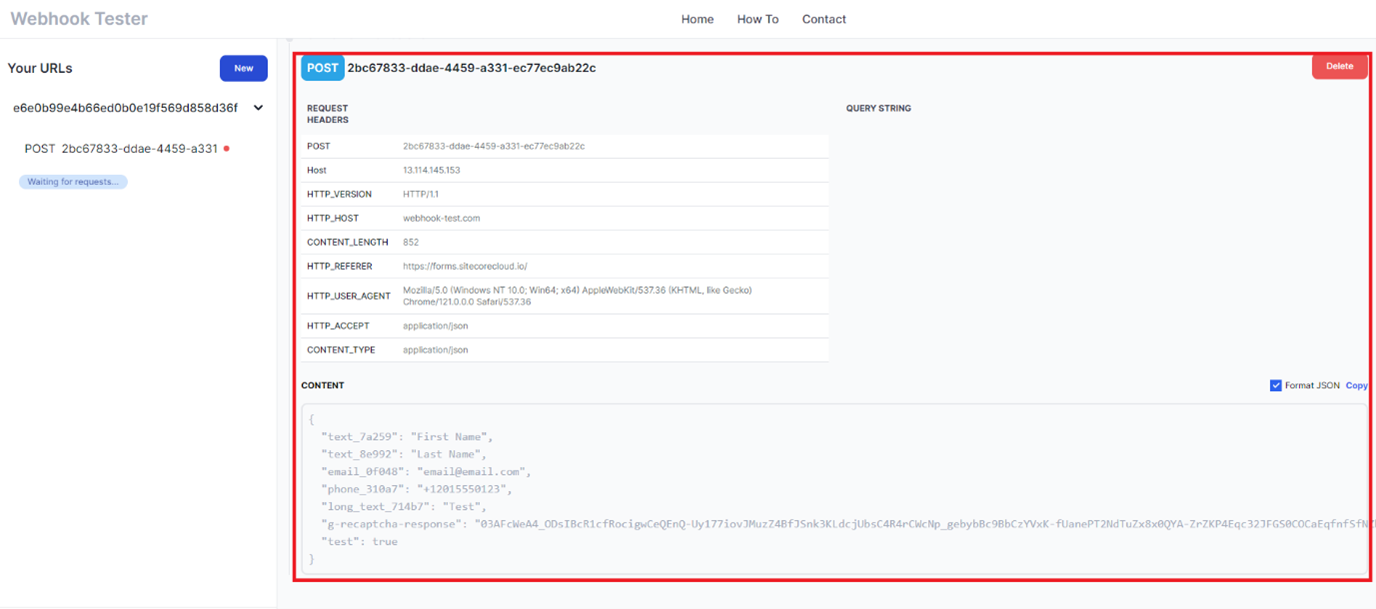
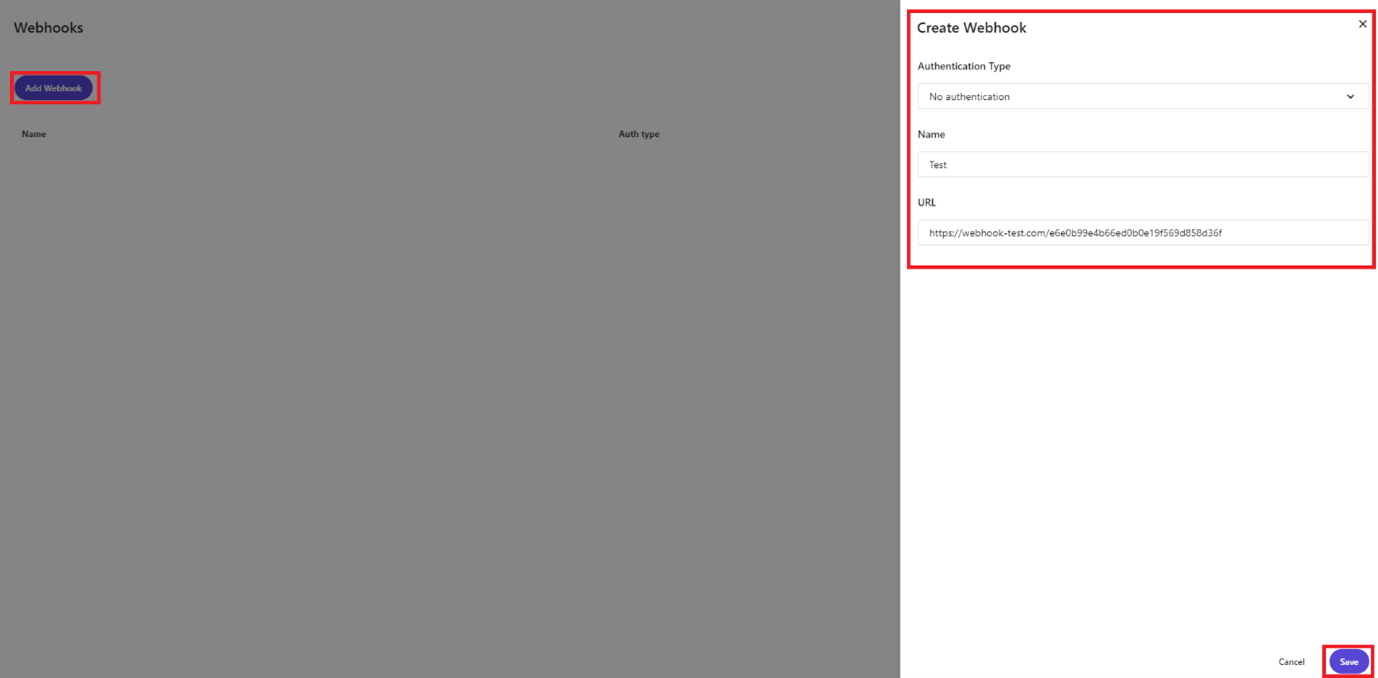
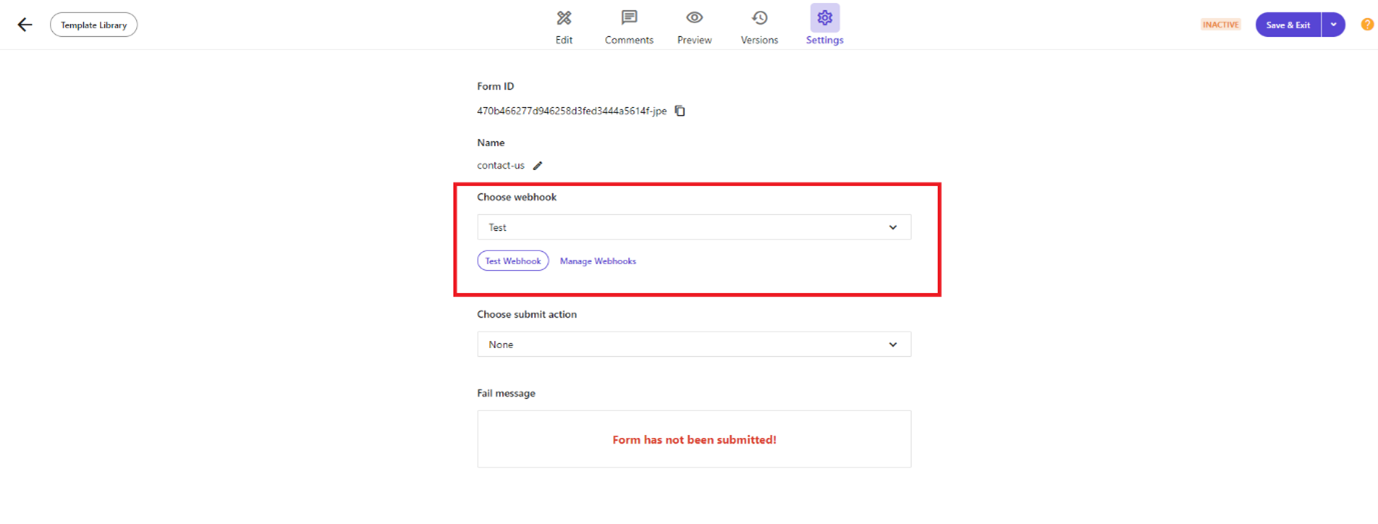
After finishing the form design, we can integrate it using webhooks to save the submitted form data. To create a new webhook, navigate to the form Settings and select Manage Webhooks. Clicking on this option will redirect you to the Webhooks page.

On the Webhooks page, click on the "Add Webhook" button. Since we don't have any existing webhooks to store my data, I'm using https://webhook-test.com/ for testing purposes. After filling in the webhook data, I'll click on "Save" to complete the process.
Once the information is saved go back to the form settings page and select the created webhook.
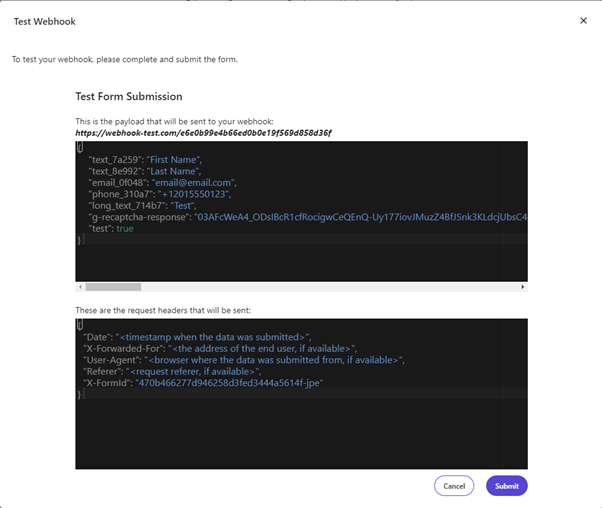
Click the "Test Webhook" button to verify the integration of the webhook, and then click on "Submit Data" to complete the testing process.
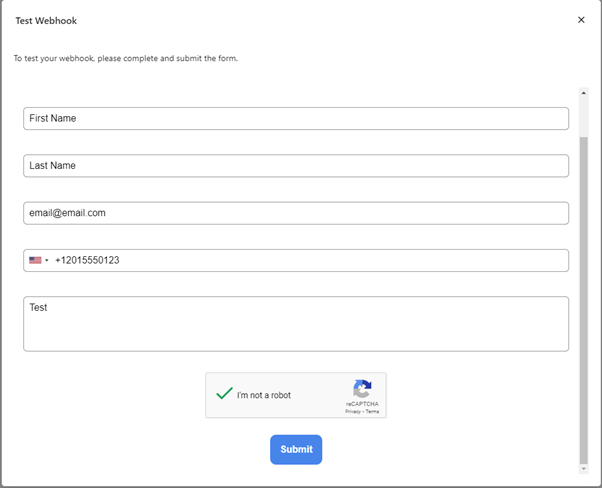
After clicking on "Submit," you will receive a detailed payload that will be sent to the webhook. Click on the "Submit" button again to send the payload to the webhook.
If the integration of the webhook is successful, you'll receive a popup stating "Webhook test successful," and you can verify if the data has been transferred to the webhook as expected.