Salesforce
Tiktok

Amir Shaheen
Sr. SFCC Developer
TikTok Business Integration
Introduction
If you're interested in Tiktok Business and integrating it with Salesforce Commerce Cloud, follow the steps in this blog to learn more.
Clone Repository
-
Sign in to https://github.com/SalesforceCommerceCloud
-
Clone the following https://github.com/SalesforceCommerceCloud/social_channel_integrations repository to your local system. To integrate with TikTok for Business, you need two cartridges:
a. bm_socialchannels: This cartridge contains the Business Manager controllers and UI logic for the Business Manager extension that a site administrator can use to integrate with different social channels like TikTok and Snapchat.b. int_tiktok: This cartridge contains the logic to integrate with TikTok. It includes the service definitions, logic to handle the customer object that stores the TikTok details, and the job that syncs the B2C Commerce product catalog with TikTok. -
Upload the cartridges to your sandbox and import the metadata.
-
Upload both
bm_socialchannelsandint_tiktokcartridges to your active code version. -
Add
bm_socialchannelscartridge to the Business Manager cartridge path.a. In Business Manager, select Administration > Sites > Manage Sites
b. On the Storefront Sites page, click Business Manager
c. Add
int_socialchannelsto the cartridge pathd. Click Apply
-
Add
int_tiktokcartridge to the Business Manager cartridge path.a. In Business Manager, select Administration > Sites > Manage Sites
b. From the list of sites, select your site
c. Click the Settings tab
d. Add
int_tiktokto the cartridge pathe. Click Apply the export catalog job directly calls the TikTok API
-
Compress the contents of the data folder and import the zip file.
a. In Business Manager, select Administration > Site Development > Site Import & Export
b. Click Choose File
c. Select the zip file and click Import
-
Give permission to TikTok for Business Manager menu to the required users.
Setup
-
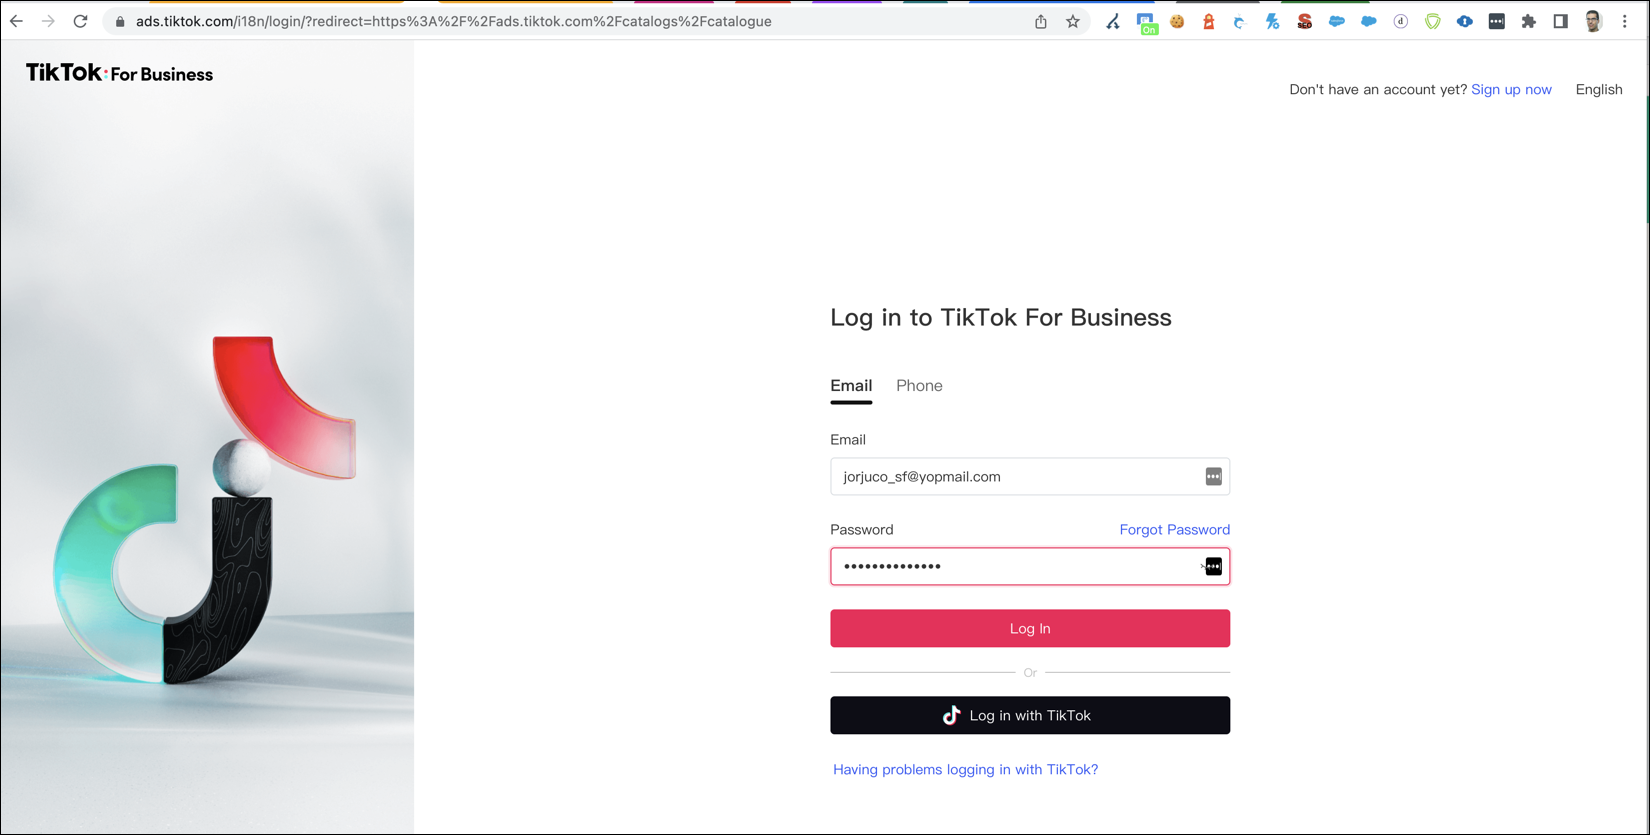
Create an account and log in to TikTok Business by visiting this URL https://ads.tiktok.com/i18n/register
-
On the same computer, log in to Business Manager and select Merchant Tools > Social Channels > TikTok for Business
-
Accept the Agreement
-
Complete Salesforce B2C Commerce and TikTok details form.
Salesforce B2C Commerce Details
o Account Manager Client id–The commerce API client you set up as an Account Manager.
o Account manager Client Secret–The secret for the API client.
o Tennent Id–The realm_instance. For example, zzie_047.
o Org Id–Available in Business Manager. Select, Administration > Site Development > Salesforce Commerce API settings
TikTok Details
o Email–The email for the marketing team that uses the account.
o Phone–The phone number for the marketing team that uses the account.
o Country Code–The region where the website is set up.
o Website URL–The URL for the site.
o Industry Id–The industry for the site.

-
Click the Launch button. You will be directed to TikTok for the Business site where you previously logged in
-
In TikTok for Business, select an account

-
Click Connect Account. The TikTok for Business plugin and integration app has been launched.

-
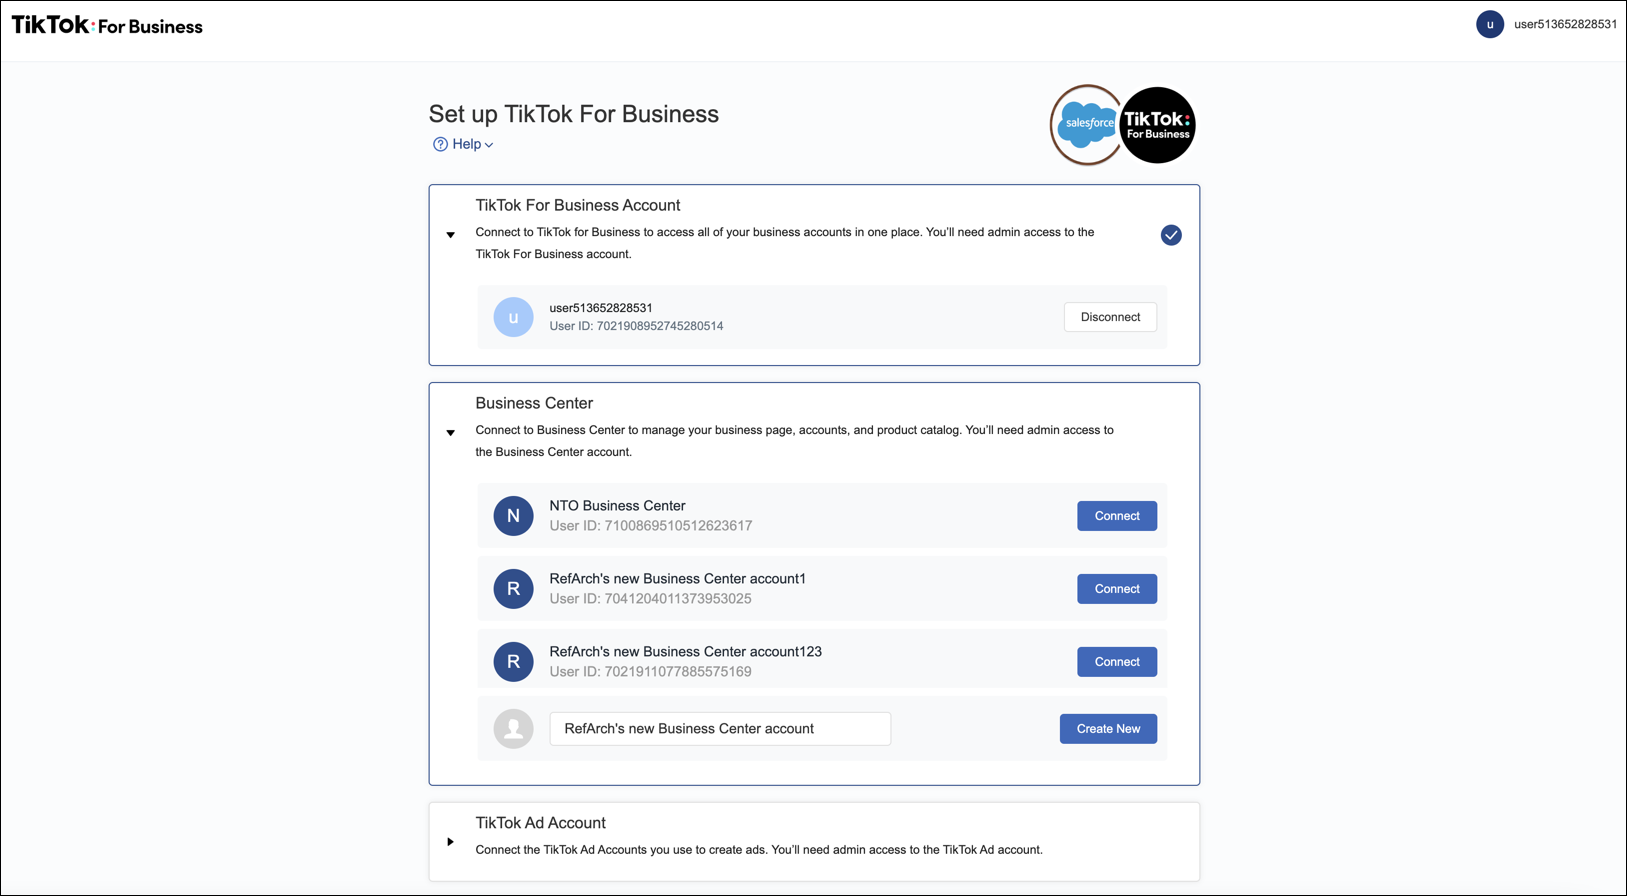
In the app, connect or create a business center. You can only connect to existing business centers for which you have admin or owner access permission.
o To connect to an existing business center, click Connect
o To create a Business Center, click Create New
-
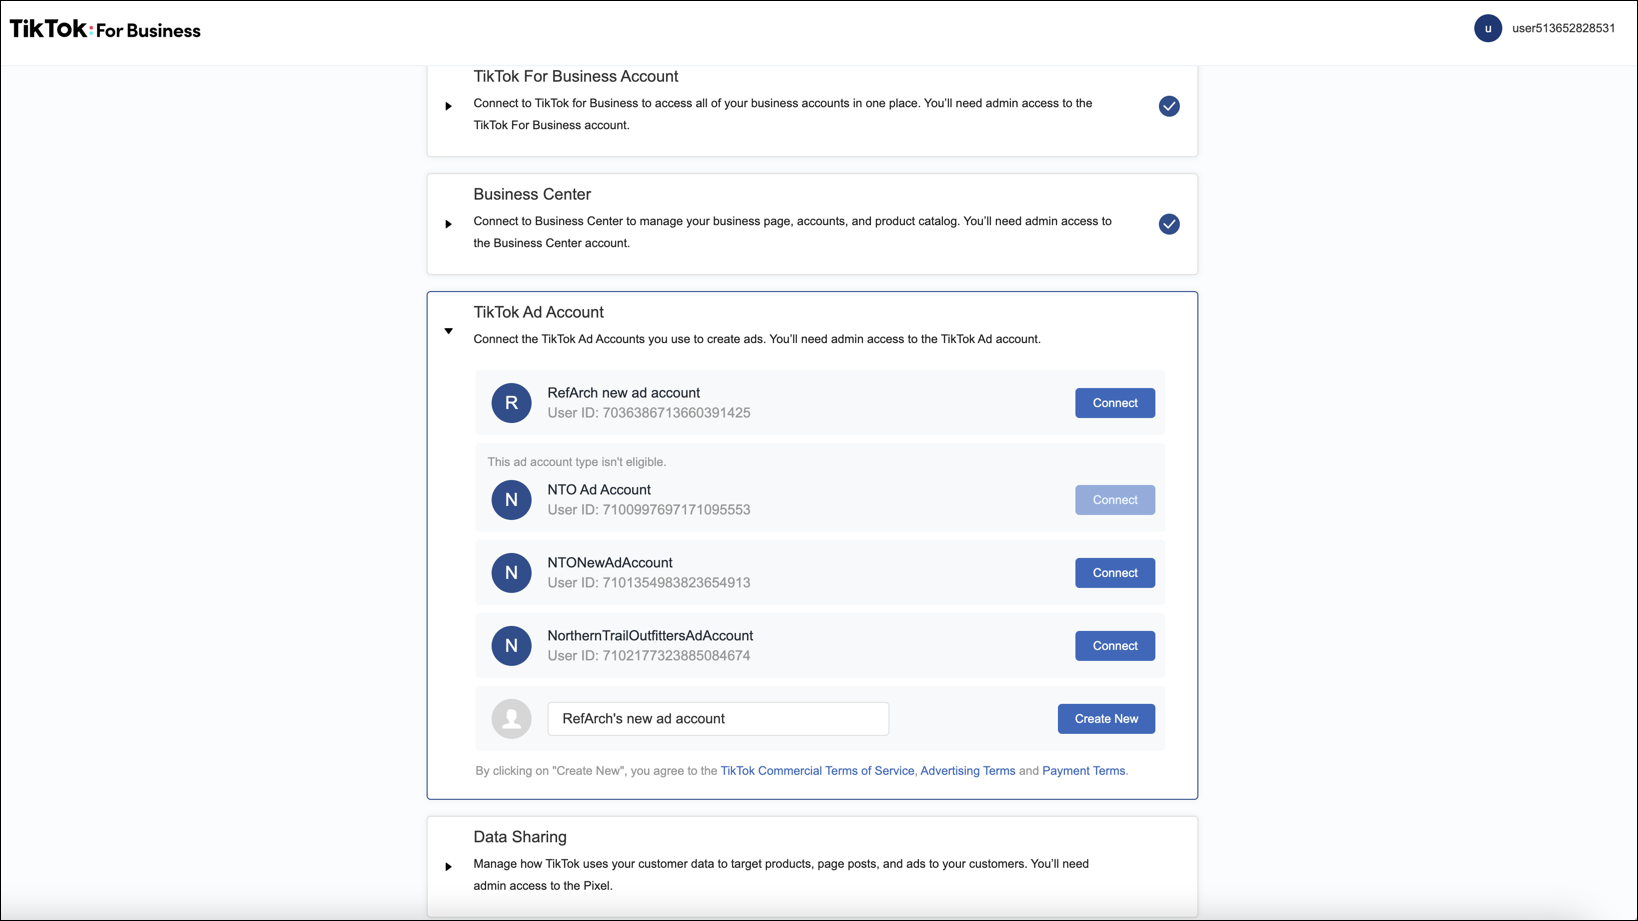
Connect or create an ad account. You can only connect to ad accounts for which you have admin or owner access permission.
o To connect to an existing ad account, click Connect.
o To create an ad account, click Create New.
-
Connect or create a pixel. You can only connect to a pixel for which you have admin or owner access permissions.
o To connect a pixel, click Connect.
o To create a pixel, click Create New.
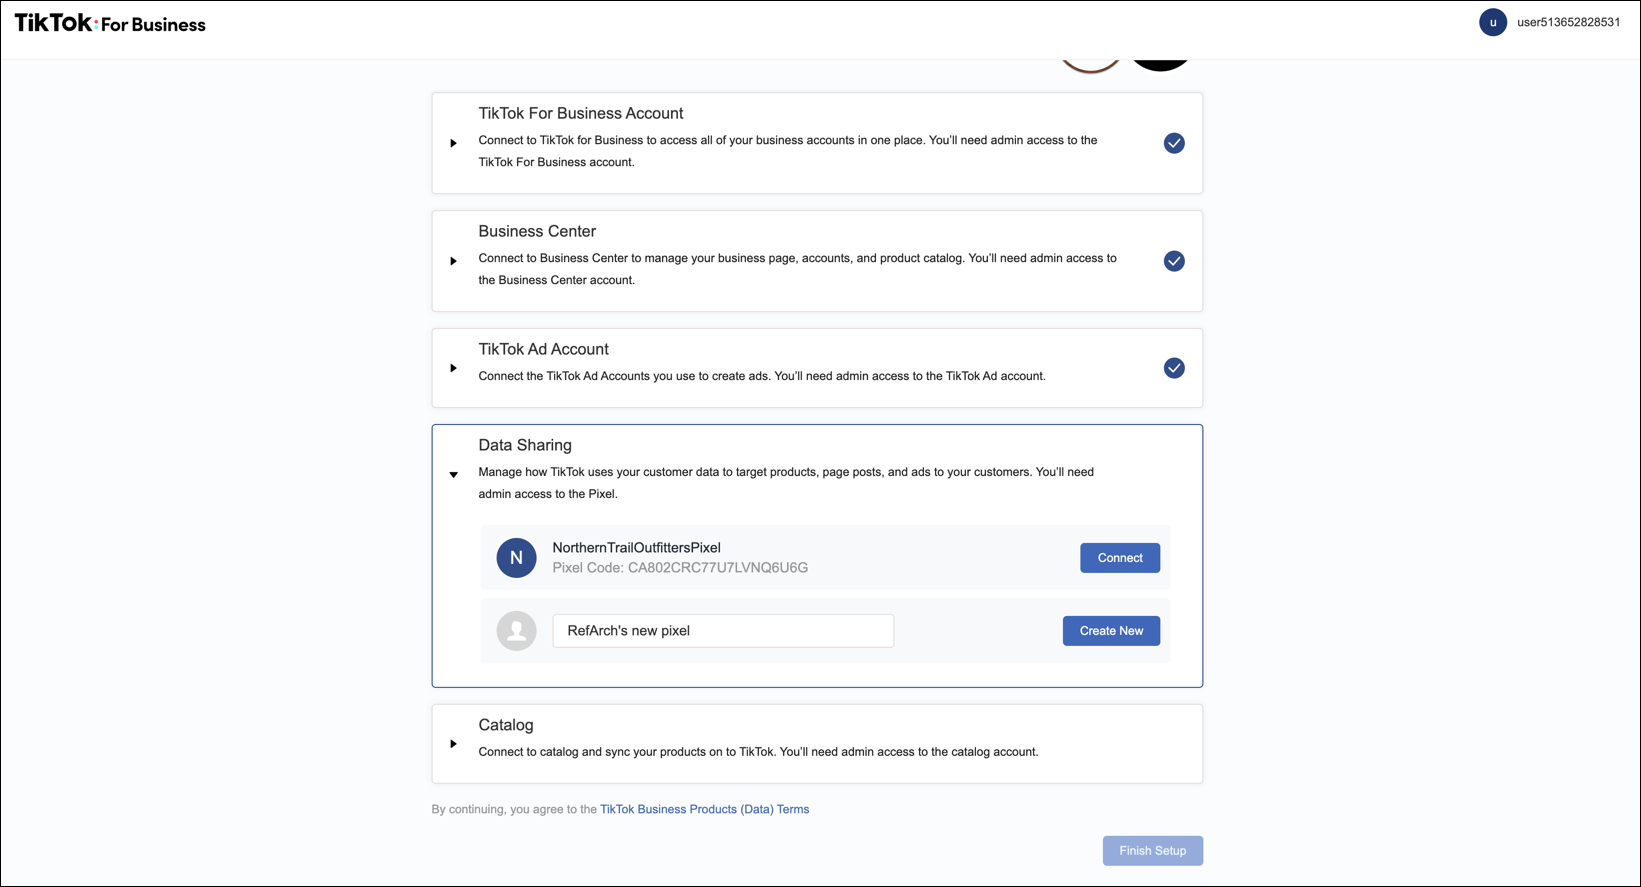
- Connect or create a catalog.
o To connect an existing catalog, click Connect
o To create a catalog, click Create New
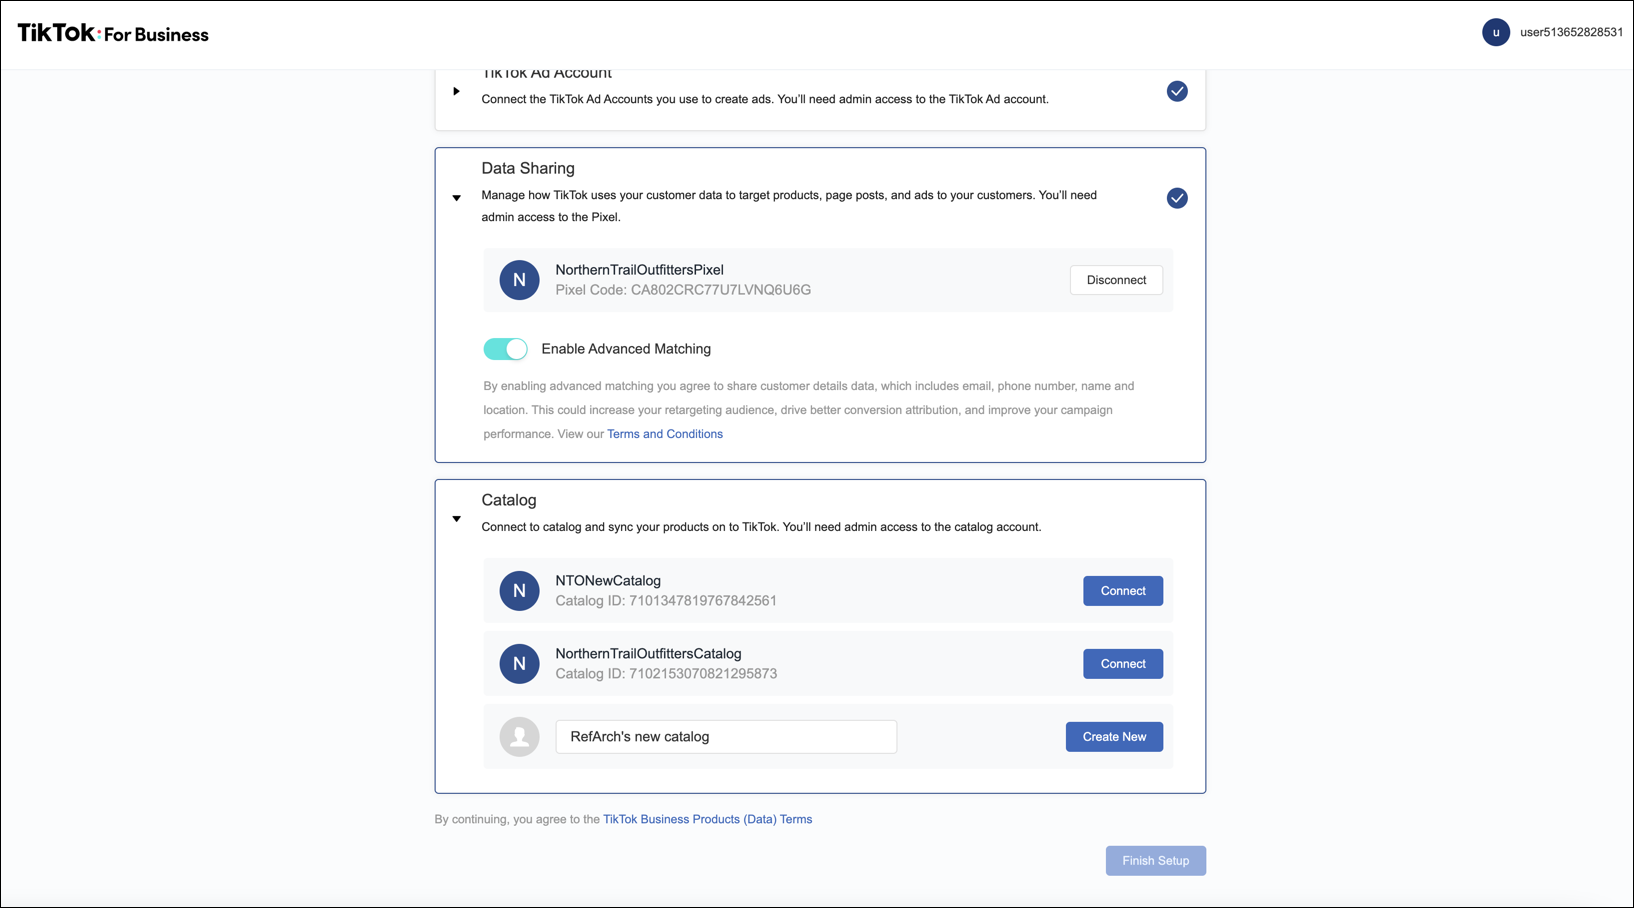
-
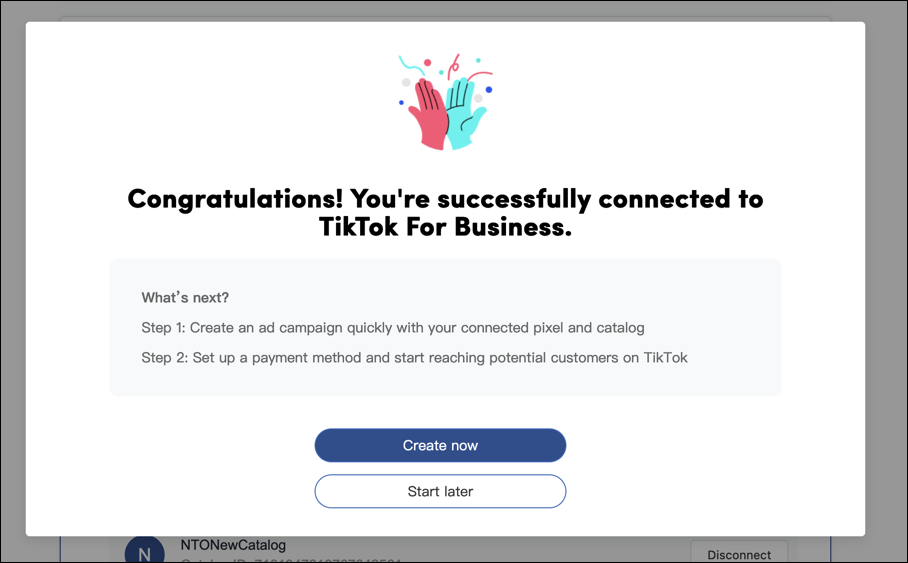
Click Finish Setup.

-
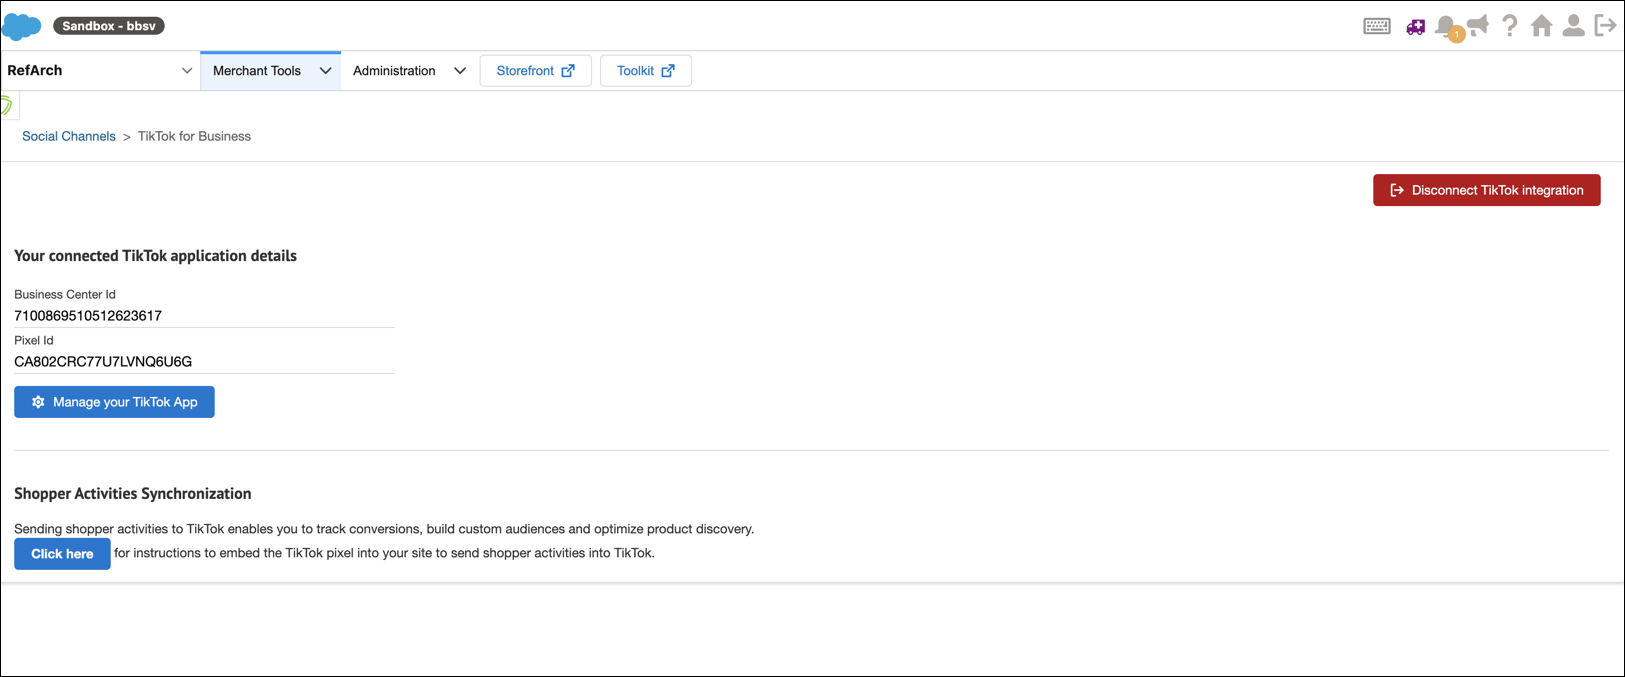
On the setup success screen, click Start Later. You’re then redirected to the Business Manager, TikTok for Business screen. The screen lists the TikTok application details created or connected during the setup.
-
To launch, Click Manage your TikTok App. The Plugin Overview page is displayed. From the Plugin Overview, you can launch ad campaigns, and get quick links to your TikTok for Business assets. For example, ad account, catalog sync status, and other settings.
Export SFCC Site Catalog to TikTok
-
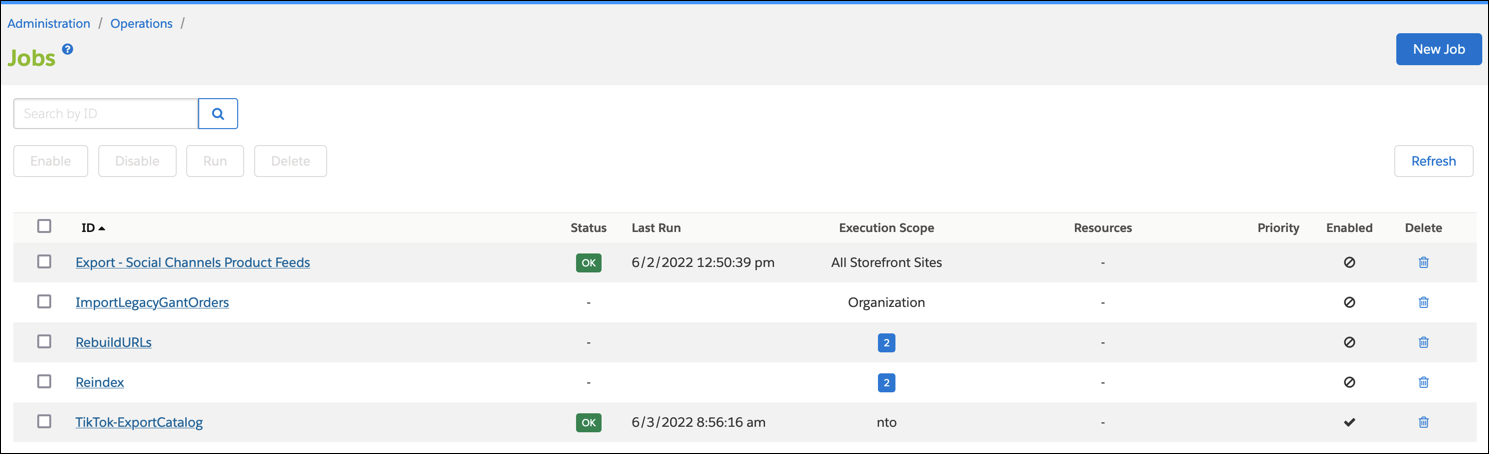
In Business Manager, Select Administration > Operations > Jobs.
-
In the Search field, enter TikTok-ExportCatalog job.
-
Select and open the TikTok-ExportCatalog job
-
Select the Job Steps tab.
-
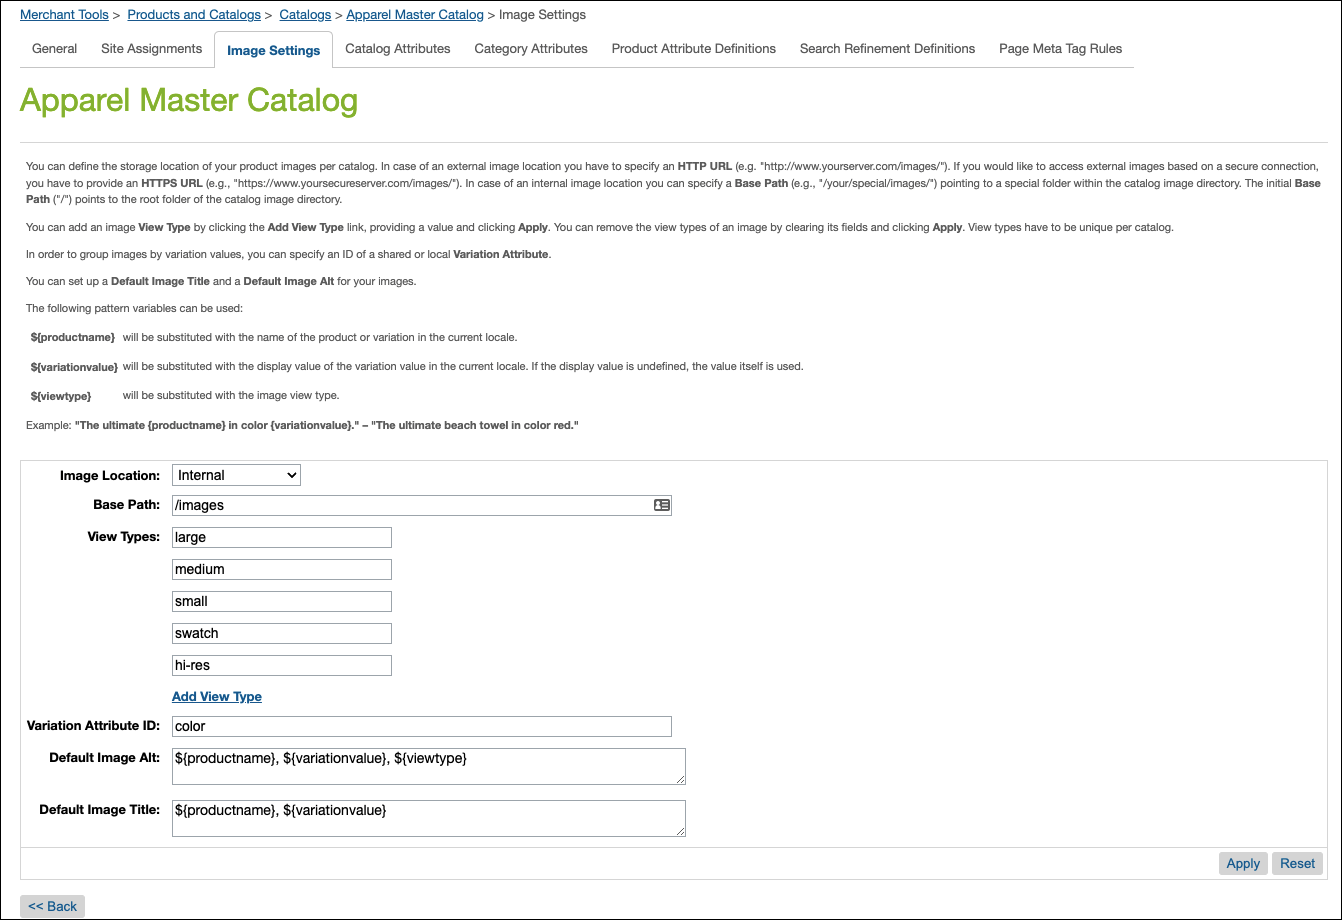
Set ProductImageView Type to the view type that is set in the catalog. The value can be large or high-res.
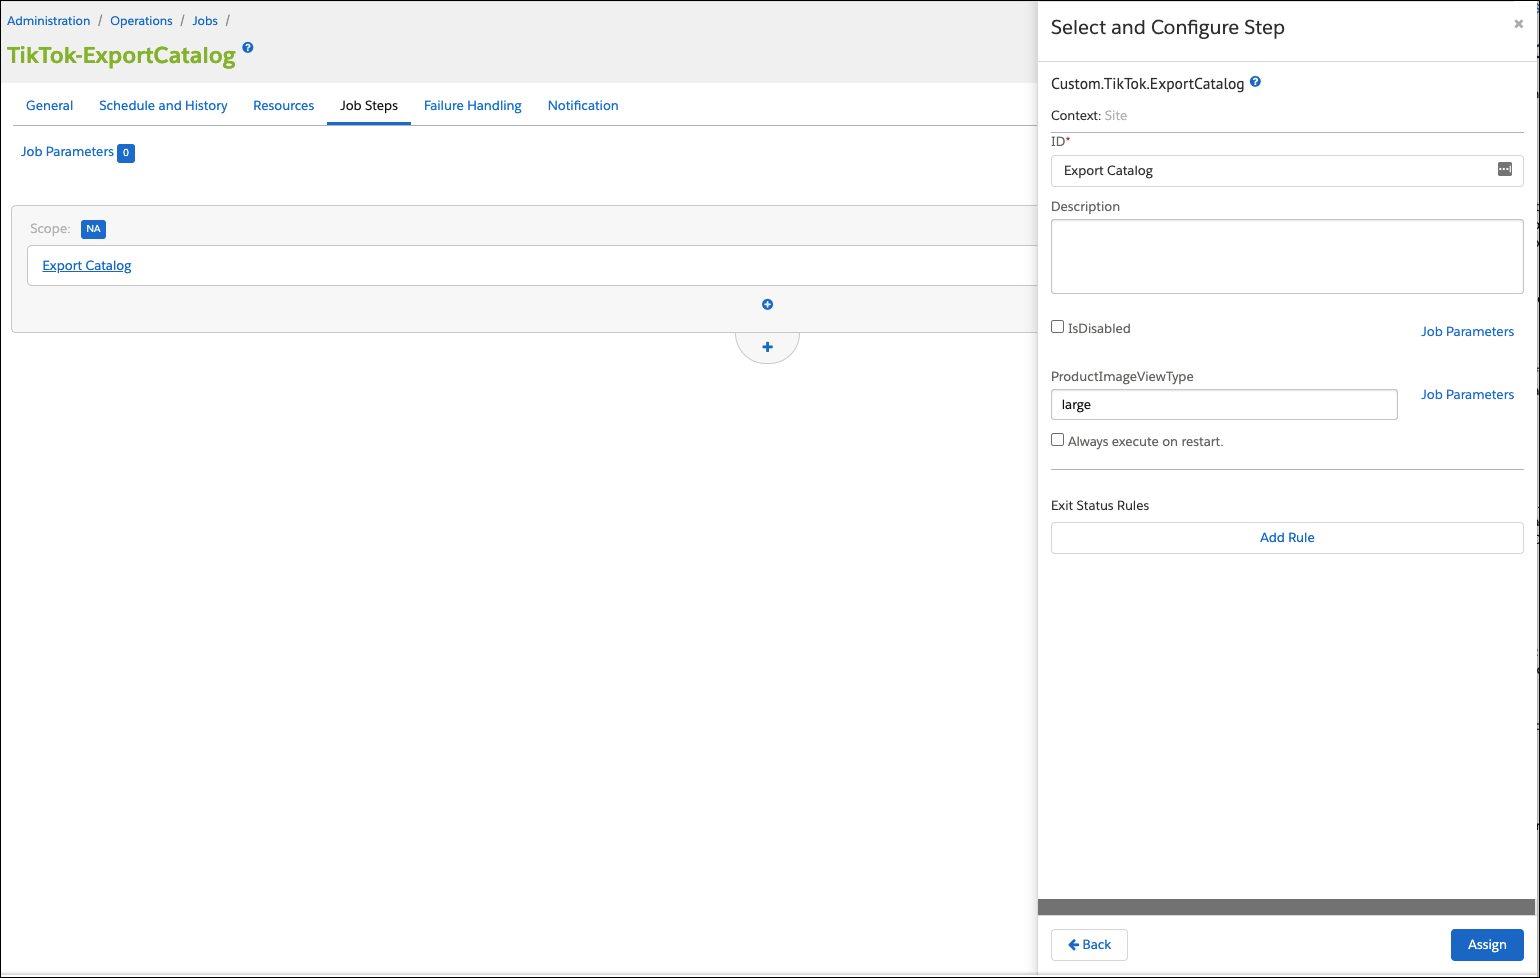
You can find the value listed in the main catalog image settings.
-
Click Assign
-
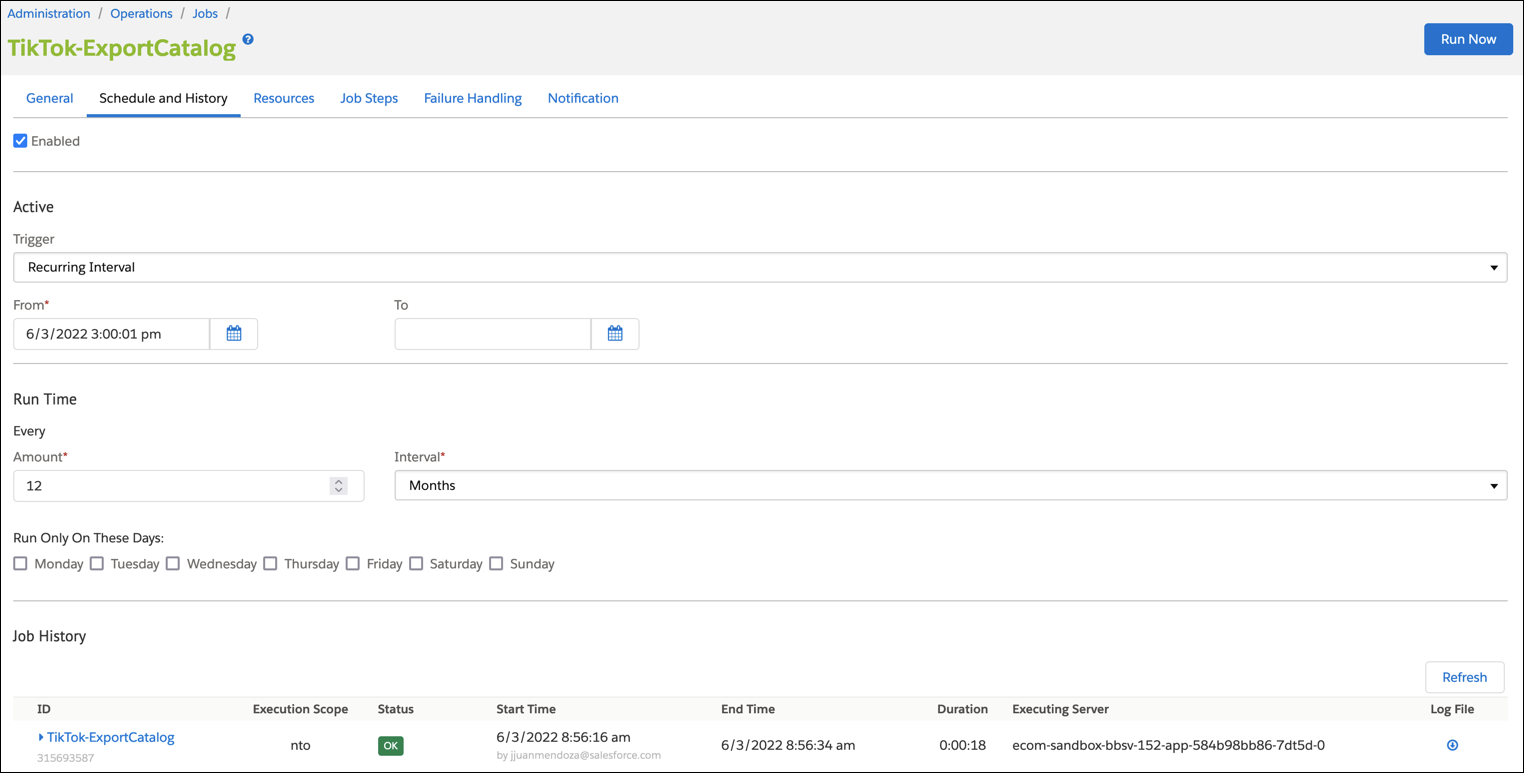
Select the Schedule and History tab.
-
Start the job or set a schedule and frequency.
o To immediately start the job, click Run Now.
o To Schedule the job, complete the Active and Run Time settings and click Run Now
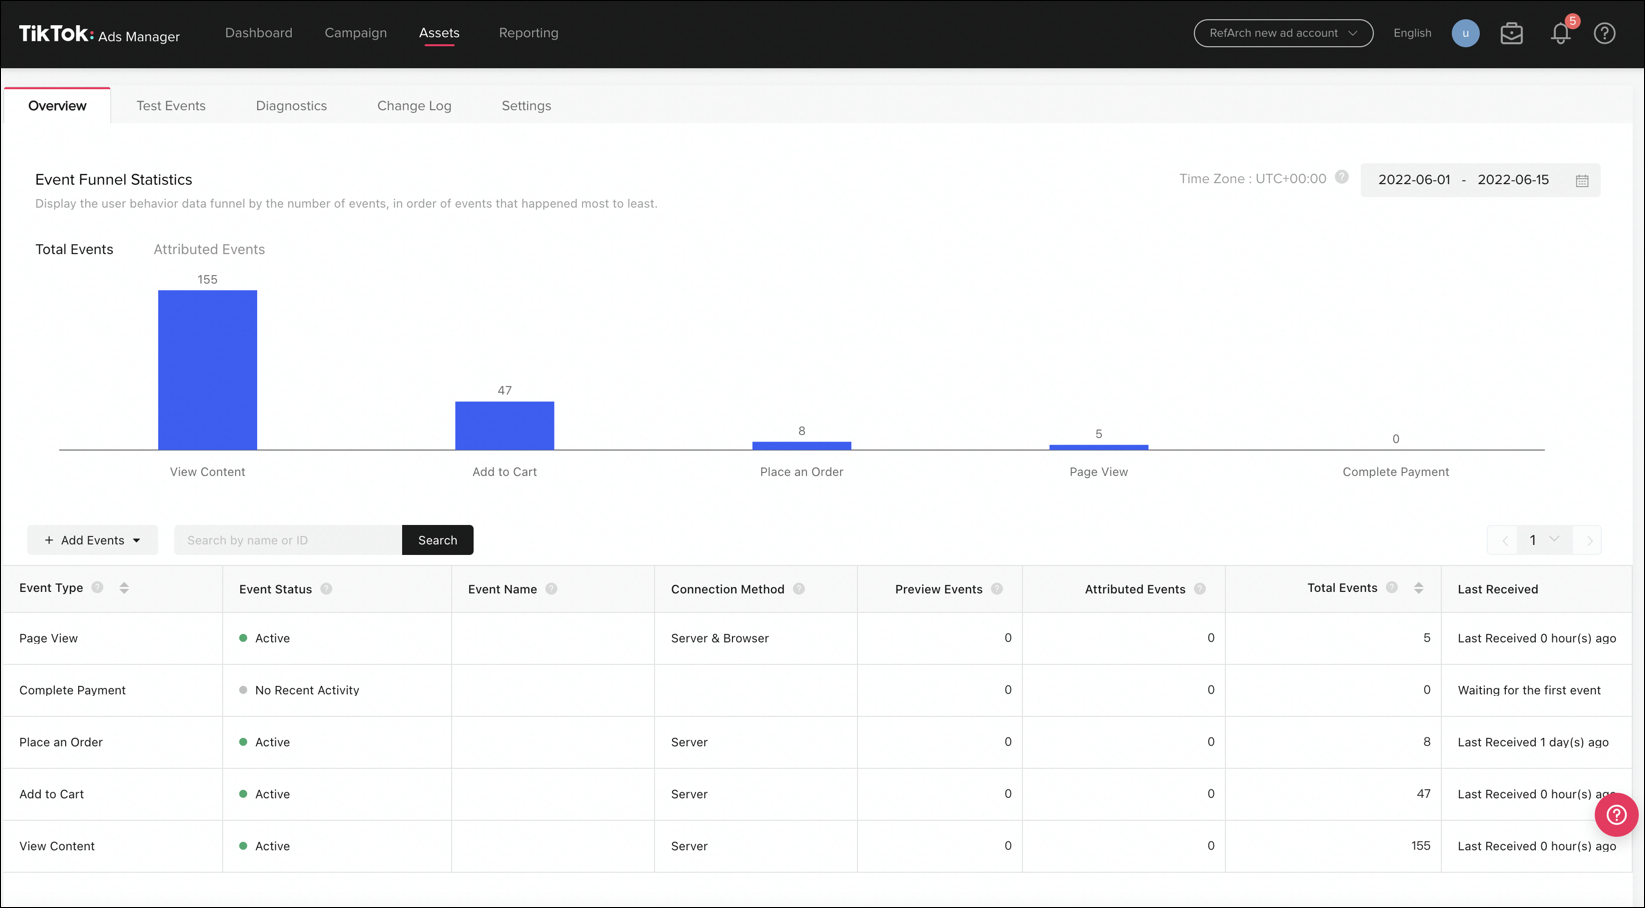
Monitor Exported Catalog
- In Business Manager, Select Merchant Tools > Social Channels > TikTok for Business.
- Click Manager your TikTok App. The plugin and integration app is loaded.

- Click Manage your TikTok App. The TikTok Catalog Manager opens.
- Review the synced product details.

Sync Shopper Activities to TikTok
-
To make sure you have the latest code changes for the
int_tiktok_pixelcartridge, pull the latest code version from https://github.com/SalesforceCommerceCloud/social_channel_integrations/tree/main/social_channels/cartridges -
Upload the code to your sandbox or instance. If you haven’t completed the TikTok for Business integration and synced your product catalog, complete those processes before you continue.
-
Import the metadata for the server-side event tracking. The files are in the data-pixel folder.
-
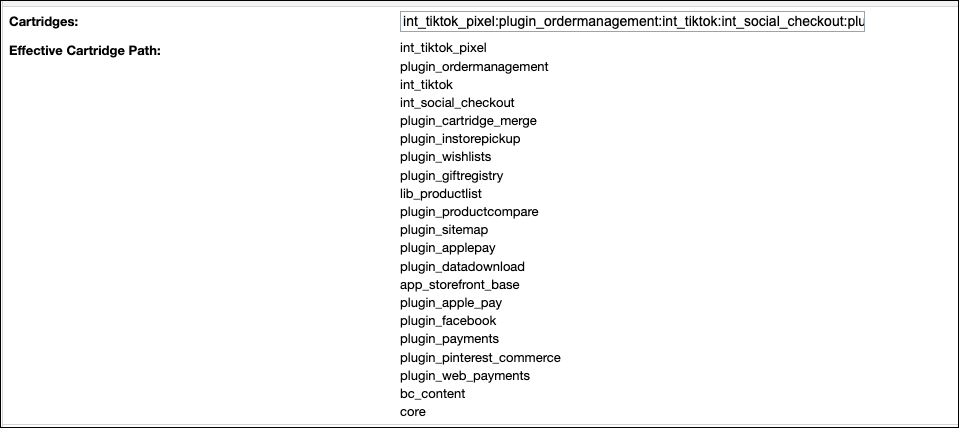
Add the
int_tiktok_pixelcartridge to your cartridge path. The cartridge tracks the following events:o
View Content(Product Show)o
AddToCart(add item to carat)o
InitiateCheckout(begin checkout)o
CompletePayment(place order)
-
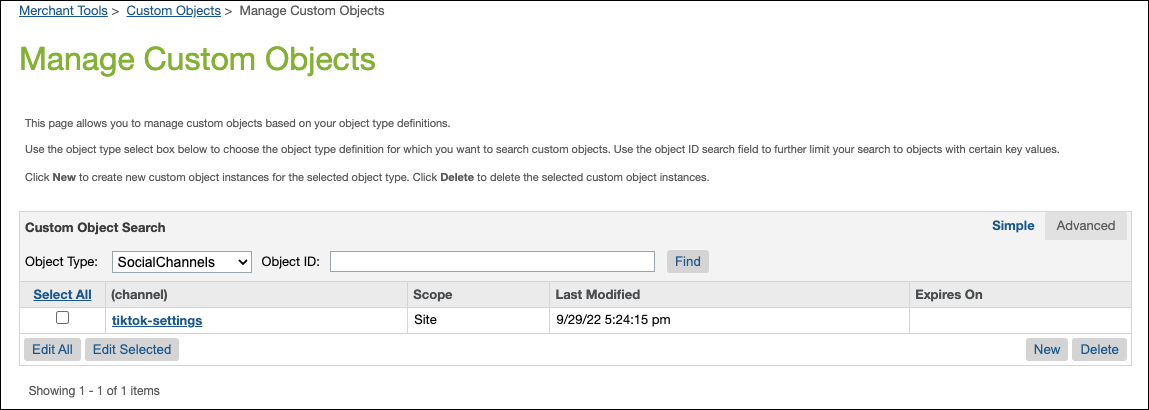
Enable or disable events tracked by the tiktok-settings custom object.
o In Business Manager, select Merchant Tools > Custom Objects > Custom Objects Editor
o From the Object Type dropdown, select SocialChannels
o From the object list, select the tiktok-settings object
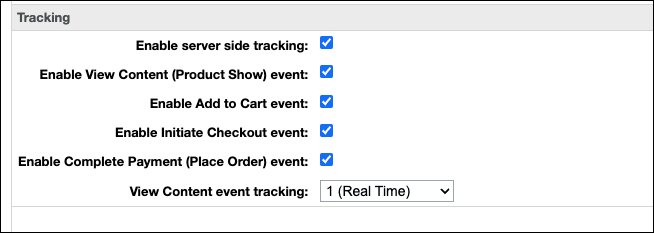
o Click Edit Selected. The tiktok-settings reflect how the TikTok for Business app links to TikTok. The Tracking section lists the toggles that you can enable or disable.
-
(Optional) Set the View Content event tracking. The default setting is None and the event isn’t queued. Setting the option to either Real Time or Queue Events isn’t recommended for high-traffic sites or during a flash sale.
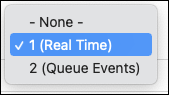
-
If you set the Queue Event option, run or schedule the TikTok-WebEvents-Push job more frequently. The job pushes the events to TikTok and clears the custom objects.