
Sitecore
Search

Andrew Nevett
Software Architect
Sitecore Search Customer Engagement Console
Overview of the Customer Engagement Console
The Customer Engagement Console (CEC) in Sitecore Search allows businesses to efficiently manage and optimize customer search experiences across their website. It also includes advanced configuration options for developers and administrators to manage the more technical aspects of the product.
You can access the CEC as a user in one of five available roles, each with decreasing levels of access and responsibility:
- TechAdmin
- Admin
- Developer
- User
- Viewer
Administration
As a TechAdmin or Admin user, you have access to the Administration section of the CEC. From here you can set up your domain, invite users, and manage sources, including triggering re-index operations.
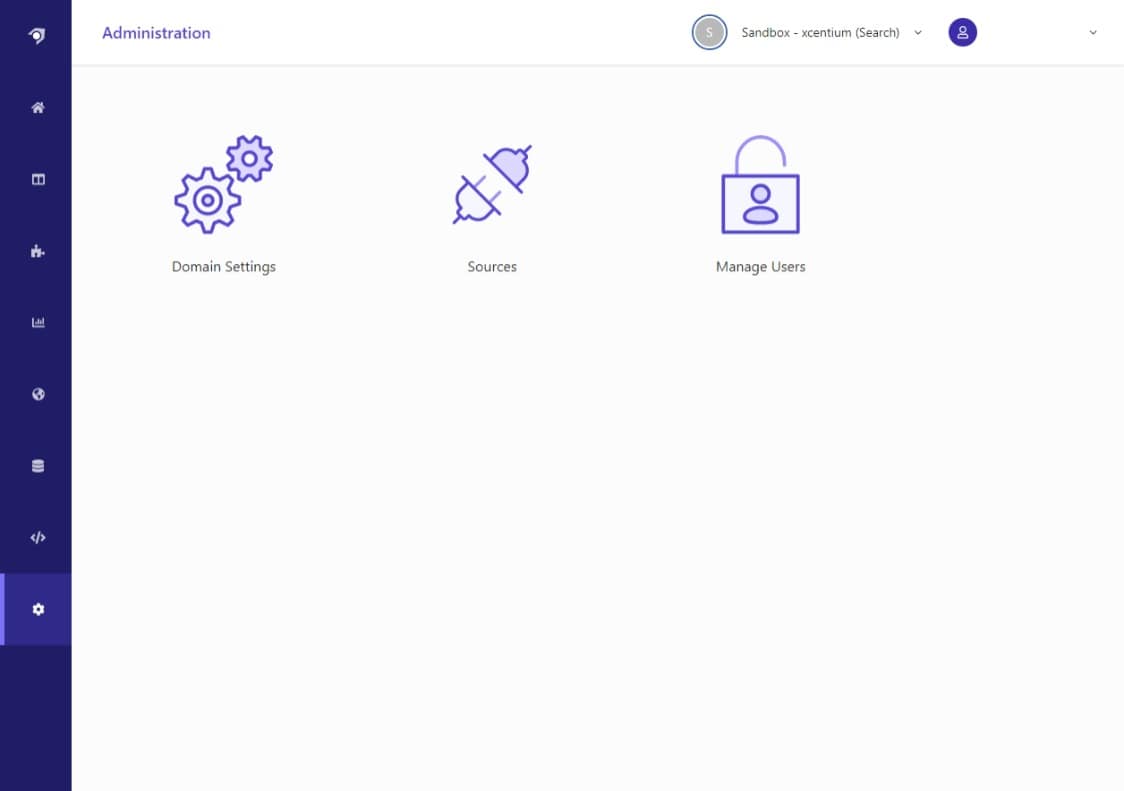
The landing page of the Administration section in the CEC
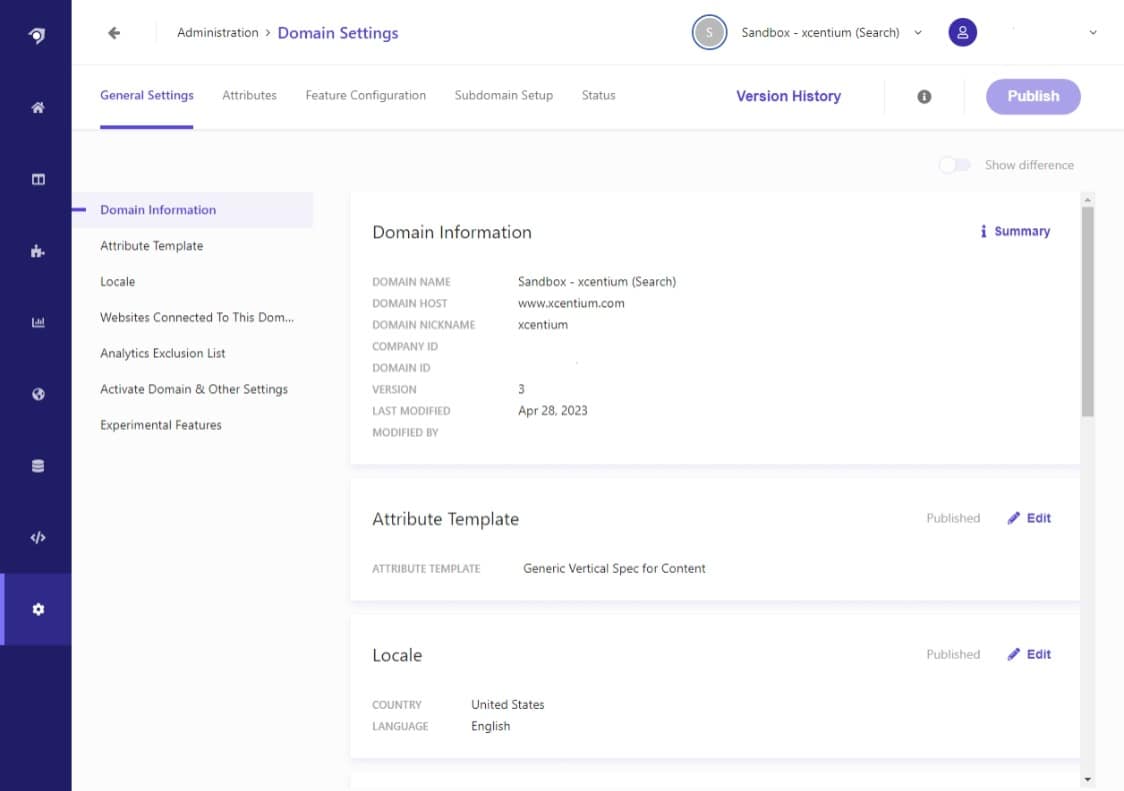
General settings
The first thing you will notice is the sheer quantity of settings that are available to you. Fortunately, Sitecore will set up most of the important things for you as part of the onboarding process, but it's best to review the General Settings page to make sure everything is correct. If you need to make any changes, remember to hit the “Publish” button at the top of the page. All settings are versioned and won’t take effect until they have been saved and published.
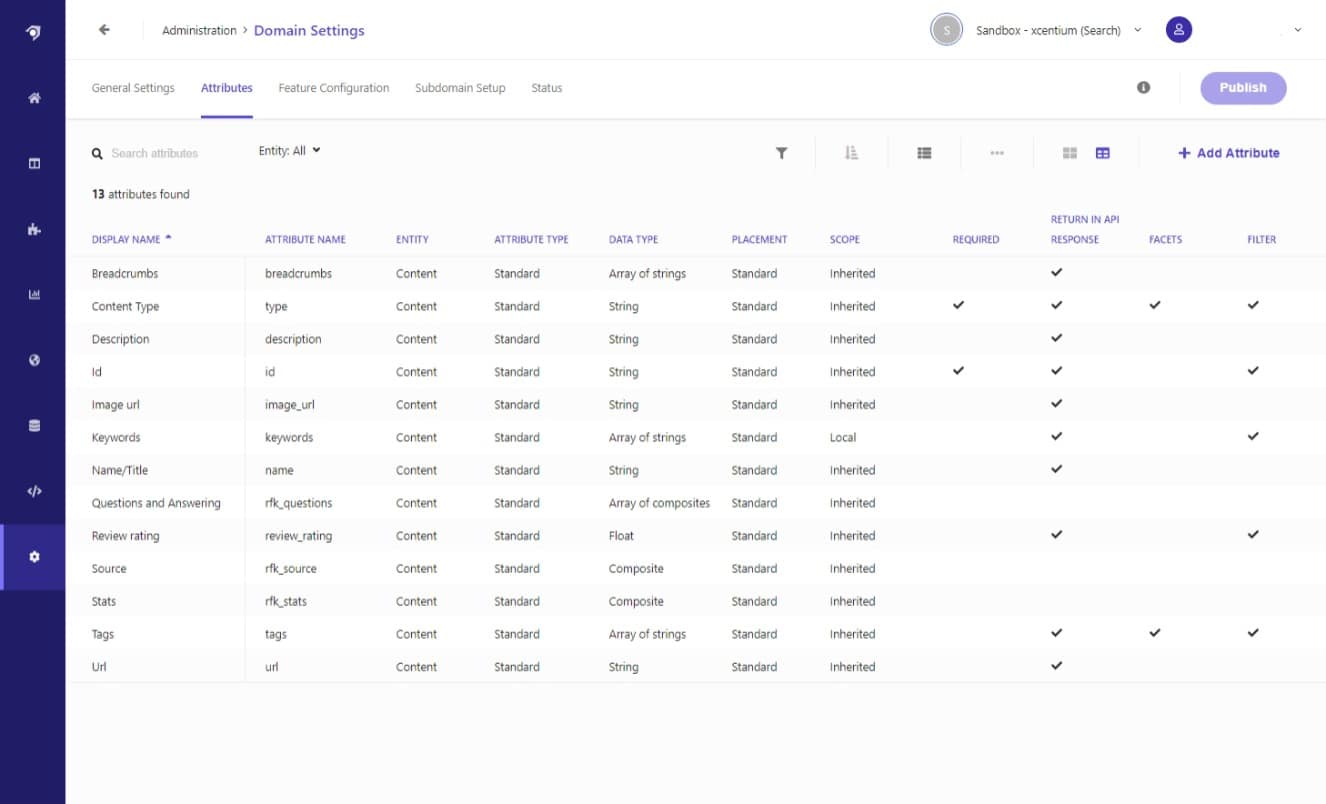
Attributes
Attributes should be one of the first things you set up. Attributes are the data points that will be extracted from each page and stored in the index. Attributes can be used for faceting, sorting and be part of your query filters. You’ll see some system attributes already exist and from here you can add your own.
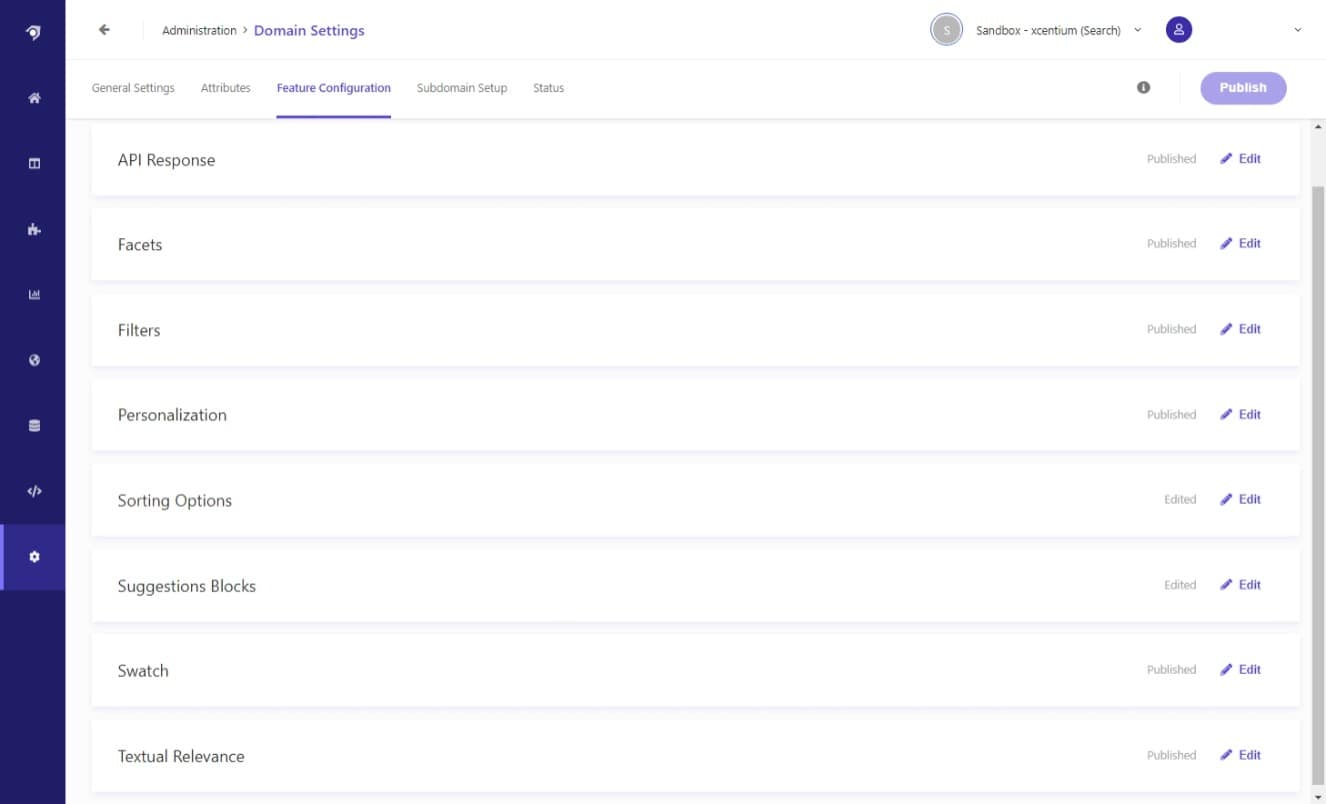
Feature Configuration
The Feature Configuration section is where you will want to spend some time configuring the options that are specific to the solution you are trying to build. At a minimum, you should define your facets and tie them to previously defined attributes, specify what attributes can be used for sorting, and how they should be used in filters. You have the option to add your custom attributes to the Textual Relevance section so their data can be included in the AI-powered relevance engine.
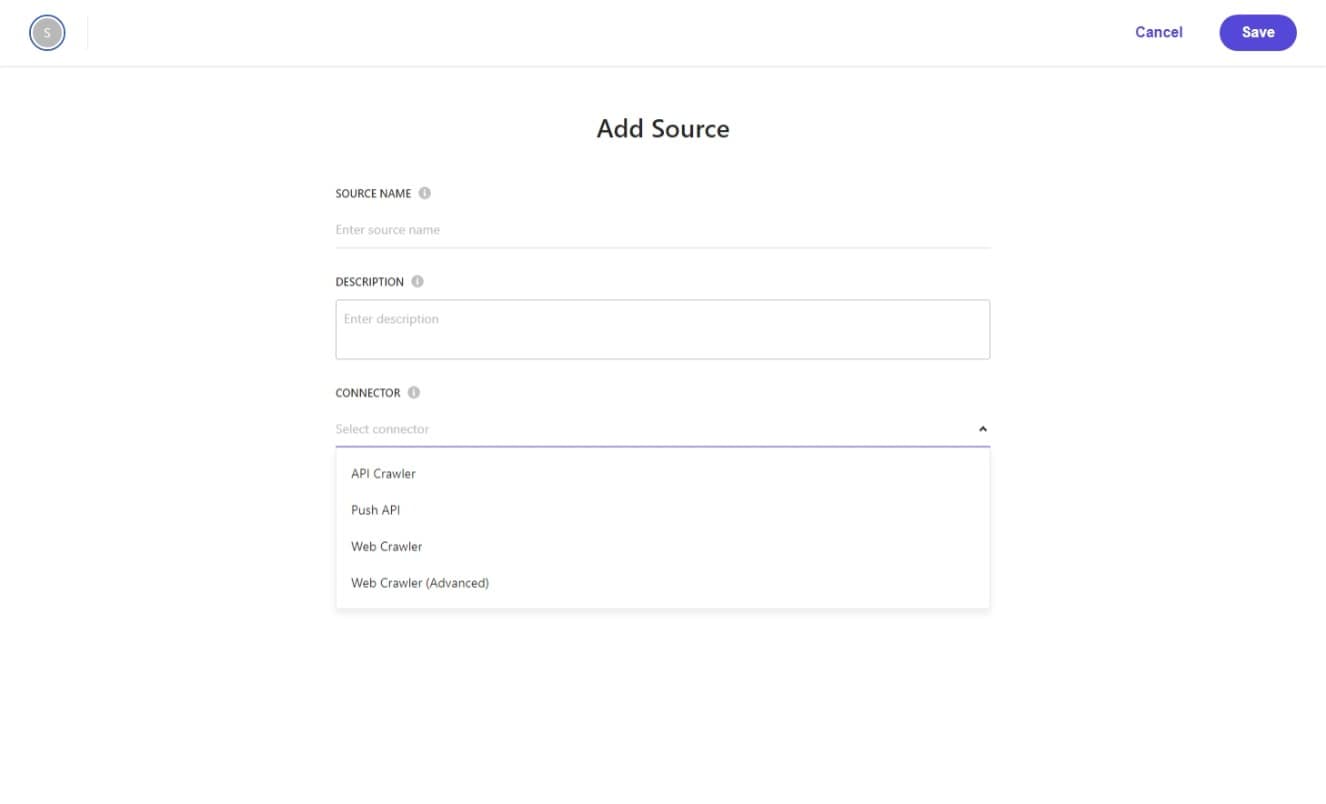
Sources
Sitecore will likely have set up a “Web Crawler (Advanced)” for you based on information provided during the onboarding process. You can add additional sources from the Sources landing page. Supported types are:
- API Crawler – Pulls a list of pages from a service
- Push API – Receives a list of pages an external service
- Web Crawler – A very simple crawler with basic configuration options
- Web Crawler (Advanced) – A full-featured crawler with advanced configuration options
Most implementations will use the “Web Crawler (Advanced)”. Other source types have no documentation at the time of writing and should be used at your own risk.
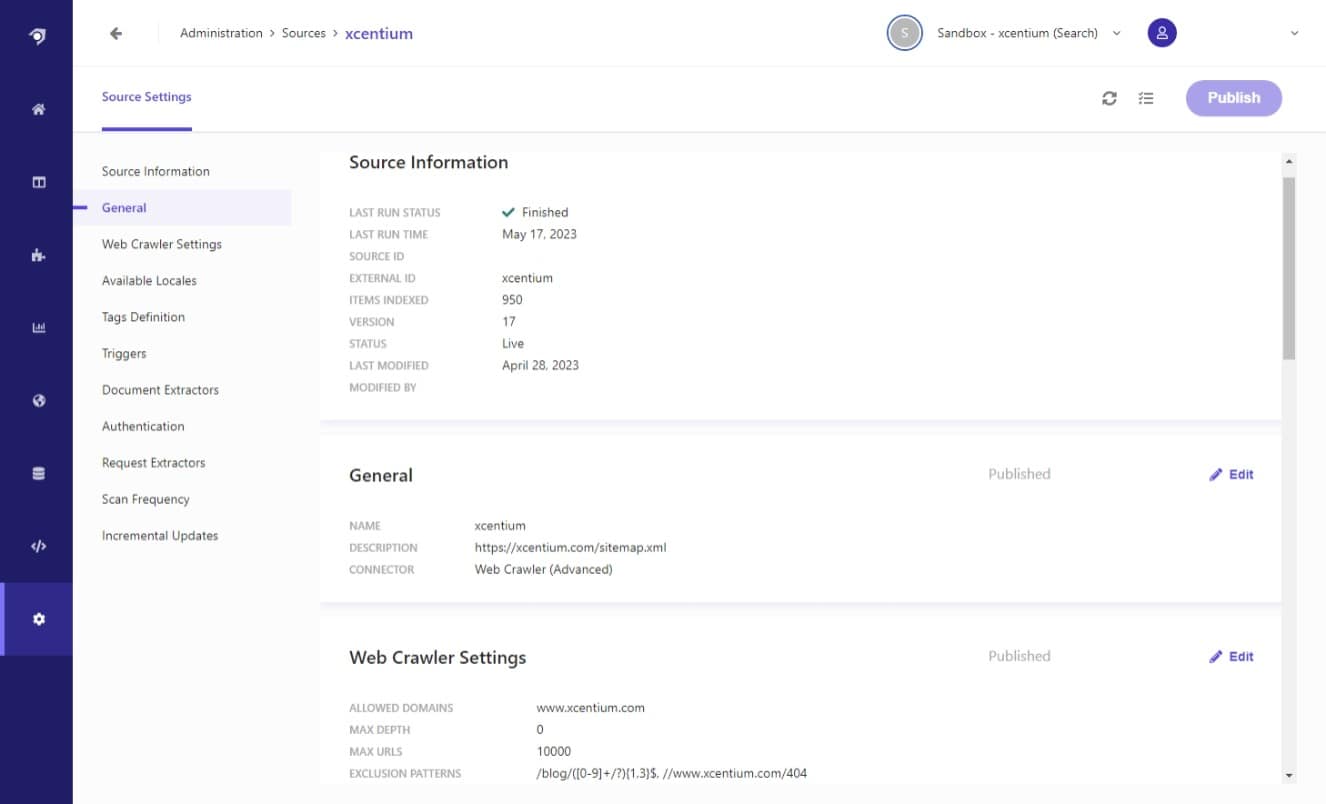
Source Settings
The Web Crawler Source Settings page will let you configure the starting point of the crawler (Triggers), the frequency of the crawling operations (Scan Frequency), and various exclusion rules that you can use to prevent sections of your site from being indexed.
The most common type of trigger is to use a Sitemap file to inform the crawler where to find all the pages it needs to crawl. All sites should already have a sitemap.xml file readily available for SEO purposes so it is easy to re-use this file and point the crawler to it.
Alternatively, you can point the crawler to a specific page on your site and specify a depth parameter. The crawler will then do its best to follow HTML links on the page and discover all pages on its own. This method is likely to be slower and less reliable and should only be used when a Sitemap file is not available.
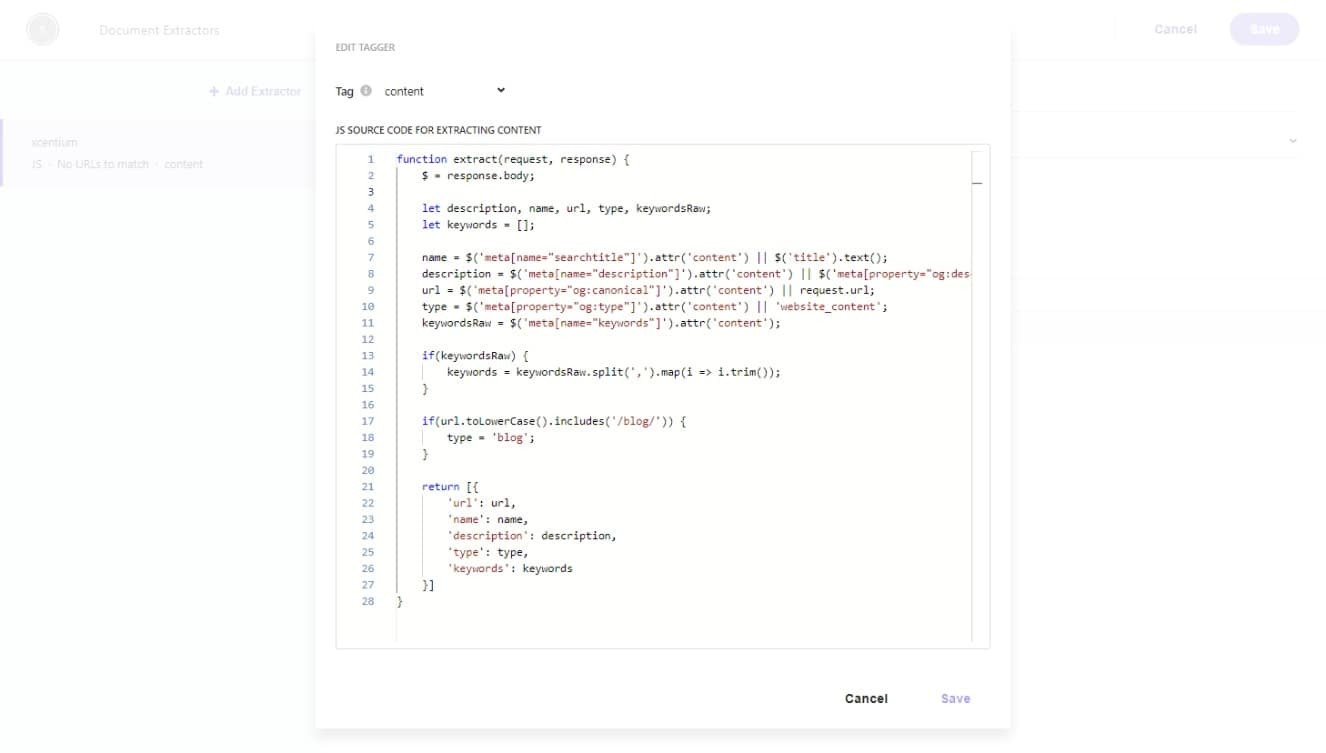
Document extractors
If you have added custom attributes, you will need to provide the implementation for reading the attribute values from each page as it gets crawled. This can be done using XPath, CSS selectors, or JavaScript.
JavaScript is the favored method to extract these attributes and provides maximum flexibility as the entire DOM is available to you. Most attributes will exist in the meta tags in the HTML markup, but you could also extract values from the URL segments, request headers, data layer, or anywhere in the content body. The extracted values are mapped in the JavaScript return statement to the attribute names that you created previously.
Populating the index
After you finish the setup tasks you can now initiate a scan and index operation. Scanning and Reindexing are two distinct operations.
- Scan – Invokes the crawler and creates a snapshot of all the content.
- Reindex – Recreates the index based on the last content snapshot.
After changing various settings and publishing them, you may be forced to scan or reindex before you notice a difference in the indexed content.

You don’t see much in the way of progress updates while a scan or index operation is taking place. The job will either display as “Queued” or “Running”. When the job is in progress, the number of indexed documents will increase occasionally giving you a sense of how long the job will run.
Note: Rescanning will only replace an existing index at the end of the operation, so your customers won’t be querying an incomplete index while the rescan operation is in progress. Think of this like the “Switch on Rebuild” functionality when using Solr in Sitecore.


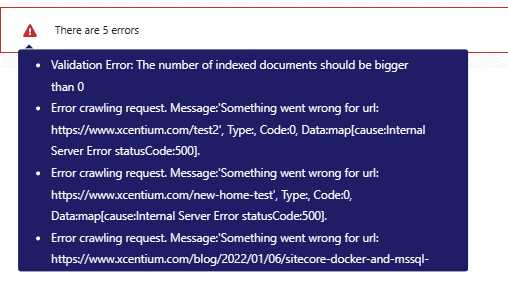
If your scan or reindex operation fails, you don’t get much of an explanation, but if you hover over the red exclamation mark you will see a fly-out with some additional information. If this information has been truncated, you can see the full error response by using the browser dev tools to inspect the contents of this fly-out. This should be enough to point you in the right direction to fix the error and try to rescan it again.
Notifications
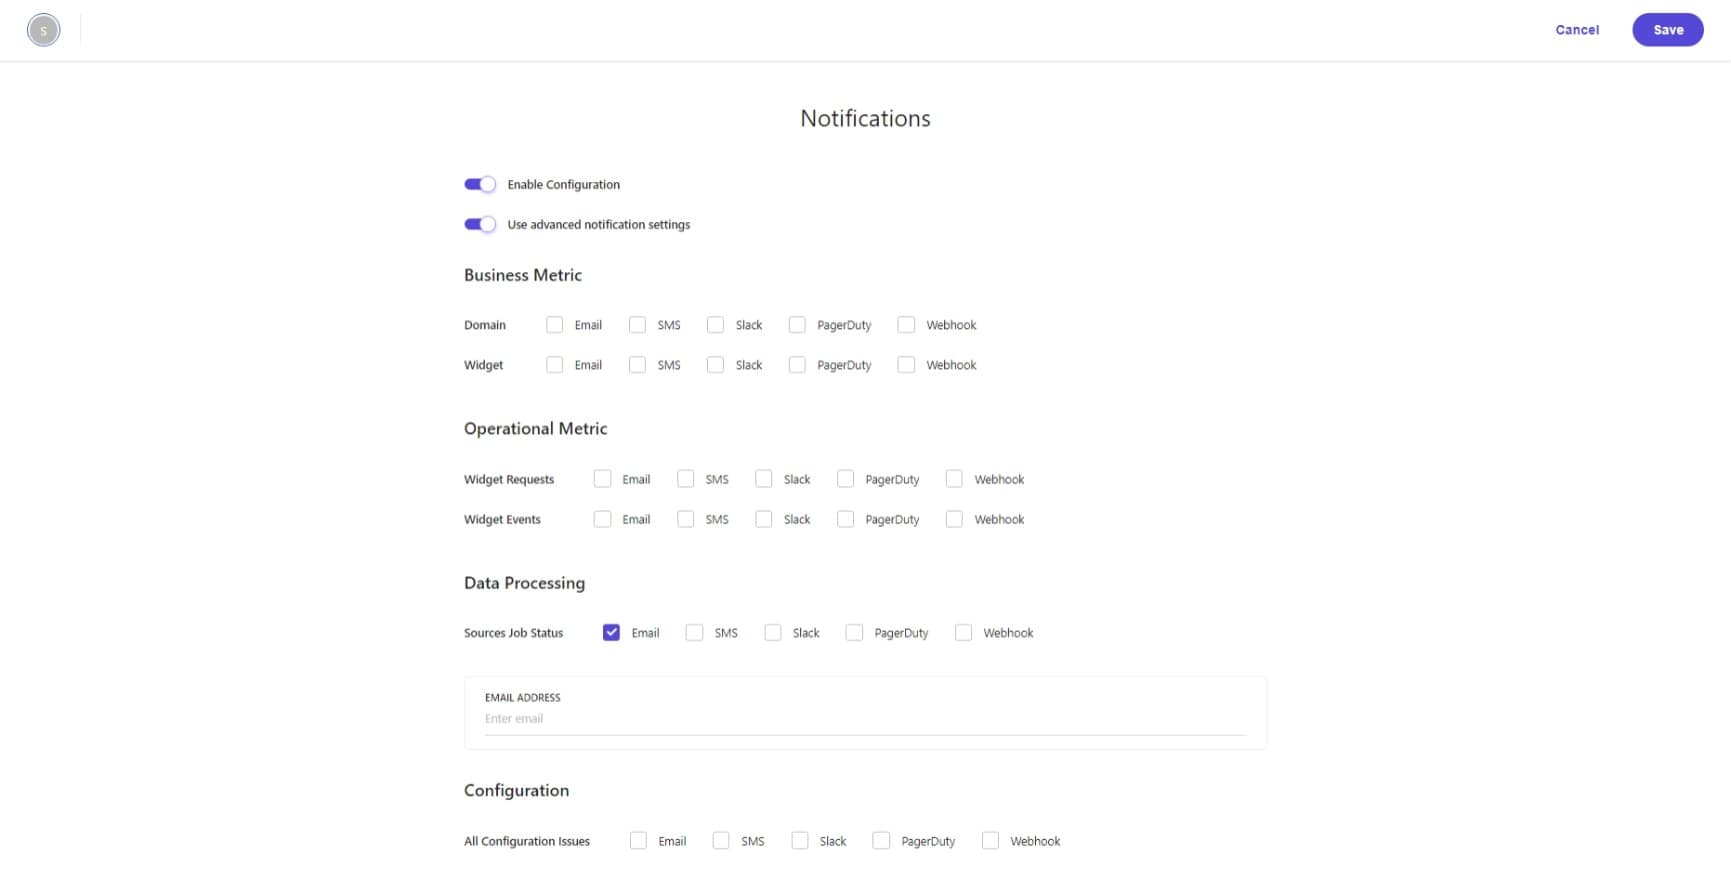
Another useful tip is to enable notifications, this way you can receive an email when a scan or reindex operation fails. The email notifications contain more information than you would otherwise see on the Notifications page in the Global Resources section of the CEC.
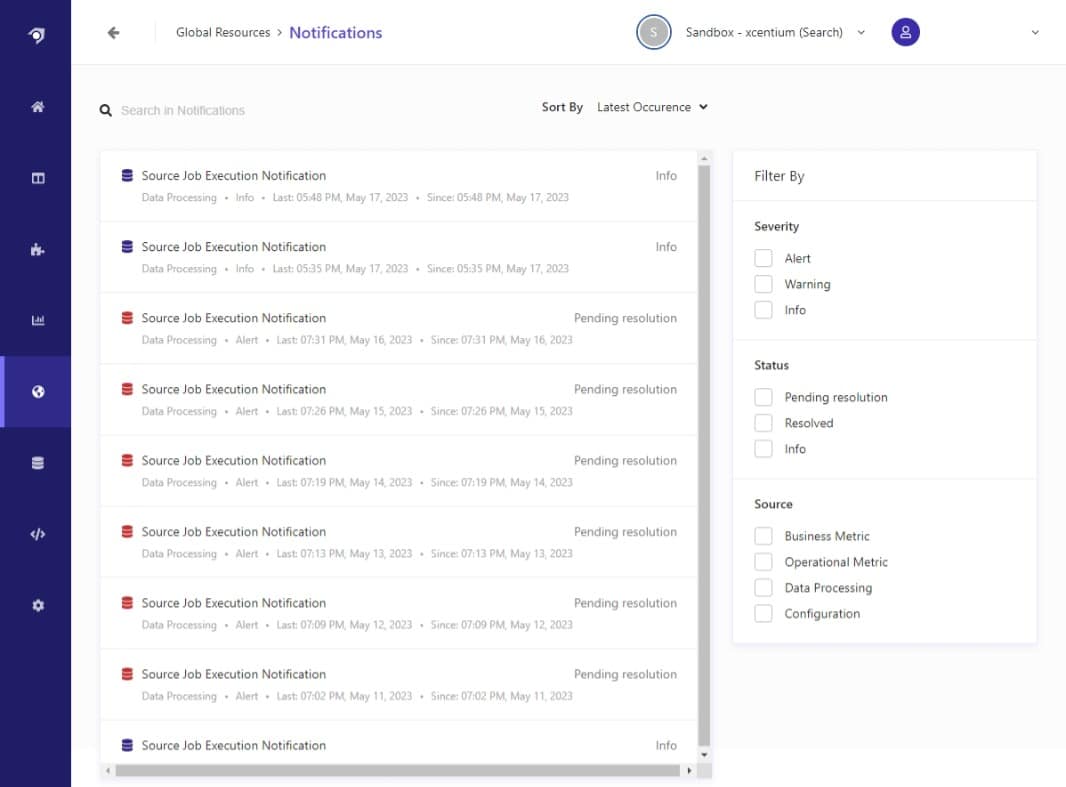
To enable email notifications, navigate to the “My Account” page and add configure of your desired notification types or each account you have access to.
When you receive a notification email, you will see that it contains more detailed information about the job status.

Developer Resources
You are now ready to make your first API request! You will want to verify that your index contains documents, and that they contain all the attributes you previously configured.
The Developer Resources section of the CEC includes a useful API Explorer tool that allows you to quickly craft API requests and send them to the Sitecore Search engine. You can review the response to check the total number of documents returned and to play with the various facet, sort, and filter parameters.
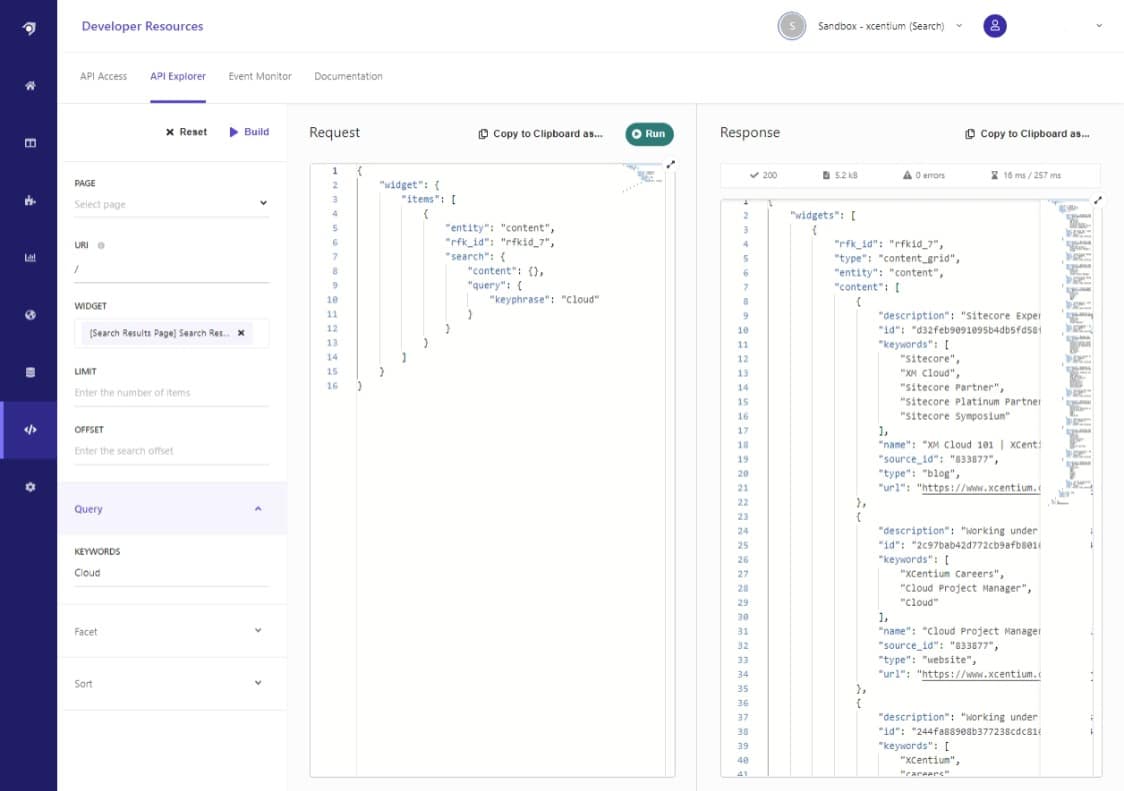
If you are happy with what you see coming from the API then it is time to refer to the Sitecore documentation and start your implementation journey.