
Sitecore
Ordercloud

Amit Patel
Sitecore Architect
Sitecore OrderCloud Quick Setup Guide
Sitecore OrderCloud
By now, you are aware of Sitecore OrderCloud and want to get started on development using it. As you may know, OrderCloud is an API First Headless eCommerce Platform. It is a SaaS based offering, so you can purely focus on utilizing it without the headache of maintenance. If you're interested in the full OrderCloud documentation visit: https://ordercloud.io/discover/platform-overview
Sitecore OrderCloud has been kind to provide a “headstart” GitHub repo to get started with relative ease. The solution consists of two parts:
- Angular for FE AND
- .Net Core for BE
The majority of this guide will focus on the Backend setup as it is the ideal place to communicate to OrderCloud API. This gives us more flexibility, control, and visibility over the calls being made to the API and the data being passed and received.
Registration:
-
Please register for an account at https://portal.ordercloud.io/register
-
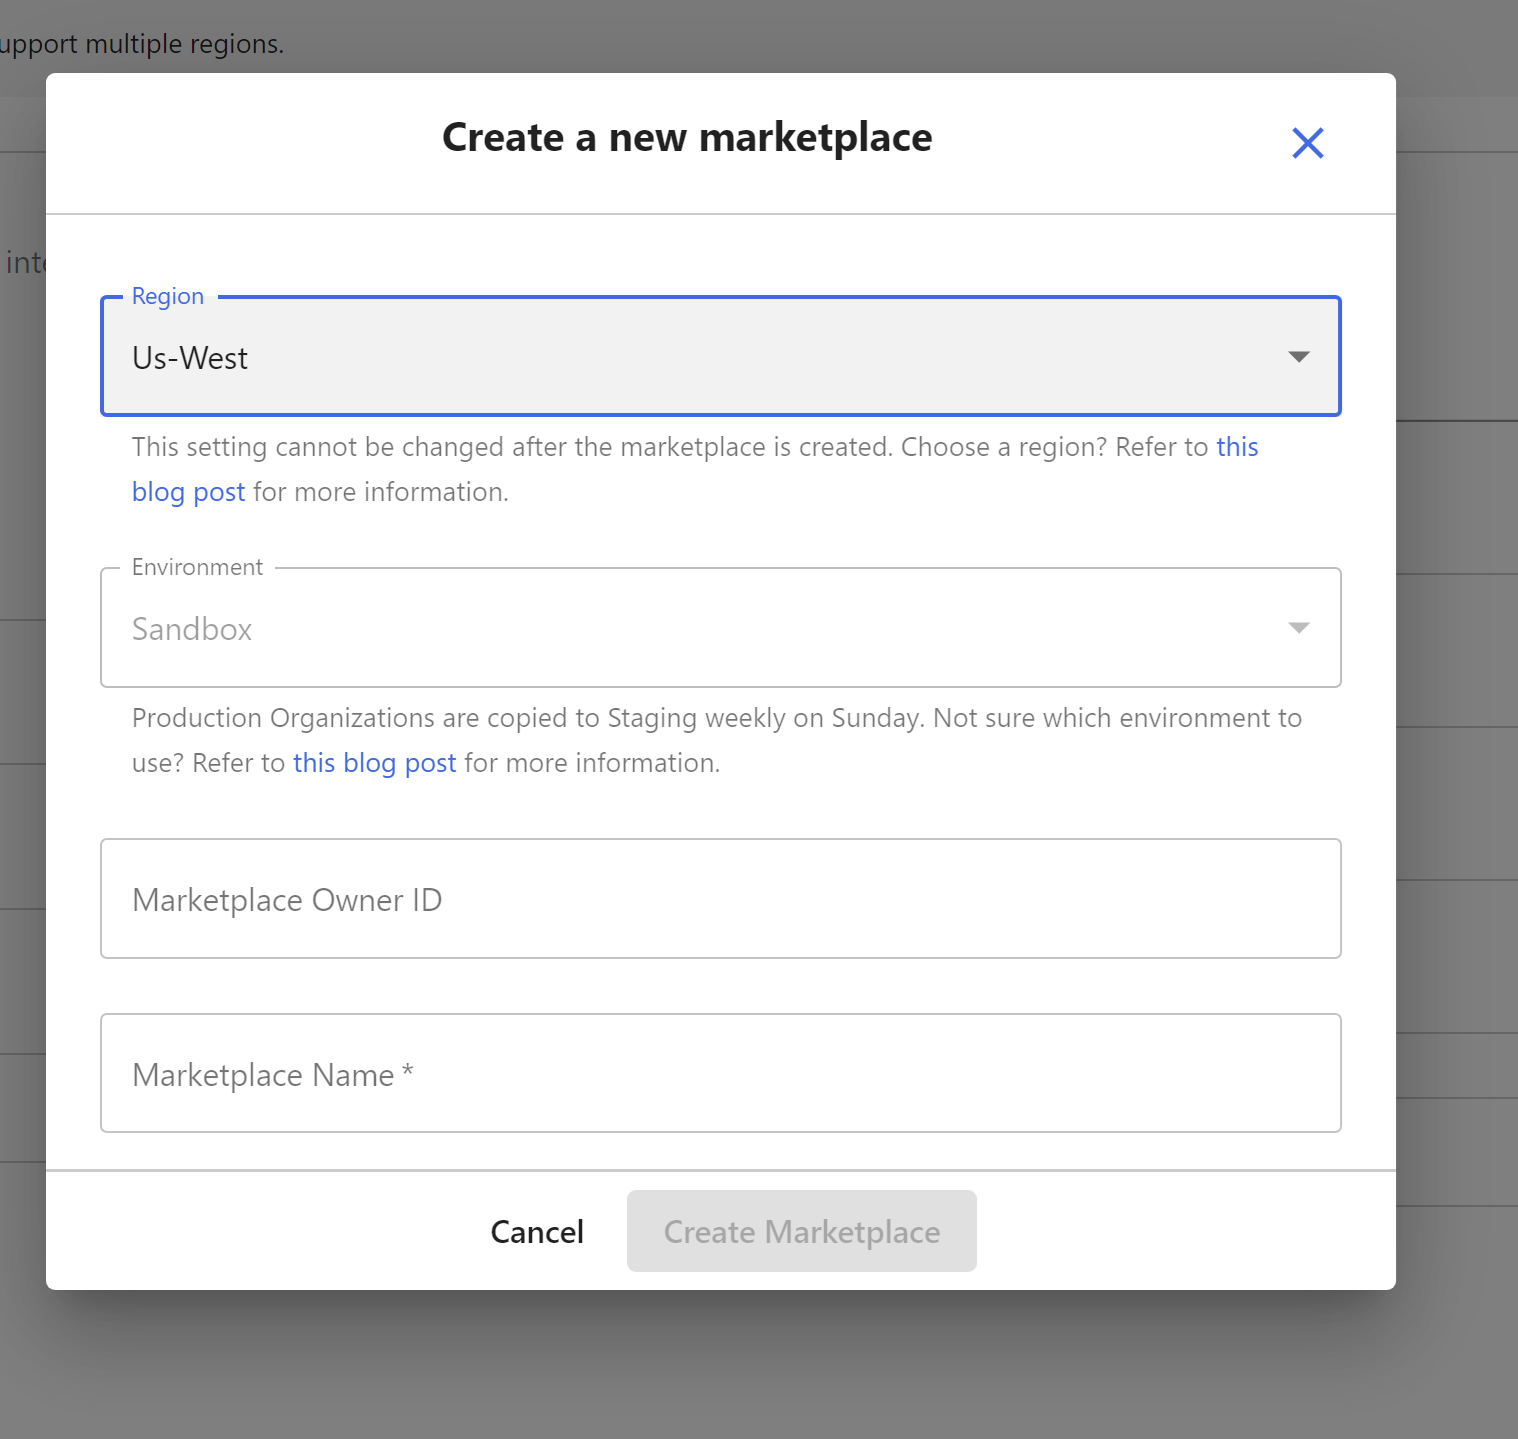
Create a new Marketplace on OrderCloud portal.
-
Review/Checkout the Headstart eCommerce solution code from here

Headstart solution has three applications mentioned below. For this guide, we will focus on the first two.
- Middleware - The backend is written in ASP.NET Core. Extends and enhances the capabilities of OrderCloud by integrating with best-of-breed services.
- Buyer - The frontend buyer application is written in Angular. This includes the entire shopping experience from the perspective of the buyer.
- Seller - The frontend admin application is written in Angular. This includes everything needed to manage the data in your buyer application(s).
Headstart Repo has given enough information to set up the solution where you can find the details here. However, I want to share our knowledge to set up the solution locally.. For local development PoC, you do not need any cloud connectivity. Let’s start the setup of the code.
Middleware Application setup
First, we have to set up the Middleware .NetCore application.
Step 1
Build the Solution and create a new Debugging Launch Profile on Headstart.Api project. This is a Console Application and hence does not require IIS publishing. In the “AppUrl” type in the following if it's not already pre-filled and then Save:
https://localhost:5001;http://localhost:5000
Now we have to configure some parameters in the Json configuration file. Take a moment to go through “AppSettings.cs” file to see the architecture of the configuration file we will be implementing.
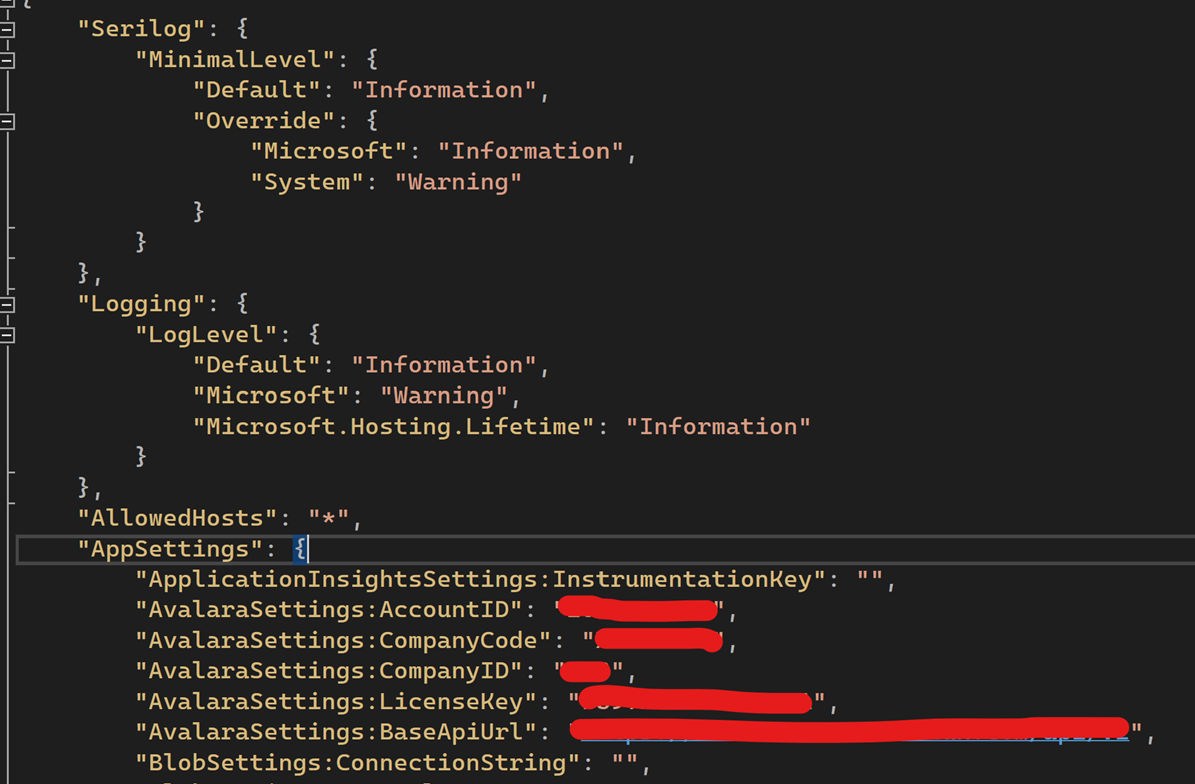
Create a new file and name it “appsettings.json”. Follow the architecture of AppSettings.cs file and add settings properties with the associated values.
Important: If you do not use a particular feature (i.e. Avalara Tax), remove its definition from AppSettings.cs and all associated references.
Here is a snapshot of an example of how appSettings.json file may look:
Step 2
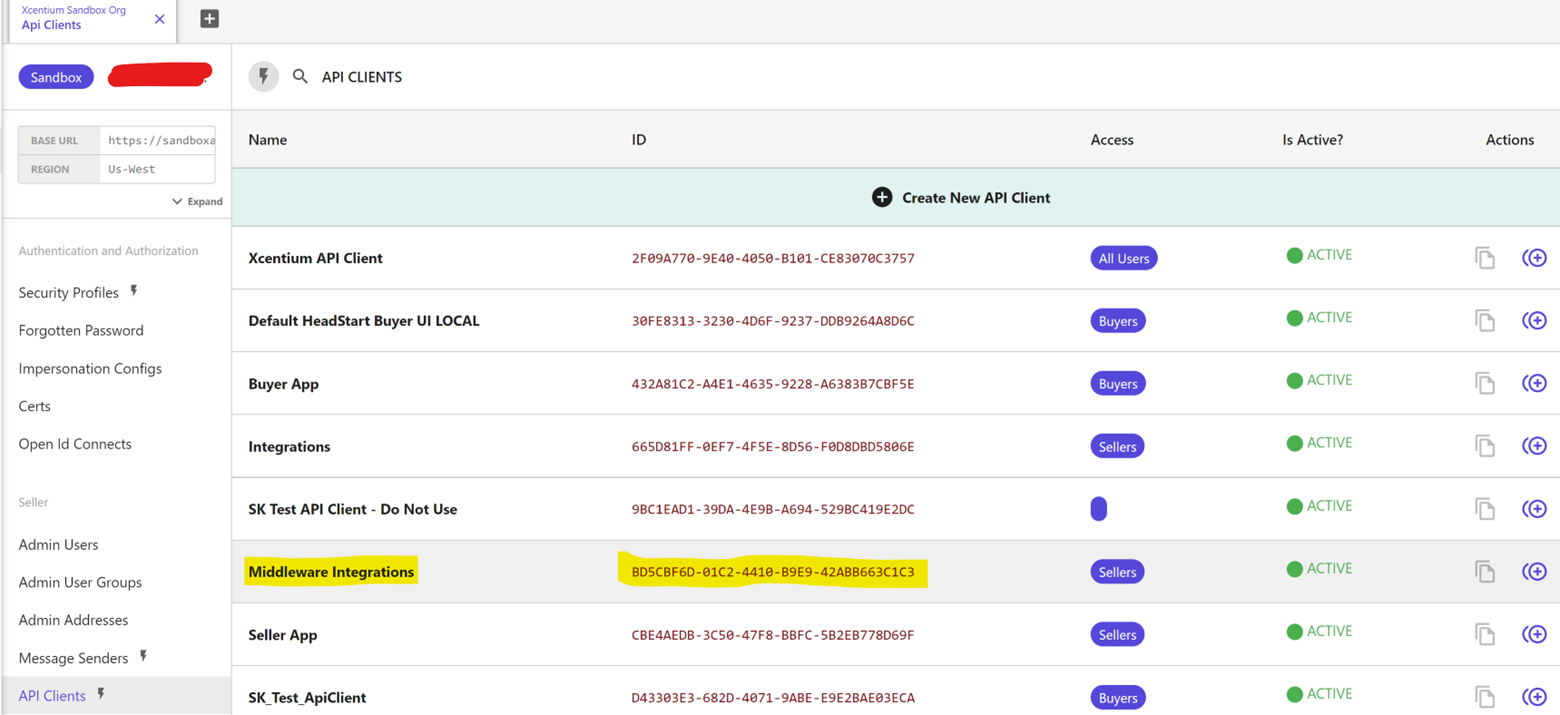
To connect the Middleware application with OrderCloud, we have to configure the Middleware client Id and ClientSecret parameter value. To get this value, your OrderCloud Marketplace needs to be seeded. For ease of use, please use this repo to seed your environment. Once seeding is complete, log in to the portal and click on marketplace.
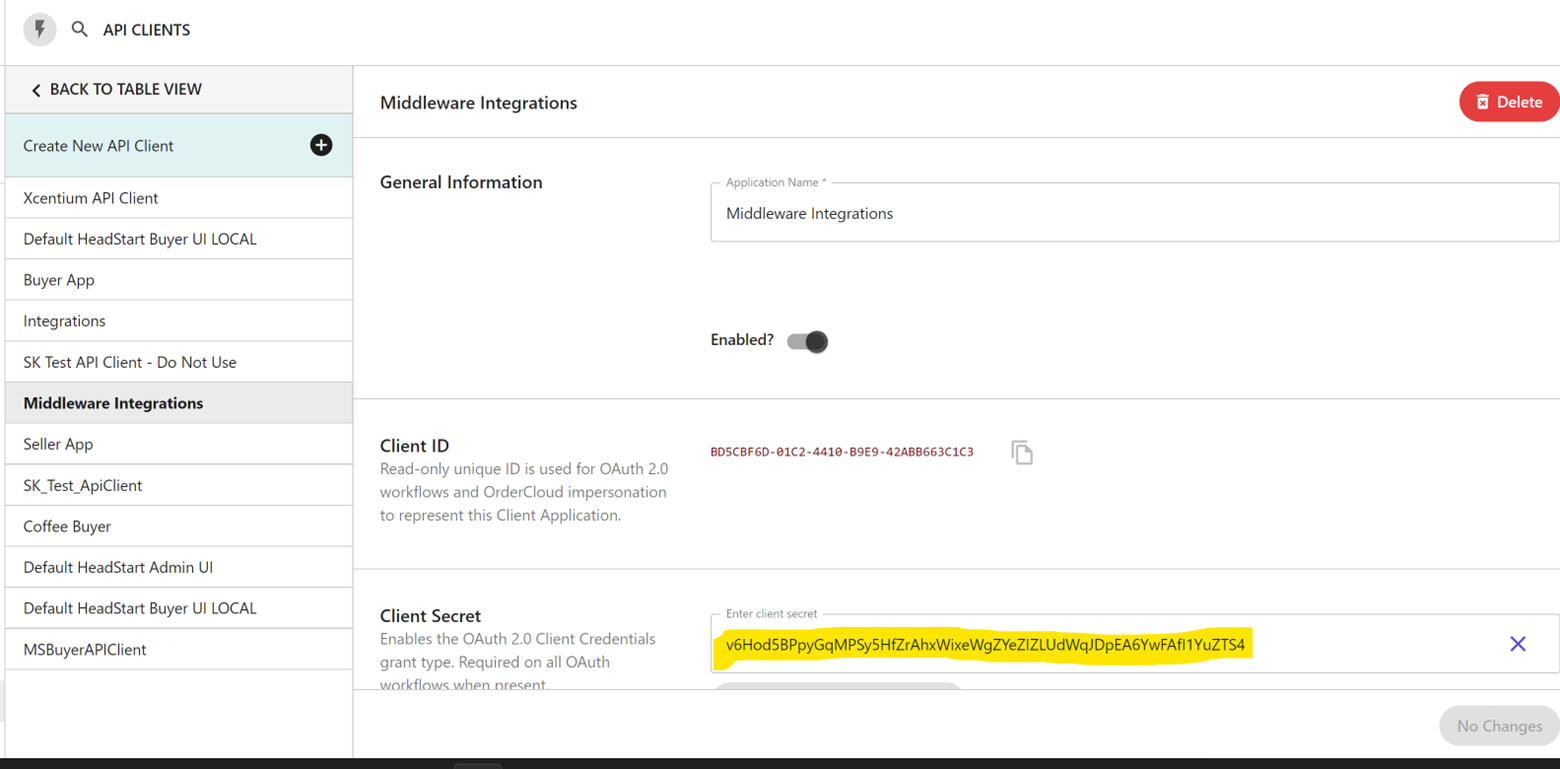
Copy the Middleware client id and secret key from OrderCloud portal and that's added to Middleware appsettings.json file.
Now your Middleware application is set up. Press “f5” or execute using “debug->Start Debugging” to start execution. Make sure the debugging profile is correctly selected.
Stay Tuned for Part 2.