
Sitecore
Docker

Victor LaLoggia
Sitecore and Sitecore Commerce Architect
Sitecore on Docker Part 4
Creating a Sitecore 9.3.0 Docker Development Environment
This blog post assumes you’ve read my previous blog post: Sitecore 9.3.0 on Docker [Part 3] - Preparing our Development Environment.
Please bookmark Sitecore’s Local Sitecore development with containers documentation as a reference for this effort.
Spoiler Alert
We are unable to use the .\docker-examples\custom-images directory to create an SXC 9.3.0 development environment.
The main reason is that the .\docker-examples\custom-images\docker-compose.*.yml files source sitecore-xp0-* Docker images that don’t exist for SXC 9.3.0. At the time I’m writing this, only Sitecore 10 is supported.
We know these images don’t exist because there are no such Docker build.json files that define these images for Sitecore 9.3.0 in the https://github.com/Sitecore/docker-images repository.
However, we do know that we can get an SXC 9.3.0 Docker Container running using the configurations found at https://github.com/Sitecore/docker-images/tree/master/build/windows/tests/9.3.x.
So, we’ll roll out our own development environment.
Creating our solution structure:
1. Clone the https://github.com/Sitecore/docker-images repository.
2. Clone the https://github.com/Sitecore/docker-examples repository.
3. Create a new local directory for our SXC 9.3.0 Development environment files. Let’s name our directory SXC9.3.0-Docker-Image.
4. Copy all the files in the docker-images\build\windows\tests\9.3.x\ directory to our SXC9.3.0-Docker-Image directory.
5. I’m digging the separation of concerns found in the docker-examples\custom-images\ directory, so we’ll reproduce it in our SXC9.3.0-Docker-Image directory:
a. Create the \docker directory
b. Move the SXC9.3.0-Docker-Image\data directory to the new \docker directory
c. Copy the following directories and files from the docker-examples\custom-images\docker directory to our SXC9.3.0-Docker-Image\docker directory:
- build
- deploy
- traefik
- clean.ps1
- .gitignore
d. Copy the .\docker-examples\custom-images\src solution files to SXC9.3.0-Docker-Image\src
e. Copy the following files from .\docker-examples\custom-images to the SXC9.3.0-Docker-Image directory:
- .dockerignore
- Directory.Build.targets
- DockerExamples.sln
- Dockerfile
- init.ps1
- nuget.config
- Packages.props
f. Create an SXC-9.3.0-Docker-Image\scripts folder. Move our needed scripts into the new directory:
- docker-images\build\Set-LicenseEnvironmentFile.ps1
- SXC-9.3.0-Docker-Image\startup
- Modify all references to the volume mapping .\startup in the docker-compose.xp.sh.yml file to: .\scripts\startup
- Delete the SXC-9.3.0-Docker-Image\Clean-Data.ps1 file
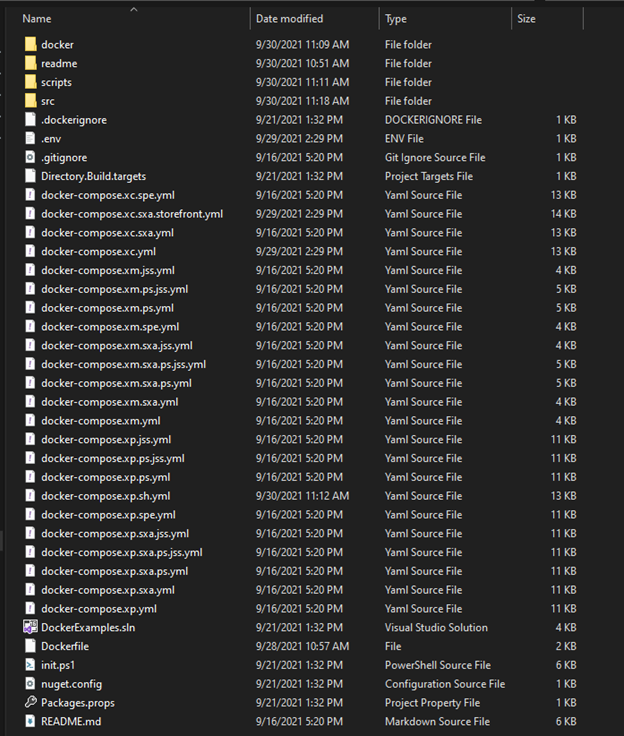
Now, we’re in good shape:
Fixing our solution:
Our Frankenstein solution is a nice start, but it won’t build properly. We need to modify a few things to make this solution viable.
As I wish to run SXC 9.3.0, I’ll use the docker-compose.xc.sxa.storefront.yml file as an example. We’ll be sourcing the docker-examples\custom-images\docker-compose.yml and docker-compose.xp1.override.yml files for the changes we’ll need to make.
1. Open the docker-compose.xc.sxa.storefront.yml file
2. Add a monitor service to the top of the file:
monitor:
    image: rahnemann/windows-hosts-writer:1.3-nanoserver-${NANOSERVER_VERSION}
    volumes:
      - C:\windows\system32\drivers\etc:C:\driversetc
      - source: '\\.\pipe\docker_engine'
        target: '\\.\pipe\docker_engine'
        type: npipe
3. Copy the traefik definition from docker-examples\custom-images\docker-compose.yml into docker-compose.xc.sxa.storefont.yml
4. Throughout the docker-compose.xc.sxa.storefront.yml file, modify all \data volume definitions by prefacing the source path with “.\docker”:
- .\docker\data\solr:C:\Data
5. Throughout the docker-compose.xc.sxa.storefront.yml file, change the destination of the ${LOCAL_DEPLOY_PATH} to c:\src. This accommodates the Sitecore 9.3.0 Watch.ps1 script. - ${LOCAL_DEPLOY_PATH}\website:C:\src
6. Create a docker-compose.xc.sxa.storefront.override.yml file
7. Modify the docker-compose.xc.sxa.storefront.override.yml with the content from the docker-examples\custom-image\ docker-compose.xp1.override.yml file:
a. Copy in the solution service definition
b. Copy in the redis service definition. Modify the BASE_IMAGE value to:
${REGISTRY}sitecore-redis:3.0.504-windowsservercore-${WINDOWSSERVERCORE_VERSION}
c. Copy in the cd service definition
- Change the image value to: ${REGISTRY}${COMPOSE_PROJECT_NAME}-xc-sxa-storefront-cd:${VERSION:-latest}
- Change the BASE_IMAGE value to: ${REGISTRY}sitecore-xc-sxa-storefront-cd:${SITECORE_VERSION}-windowsservercore-${WINDOWSSERVERCORE_VERSION}
- Remove the SXA_IMAGE and TOOLING_IMAGE variables
- Remove the entrypoint variable
- Modify the docker/build/cd/Dockerfile:
-
Remove any SXA_IMAGE variable references
-
Remove any TOOLING_IMAGE variable references
-
d. Copy in the cm service definition
- Change the image value to: ${REGISTRY}${COMPOSE_PROJECT_NAME}-xc-sxa-storefront-cm:${VERSION:-latest}
- Change the BASE_IMAGE value to: ${REGISTRY}sitecore-xc-sxa-storefront-standalone:${SITECORE_VERSION}-windowsservercore-${WINDOWSSERVERCORE_VERSION}
- Remove the SPE_IMAGE, SXA_IMAGE, TOOLING_IMAGE, and HORIZON_RESOURCES_IMAGE variables
- Remove the entrypoint variable
- Remove the Sitecore_Horizon_ClientHost variable
- Modify the docker/build/cm/Dockerfile:
- Remove references to the SPE_IMAGE, SXA_IMAGE, TOOLING_IMAGE, and HORIZON_RESOURCES_IMAGE variables
e. Copy in the xdbcollection service definition
- Change the service name to xconnect
- Change the image value to: ${REGISTRY}${COMPOSE_PROJECT_NAME}-xc-xconnect:${VERSION:-latest}
- Change the BASE_IMAGE value to: ${REGISTRY}sitecore-xc-xconnect:${SITECORE_VERSION}-windowsservercore-${WINDOWSSERVERCORE_VERSION}
8. Modify the SXC9.3.0-Docker-Image\.env file with content from the docker-examples\custom-image\.env file:
-
BUILD_CONFIGURATION
-
COMPOSE_PROJECT_NAME
-
LOCAL_DATA_PATH
-
LOCAL_DEPLOY_PATH
-
SOLUTION_BASE_IMAGE
-
SOLUTION_BUILD_IMAGE: Change the value of this variable to: mcr.microsoft.com/dotnet/framework/sdk:4.8-windowsservercore-ltsc2019. The reason being that our build will fail with the following message:
Step 13/22 : RUN nuget restore
 	---> Running in 6a3dea67ca77
MSBuild auto-detection: using msbuild version
'16.11.0.36601' from 'C:\Program Files (x86)\Microsoft
 Visual Studio\2019\BuildTools\MSBuild\Current\Bin'.

MsBuild timeout out while trying to get project to project
references.
The reason for this failure is that the SOLUTION_BUILD_IMAGE, defined in the .env file: mcr.microsoft.com/dotnet/framework/sdk:4.8 doesn’t have TLS enabled.
-
TRAEFIK_IMAGE
-
TRAEFIK_ISOLATION
9. In the Packages.props file, change the <PlatformVersion> value to 9.3.0
10. In the \src\DockerExamples.Xconnect\App_Data\Moedls\DockerExamples.Xconnect.Model.DemoModel, 1.0.json file, change the Sitecore.Xconnect.Collection.Model Version value to “9.3”
Pre-Flight Checks
Before we fire our solution up, there’s some pre-flight checks we need to run through:
1. Make sure you’ve built all the required Sitecore 9.3.0 Docker Images.
You’ll find a walk-through of this process in my previous blog post - Sitecore 9.3.0 on Docker [Part 1] - Hosting Docker on an External Drive
2. Check that any of the port mappings defined in the docker-compose.xc.sxa.storefront.yml and docker-compose.xc.sxa.storefront.override.yml files don’t conflict with existing services your machine is hosting. For example, any local SOLR servers.
3. In your \.env file, modify the COMPOSE_PROJECT_NAME value to something meaningful to your project. For some reason, Docker will ask you to use all lower-case letters. This value will be used to create the Docker Image specified in the docker-compose.xc.sxa.storefront.override.yml file.
Firing up our solution
1. Open an administrative PowerShell Terminal
2. Clean out your data directories: >.\docker\clean.ps1
3. Run the init.ps1 script: >init.ps1 [Path to your Sitecore license file] “[Your custom host name]”
Please know that “[Your custom host name]” will be the second segment of your new Sitecore domains and written to your host's file.
4. Run docker-compose: > docker-compose -f .\docker-compose.xc.sxa.storefront.yml -f .\docker-compose.xc.sxa.storefront.override.yml up. With a little luck, your Docker application will start successfully.
Your CM instance will be at: http://localhost:44001/ and http://cm.