
Sitecore
Docker

Victor LaLoggia
Sitecore and Sitecore Commerce Architect
Sitecore on Docker Part 1
Hosting Docker on an External Drive
As my trusty C: drive is running out of space, it’s a perfect time to host additional Sitecore instances on an external drive, via Docker. Currently, Sitecore is only providing Sitecore 10 Docker images for development. Therefore, to run any other version of Sitecore we need to build the images ourselves. Fortunately, Sitecore has provided us with a build script to do just that.
Following, is my procedure for getting a Docker-hosted Sitecore instance running on an external drive.
1. Format your external drive as NTFS
This is important. My external drive came out-of-the-box formatted as exFAT. I lost a good bit of time trying to understand why my Docker images were not persisting on my external drive. The behavior I experienced was that once an image was pulled, the image directory was renamed with a “-removing” suffix. Necessarily, Docker could no longer find the image to be registered and failed.
In the example output below, the windowsfilter subdirectory was renamed to:
D:\Docker\windowsfilter\4aacd926ced0ef65daecccf6f632ea567bc2d0e3bc930c0256980b203b8a7aab-removing
D:› docker pull hello-world
    Using default tag: latest
    latest: Pulling from library/hello-world
    3585a81ca503: Extracting [==================================================>]
    102.7MB/102.7MB
    a25c4ee2d18d: Download complete
    ee745e5dec32: Download complete
    failed to register layer: re-exec error: exit status 1: output: link \\?
\D:\Docker\windowsfilter\4aacd926ced0ef65daecccf6f632ea567bc2d0e3bc930c0256980b203b8a7aab\Files\Windows\INF\PERFLIB\0000\perfc.dat \\?
\D:\Docker\windowsfilter\4aacd926ced0ef65daecccf6f632ea567bc2d0e3bc930c0256980b203b8a7aab\Files\Windows\INF\PERFLIB\0000\perfd.dat: Incorrect function.
The disc format was the culprit. Once I reformatted my external disc as NTFS, everything worked properly.
2. Create a directory on your external drive where you will store your Docker resources.
I simply created a directory in the root: D:\Docker.
3. Install Docker Desktop for Windows.
4. Switch to Window Containers.
5. Startup Docker Desktop.
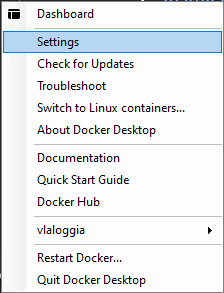
Right-click the Docker icon in your system tray, then click Settings:
6. Click the Docker Engine tab and add the “data-root” configuration:
{
  "registry-mirrors": [],
  "insecure-registries": [],
  "debug": false,
  "experimental": false,
  "data-root": "D:\\Docker"
}
Be sure to escape any backslashes in your data-root value.
7. Click the “Apply & Restart” button.
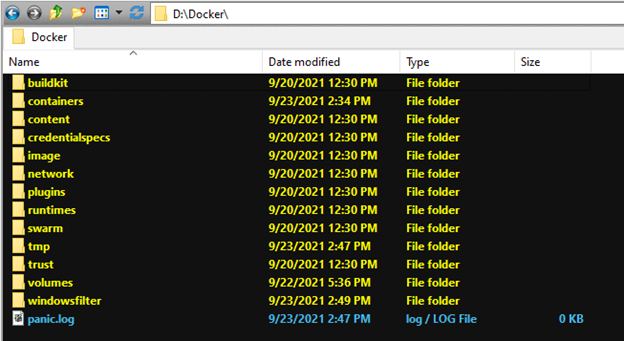
When Docker restarts, you’ll see your external drive’s Docker directory become populated:
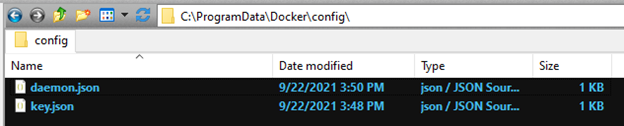
Please do note that the Docker config directory remains on the C: drive:
8. Clone the Sitecore docker-images repo:
https://github.com/Sitecore/docker-images
9. Before we start building our Docker images, there’s a couple of parameters of the docker-images\Build.ps1 script I’d like to highlight:
a. SitecoreVersion:
A three-digit string specifying the version of Sitecore you wish to build. For me, it’s “9.3.0”
b. Topology:
The current version of Build.ps1 accepts 4 different topologies:
- xc: Sitecore Experience Commerce
- xm: Sitecore Experience Management
- xp: Sitecore Experience Platform
- xp0: Sitecore Single Developer
c. OSVersion:
These are the platforms on which Sitecore images were built. It’s important to understand if your build of Windows matches these platforms. If your build of Windows matches, then you may use process isolation in Docker. If not, you’ll need to use hyperv isolation.
You can determine your Windows build by running >winver from a command line:
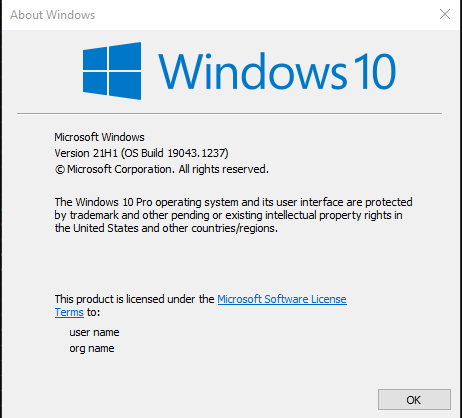
Above, we see my build is “21H1”.
Sitecore provides us with the following builds:
- 20H2 (Windows)
- 2004 (Windows)
- 1909 (Windows)
- 1903 (Windows)
- ltsc2019 (Windows)
- Linux
Microsoft nicely provides some documentation on container version compatibility to aid you in identifying which images you should pull. In my case, I found that the 20H2 images were not starting when using Docker process isolation. Each time I attempted to start my Docker container every image threw the error message: “…The requested image’s platform does not match the detected host platform”. Switching my Docker isolation value to “hyperv” fixed that issue. I’ll explain how to do that later.
d. IncludeSpe
If provided, Sitecore Powershell Extensions will be installed
e. IncludeSxa
If provided, SXA will be installed
f. IncludeModuleAssets
If provided, the ./Download-Module-Prerequisites.ps1 script will be executed
g. IncludeSh
If provided, and the Topology is “xc”, Sitecore Horizon will be installed.
h. SkipExistingImage
A great time saver. If the image is already built, don’t pull and build it.
10. Build the Sitecore Docker images
This process takes hours to complete, so make sure you plan accordingly.
Once the images are built, you need not build them again, save to upgrade or modify them. As I wish to run Sitecore 9.3.0 XC, I needed to build both the XC and XP images. I determined this by examining the test docker-compose configurations I’ll use later:
docker-images\build\windows\tests\9.3.x\docker-compose.xc.sxa.storefront.yml
Here are my Build.ps1 invocations:
.\Build.ps1 -SitecoreVersion "9.3.0" -IncludeSXA -IncludeModuleAssets -IncludeSpe

.\Build.ps1 -SitecoreVersion "9.3.0" -Topology xc -IncludeSXA -IncludeModuleAssets -IncludeSpe -SkipExistingImage
When the builds were complete, 101GB of space was used on my external drive.
You can reduce the amount of drive space required to host your Docker images by running:
>docker system prune
This command will remove unused containers, images, and networks. In my case I recovered 55GB of space.
11. Create our Sitecore license environment variable
Before we can test our Docker images, we need to serialize our Sitecore license and store it in a Windows Environment Variable. This is done via the docker-images\build\Set-LicenseEnvironmentVariable.ps1 script:
>Set-LicenseEnvironmentVariable.ps1 [Path to your Sitecore license]
12. Test our Images
In the docker-images\build\windows\tests directory, Sitecore has provided us with some test docker-compose files to work with. As I’m working with Sitecore 9.3.0, I used the files present in the docker-images\build\windows\test\9.3.x directory. However, I need to modify the Docker .env file before I did so. Here are the values I modified:
a. REGISTRY
I simply emptied this value, as I built all my own images using the Build.ps1 script
b. LICENSE_PATH
This is the path to where you’ve stored your Sitecore license on your hard drive. I store my Sitecore license file in the root of my Git directory:
D:\Git
Please note: As the LICENSE_PATH variable does not include the license file name, it is assumed your license file is named “license.xml”
c. ISOLATION
I changed this value to: hyperv.
Now, I can invoke docker-compose:
>docker-compose -f docker-compose.xc.xa.storefront.yml up
Firing up the container the first time took about 10 minutes, but subsequent starts took about half that. If you specify the “-d” parameter to docker-compose, your terminal will not display log file entries from all your images.
Unfortunately, my Docker container exhibits a few problems on startup:
- The xconnect-automationengine service cannot find its Sitecore license and fails
- The xconnect-indexworker service cannot find its Sitecore license and fails as well
I’ll speak about how to solve these issues in my next Docker Blog Post: Sitecore 9.3.0 on Docker [Part 2]: Fixing Sitecore Startup Problems.
Notes:
Directory of note:
./docker-images/build/windows/tests/9.3.x/data directory
This directory contains several Docker-mounted subdirectories for all possible images:
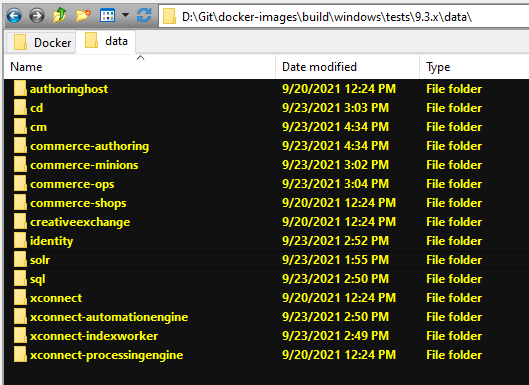
Once your container starts any volume definitions found in the docker-compose.*.yml composer file will write files here. For instance, your Content Management logs will be found in docker-images\build\windows\tests\9.3.x\data\cm\
Troubleshooting:
1. When I first started up my Sitecore 9.3.x container, the SqlServer image would constantly crash. Upon examining the docker-images\build\windows\test\9.3.x\data\sql directory, I found that only the Sitecore.Core_Primary database files were found.
I stopped my 9.3.x Docker container and deleted all database files. Upon re-running: >docker-compose -f docker-compose.xc.xa.storefront.yml up
I found that the missing database files were restored and my SqlServer image ran correctly.
2. Use the Clean-Data.ps1 script!
In each test directory, you’ll find a Clean-Data.ps1 script. If you’re having trouble with your Docker container, use this script to clean out all the .\data\ subdirectories. Just be sure to stop your Docker Container before you invoke it.
3. Restart Docker Desktop. As far as we’ve come, sometimes the old practices are still valuable.
Documentation
There’s a lot of good documentation out there to get you up to speed. I’ve found the following very helpful:
- This is a very helpful guide on integrating Docker and Sitecore for development: https://doc.sitecore.com/en/developers/100/developer-tools/containers-in-sitecore-development.html
- A great resource for all the docker command line commands available to us: https://docs.docker.com/engine/reference/commandline/docker/
- Great documentation on Dockerfile syntax: https://docs.docker.com/engine/reference/builder/
- All of these flags for the dockerd process may also be specified in the json configuration either via Docker Desktop or directly in C:\ProgramData\Docker\config\daemon.json: https://docs.docker.com/engine/reference/commandline/dockerd/
- Sitecore’s official list of all Docker images hosted on scr.sitecore.com: https://raw.githubusercontent.com/Sitecore/docker-images/master/tags/sitecore-tags.md
- Microsoft’s documentation on Docker image and Windows Client host OS compatibility: https://docs.microsoft.com/en-us/virtualization/windowscontainers/deploy-containers/version-compatibility?tabs=windows-server-2022%2Cwindows-10-20H2