
Salesforce
B2b commerce

Andrew Day
Senior Developer
Show a Progress Indicator on the B2B Commerce Lightning Checkout Flow
Creating a Guided Experience for Your Customers
In the previous version of Salesforce B2B Commerce (formerly known as CloudCraze) the customer could see which checkout stage they were on, as well as all the next and previous stages. In the new B2B LEX, this feature is no longer present with the default checkout flow. In this article, I will show you a quick and easy way to enhance your B2B Lightning Checkout Flow and give your users a progress indicator.

Note that this is using the lightning:progressindicator from the aura component library. You can check out the documentation for it here.

About This Tutorial
This tutorial assumes that you already have a WebStore up and running with at least one product you can take into the checkout process. Additionally, it assumes that you already have an account with at least one contact activated and able to shop on your WebStore. If you have not gotten that far yet, I recommend checking out the B2B Lightning documentation to get your WebStore up and running. Once you have your store set up, you can return to this tutorial to modify your checkout flow.
Creating the Progress Indicator
Unfortunately, salesforce flows do not have a progress indicator component built-in (and they are very clear about this in their documentation). The good news is Salesforce gives us all the code we need for a Progress Indicator aura component right in this article. We will begin by building that lightning component. Feel free to bookmark this article, build your lightning component, then return when you are finished.
Once you have finished your Progress Indicator component, the next step will be to navigate to the first screen that appears in your checkout flow. In my checkout flow, the first screen is the Shipping Address Screen.

The next thing we will do is create a variable which holds the names of each possible stage in our checkout process. For this tutorial we will keep it simple and assume three stages:
1. Shipping
2. Billing
3. Confirmation
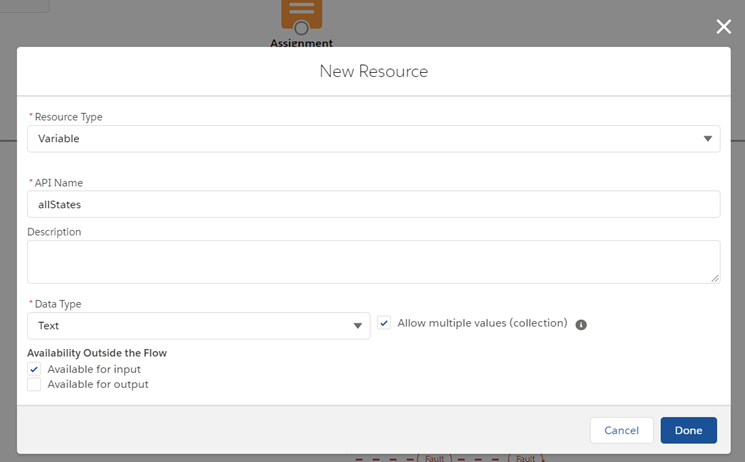
In the Toolbox, under the Manager tab, I will click on “New Resource”. Set up your resource as follows:
· The Resource Type is ‘Variable’,
· you can make the API name anything you would like
· the data type will be text
· check the ‘allow multiples’ checkbox (because it will store multiple checkout stages)
· check the ‘available for input’ checkbox
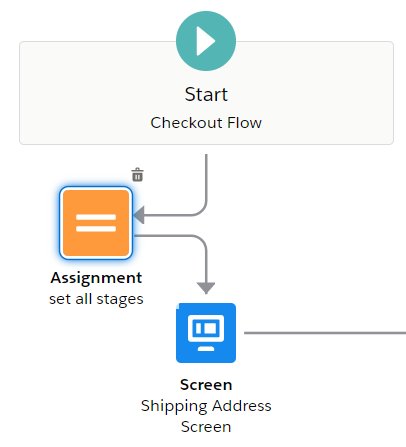
Next, we need to define our stages. I will drag and drop an ‘Assignment’ element into the flow and hook it up as shown below. We need to assign our stages before displaying them on the shipping screen, so I will make sure the assignment runs first.
In our assignment element, we will define our three stages. By using the “Add” operator, we are adding them to the variable we created earlier.

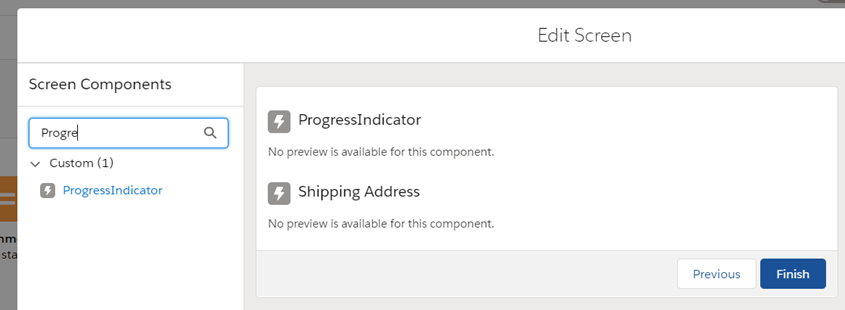
Next, we need to get our progress indicator to show up on our shipping screen. I will click into the Shipping Address Screen. We will add in our aura component we built earlier. I called mine “ProgressIndicator”.
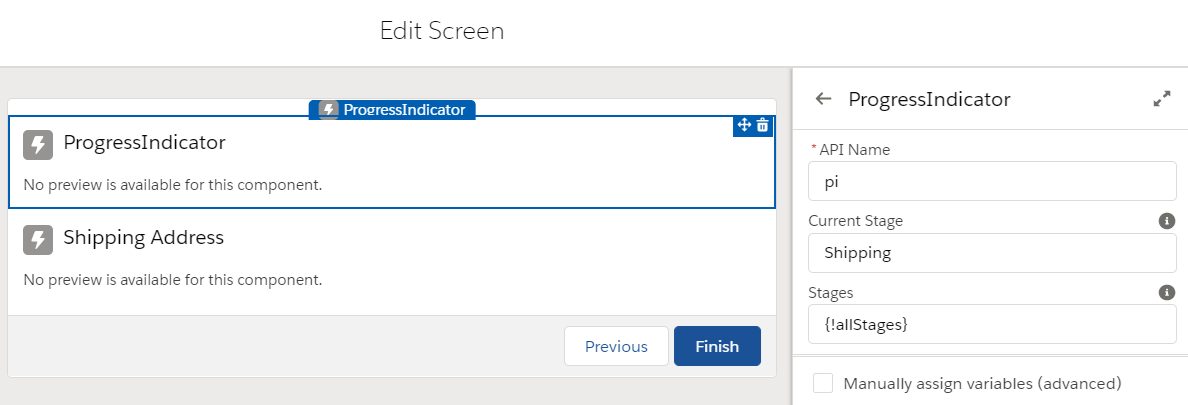
In the properties, we will set our current stage to ‘Shipping’ and the Stages to our variable we created earlier. Now the component knows which stage it is on currently, and it knows all the stages in our flow.
Save and activate your flow. Remember, you will need to add your custom Progress Indicator component to each screen which displays in your flow. Now you can give it a try in your webstore to make sure it is displaying as expected.
In Summary
Although there is no out-of-the-box progress indicator flow component, Salesforce gives us the code to quickly build one ourselves. With that component, we can show our users where they are in our checkout process at each flow screen. The progress bar is utilizing the nicely styled lightning:progressindicator aura component from the aura component library, so we do not need to do much CSS tweaking to get a modern and professional looking progress indicator. I hope you found this article helpful, and I wish you the best on your flow building adventures in Salesforce B2B Commerce for Lightning Experience.