
Sitecore
Sitecore XM
XM Cloud
Technical

Hina Garg
Architect
How to Set Up a Production like Lower Environment in XM Cloud in 30 mins
Recently I had the opportunity to spin up a new staging environment on XM Cloud for a customer. This blog will cover the set-up process and how in can be achieved in 30 minutes.
Step 1: Log in to the Sitecore cloud portal and switch to the organization that your project belongs to in case you are assigned to more than one organization.
Step 2: Make sure you are assigned as the Organization Admin. If you are not an Organization Owner, you will need access to the XM Cloud Deploy App.
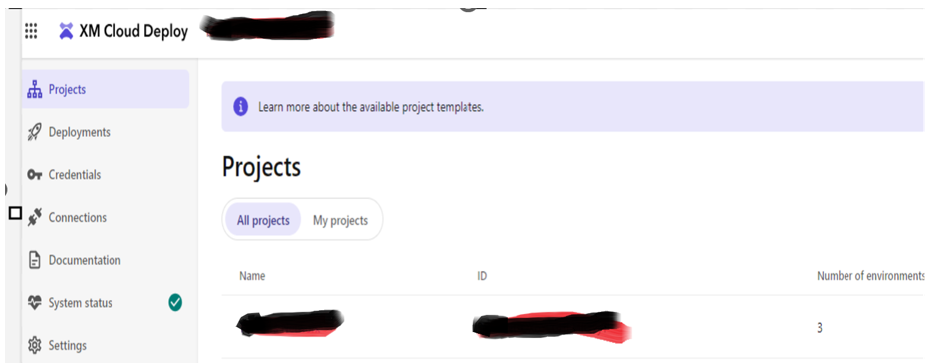
Step 3: Open the XM Cloud Deploy App. You will then see the list of all the projects as shown below:
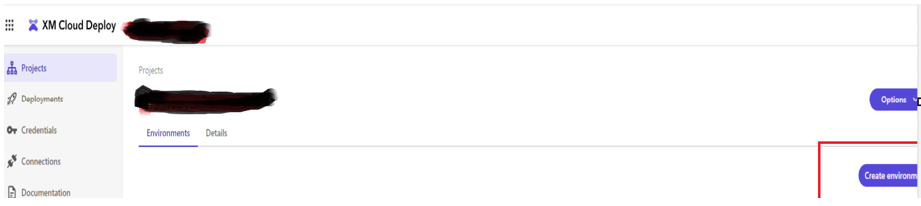
Step 4: Click on the project and go to the Environments. Click on the Create Environment button under the Environments tab as shown below:
Step 5: Fill out the details for the new environment in the pop-up modal that opens after clicking on the create environment button:
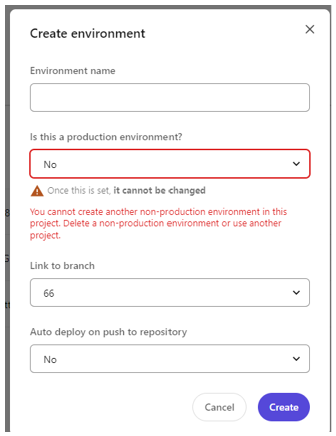
Note: If the new environment is going to exceed the allowed limit of your subscription, then you will see the message as highlighted in red in the screenshot.
- Environment Name: For example: Staging
- Is this a production Environment: No in our case.
- Link to branch: The branch in git hub in which the code would be checked in for the staging environment. *Auto-deploy: You can set this option to No if you want to keep the deployment to your CM instance to be manual otherwise set it to Yes. *Click the Create button and the new environment will be created.
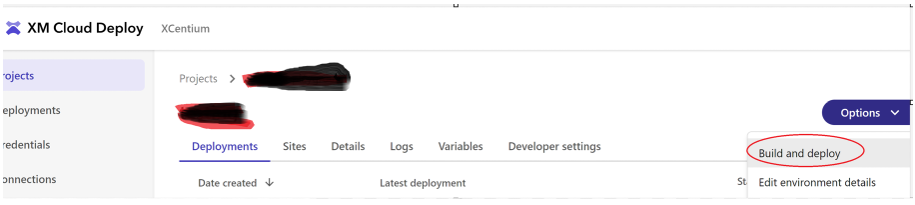
Step 6: After the new environment has been created successfully, you won’t find any sites under this environment if you go to the sites tab. To get your CM instance, site provisioned etc. click on the Build and Deploy option available on the environments page.
Once all the steps are completed, you will see the new site under the Sites tab.
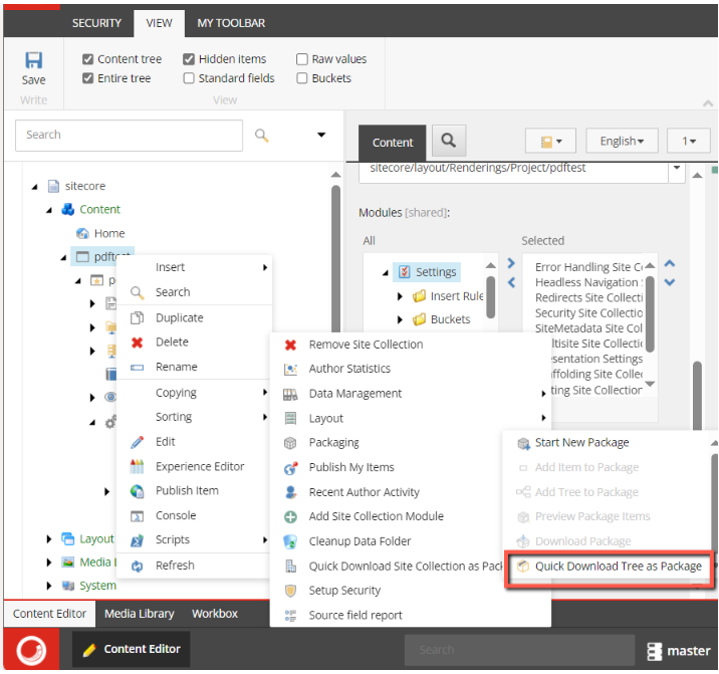
Step 7: If you already had the content on a higher environment like production, then that needs to be sync’d down to the newly configured staging environment. You could use the below option:
Package your Production website using the "Quick Download Tree as Package" feature, as shown below. Then, you should install it in your Staging environment.
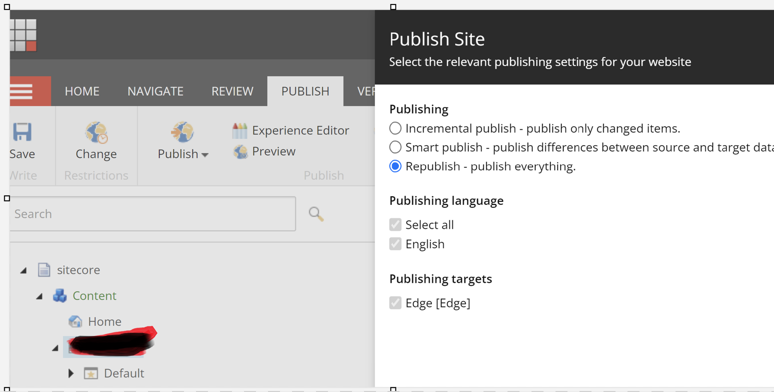
Step 8: Once you have the content set up in your new environment, publish the site content to the experience edge.
Step 9: Index the new content by going to the Control Panel.
Step 10: After all the steps are completed, you might still notice a few issues on the new site, like images missing, or styles not consistent. You could solve this issue by clearing the tenant cache, or the tenant Data Storage in XM Cloud. I will leave this topic for the next blog post.
Stay tuned for more!!