

Matt Kloss
Vice President of Client Services
My First Words A BrainDump on my First Experience with SPEAK UI
I am wrapping up development on a Sitecore project that involved my first real experience with SPEAK UI. I’ll admit, at first I struggled. I struggled more with SPEAK than I had with anything in a while. It was new to me and creating what I wanted required a different way of thinking than anything I was familiar with. Once I got over the hump and figured a few key things out, it started to click. This blog post aims at helping out the first time SPEAK developer, while Sitecore’s documentation and Jakob Christensen’s blogs and videos helped me out a ton, my hope is that this post compliments the documentation that is already out there.
As I already mentioned, SPEAK development requires a different way of thinking. The first two things you’ll notice right away is that 1) you are required to use Rocks and 2) that all your work is done in the core database. This second point is important, be sure to take backups and be careful. Your changes are immediate and not easily revertible.
Like a lot of things, the best way to learn SPEAK is to roll your sleeves up and get to work. I am assuming you have Rocks installed and configured to connect to a Sitecore instance.
Browse down to: core > sitecore > client > Your Apps
Right click on Your Apps and insert a new item – In my case I inserted a Speak-DashboardPage.
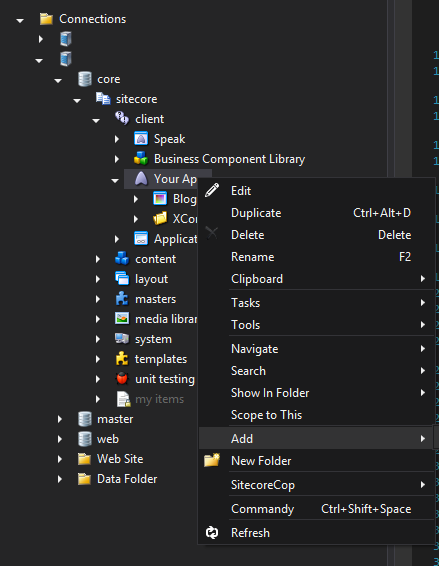
Now that you have a page created we need to assign a layout and some renderings (sound familiar?). To do this, right click on your newly created page and go to Tasks, Design Layout.
This brings up a page similar to the presentations details where we can assign a layout (Speak-Layout) and renderings or components that we want.
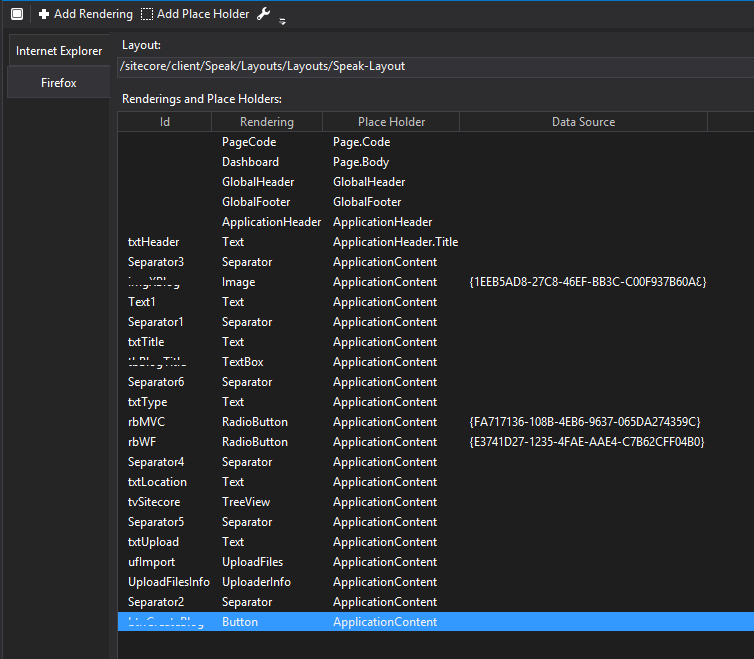
In my opinion, this is one of the strengths of developing in SPEAK, Sitecore has a lot of very useful components that come out-of-the-box.
To start adding some components, click on the Firefox tab and click on +Add Rendering. With this, you’ll see a list of all the components. The Sitecore SPEAK Component Reference has a lot of information on what all of these are and how to use them.
In this blog we’ll cover the PageCode, Text, TextBox, and Button components.
The PageCode component doesn’t have any presentation settings on it and will not be visible on your page. It exists to allow you to reference external documents, such as CSS or JS.
The Text component is pretty standard, but introduces us to some basic SPEAK features. After adding your text component, double click on it and you’ll see a list of options. IsVisible, by default is true (you can set this in case you want to work in some conditional logic). Text, simply the text you want displayed. Placeholder Key (just like in Content Editor) this determines where the text will be renderd on the page, sort order matters. Id, this will come in handy later when we get to the js and want to update or read values from our app.
The Text Box component has many of the same fields as the Text component. Text boxes, however, give us the ability to get input from a user – I’ll get to that in a bit.
The Button component’s fields are all pretty self-evident with the exception of the click field. In my experience, two things can be put in there. First, a simple JavaScript function such as javascript: alert(‘meh’). The other (and more useful) method is to set it up in your JavaScript file. This can be done by simply adding this.idYouGaveYourButon.on(“click”, function () {}… more on this in a bit.
Before we go in to the javascipt file, I cannot stress enough the importance of adding sc_debug=1 as a query string parameter. This will allow you to type all sorts of things in the console window. I recommend getting lost in it. Start with typing Sitecore.app and just browse through all the information and actions that are available to you. Autocomplete should pick up all of your component names, for example Sitecore.app.tbInput.
Once you are familiar with all of the Sitecore commands, using the javascipt will be easy. Your file should look something like this:
define(["sitecore"], function (Sitecore) {
    var SPEAKDemo = Sitecore.Definitions.App.extend({
        initialized: function () {
            this.idYouGaveYourButon.on("click", function () {
			var tbValue = this.tbInput.viewModel.text._latestValue;
            }, this);        }
    });
    return SPEAKDemo;
});
***Be sure and reference this file in your PageCode component***
Now, for the last part. If you are anything like me, you are decent with javascipt but you realty feel at home with C#. More than anything I wanted to get information from SPEAK to a controller so I could interact with any user feedback.
First – create your controller and make it public. Create a method that looks something like this:
[HttpPost]
[AllowAnonymous]
public JsonResult Create(string demoSPEAK)
{
    //deserialize here
}
And in your javascipt file, within your initialized function() create an ajax call that will send the data to the newly created controller:
$.ajax({
	type: "POST",
	url: "/api/sitecore/PATH TO YOUR CONTOLLER/CONTROLLER NAME",
	content: "application/json; charset=utf-8",
	dataType: "json",
	data: "xBlogData=" + JSON.stringify(yourVarHere),
	success: function(d) {
		if (d.success == true) {
			alert('success');
		}
		else { }
	},
	error: function (xhr, textStatus, errorThrown) {

	}
});
Once the information is passed to your controller, deseralize it and you’ll be all set.
This is by no means a comprehensive, or even that well thought out, introduction to SPEAK. Instead this is just a dumping ground where I am sharing things I think may help you with your first SPEAK app. Good luck!