Sitecore
Customer Data Platform
Personalize

Meng Hak
Lead Architect, Sitecore Experience
Integrating Sitecore Smarthub CDP Experiences with External Data
Introduction
In demos, we see that many web experiences have content living in the CDP system. This works for simple components, but what if your component has content that is dynamic or has data from an external system? This blog will explore how to connect a web experience to an external data source. The web experience we’re building is a super simple weather component.
Create a Connection
First, we will create a connection to an API that returns some data. The API we will be using is a simplistic one which is meant to show that we can pass data from the CDP to the API. All we’re doing is hard coding some values and reflecting what city the guest resides in.
To create the connections, within CDP click on Connections, then click “Add Connection” and select Data System.
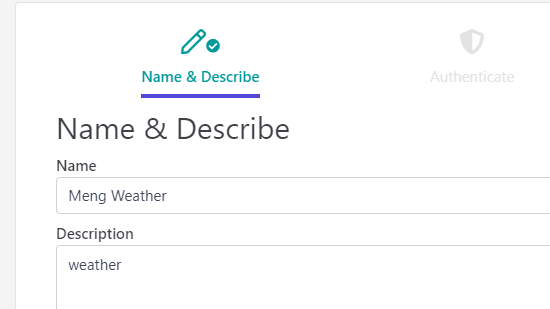
On the initial screen, add a name, description, and icon, then click next. Since I’m on Partner Sandbox, I like to prefix everything I touch with “Meng” for easy filtering.
On the authenticate screen, select an authentication method. CDP currently supports Basic and OAuth2 authentication. For simplicity, my API does not require authentication, so I select none.
On the next screen, enter the API to connect to. To pass a value, use ${param} pattern. In this case, we’ll be passing in a city.
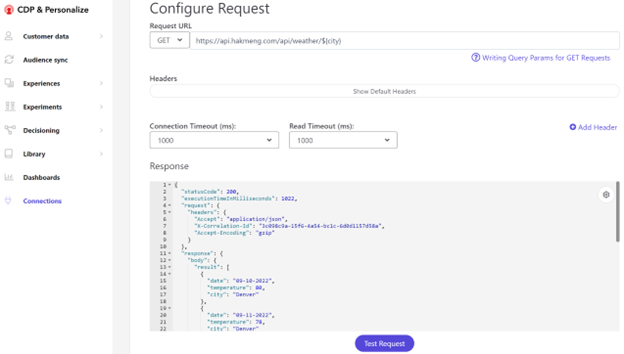
Click “Test Request” and we'll see that we can pass in a value to the API. Go ahead and test the request. Once it is successful, click next.
On the Input Configuration screen, leave everything as is and click next. Save your connection.
Create a Decision Model
We will create a decision model to consume our connection. Decision models are a business logic that can be built under the solution. To create a Decision Model, under Decisioning, Decision models, click Create Decision Model. Click add variant and name it v0.1. Double-click on v0.1 and you should see the Decision Canvas.
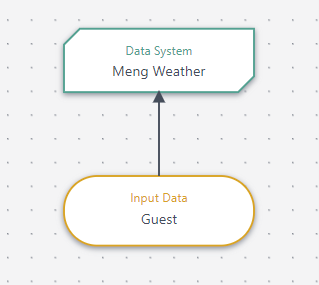
Drag in Guest under Input Data, this will feed our API.
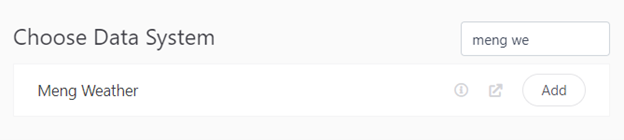
Drag in Data System under External Systems. In Choose Data System, search for the one you created earlier and click Add.
Click the arrow from Guest and drag it onto the Data System. At this point, you should have two items on your canvas.
Now, edit the Data System. Under city, type in “guest.city” (this will feed our API with the guest’s city) click save. This is technically all we need for this example, but in a real-life scenario, our decision model usually has some business logic associated with it.
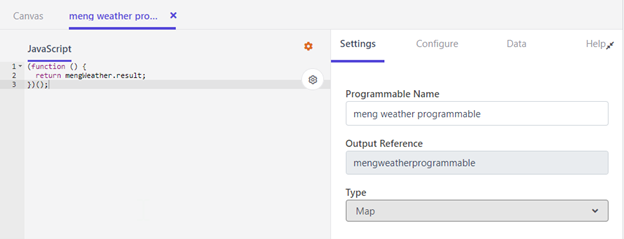
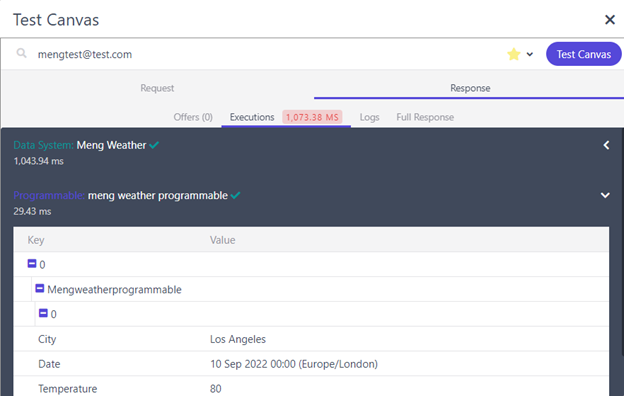
Make a note of the Result output (mengWeather.result in my case) in this screen as we’ll use it to feed the next item.

Click and drag in “Programmable” and give it a name. Then click and drag the arrow from Data System to the programmable. Edit the programmable, this is normally where you add some business logic, but for simplicity, I will just return the results from the data source. The output type should be map since we’re passing out a JSON array.
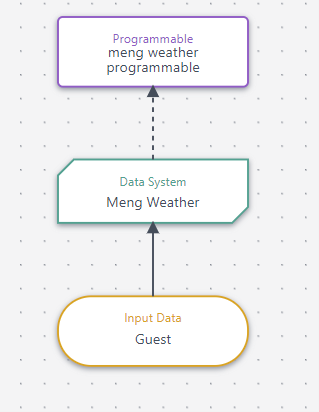
At this point you should have three items in your canvas: Guest, Data System, and Programmable.
Let’s test the Decision Model by clicking Test Canvas, select a guest, and click Test Canvas. The programmable should return data from your API.
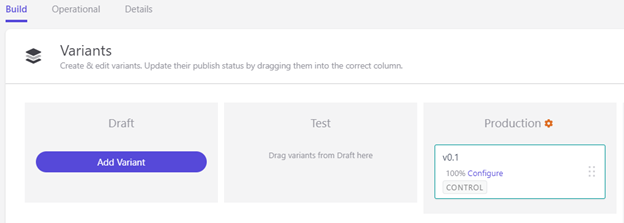
At this point save and move the variant to Production. We can now use this in our experience.
Create the Web Experience
Web experiences are injected into your website via JavaScript. The beauty of web experiences is that you can insert the experience onto any type of website including static html!
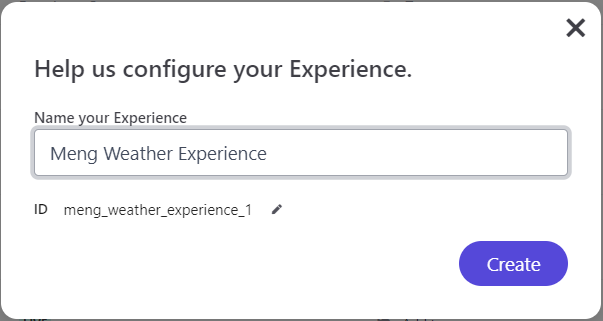
Let’s create our web experience - under Experiences, Web, click Create Experience, enter a name, and click Create.
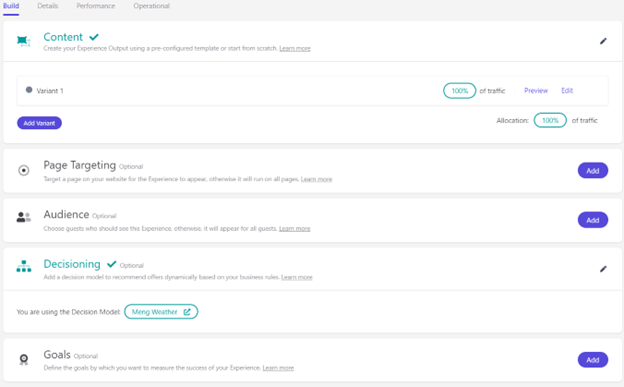
Choose New Empty Template. Click Save, then Close. We will attach the Decision Model that we created earlier. Under Decisioning, click Add. Find and select the Decision Model that you created earlier and close the right tray. You should now have a screen like the image below.
Let’s start building the component by clicking Edit to the right of Variant 1.
API
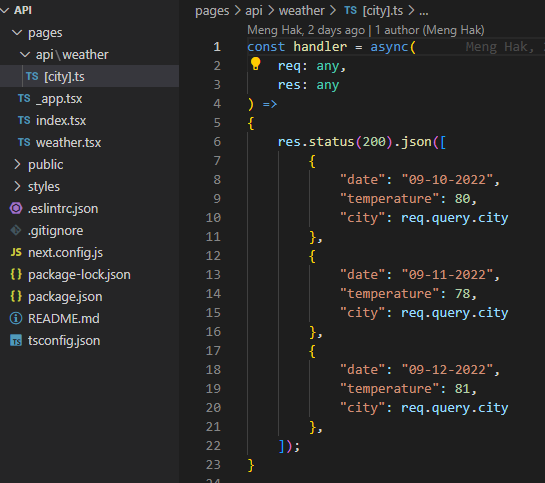
The API tab is where we feed our HTML that we have yet to build with JSON data. The API tab uses freemarker syntax and just like the comment says, at a minimum, it requires opened and closed braces {}. We need to construct JSON data from our Decision Model.
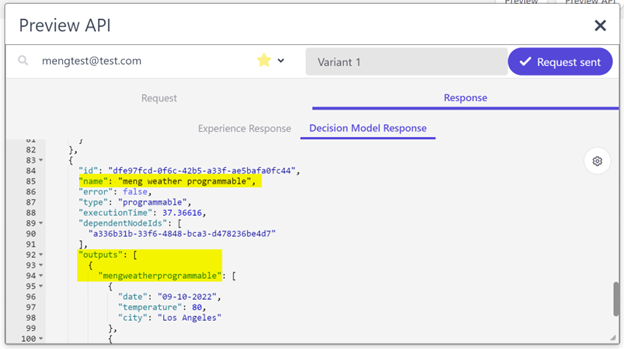
To find our decision model properties, click preview API (make sure you’ve attached the Decision Model in the previous step), and click Send request. In Decision Model Response, you’ll see something like the below. Make note of the name of the programmable node, and the outputs property. Close the Preview API
In API tab add the following:
<#assign items = getDecisionModelResultNode("meng weather programmable").outputs[0].mengweatherprogrammable>
{
 "weatherItems": [
     <#list items as item>
         ${toJSON(item)}<#sep>, </#sep>
    </#list>
 ]
}
For the first line, we are the output of the “meng weather programmable” data to an items variable.
<#assign items = getDecisionModelResultNode("meng weather programmable").outputs[0].mengweatherprogrammable>
From there, we are creating a JSON and assigning the values from the items variable to the weatherItems. As items are a list, you must use the <#list> freemarker syntax. In a real-life scenario, you may want to manipulate the data and form a lighter subset of JSON from the Decision Model, but this example is just passing through the entire JSON.
HTML
Let’s build the html that should be injected into a page. Click on the Html tab. The html is built using handlebars syntax. In the below example, we’re looping through the weatherItems node (which we built from the API tab) and outputting each property.
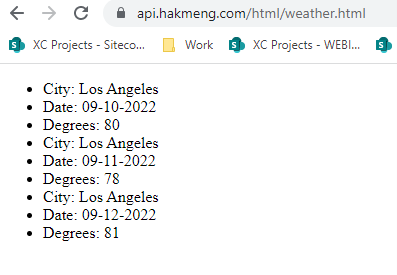
<ul class="weather">
{{#each weatherItems}}
    <li>City: {{this.city}}</li>
    <li>Date: {{this.date}}</li>
    <li>Degrees: {{this.temperature}}</li>
{{/each}}
</ul>
Save the experience.
CSS
For simplicity, we won’t include any CSS, but feel free to add styling if you desire.
JavaScript
Once we’ve built the Html, we need to tell Sitecore Personalize where to inject the experience. In the JavaScript tab, add something like the following and ensure your target page has a html class with “weather”
(function () {
  replaceHTML('.weather');
})();
Save the experience.
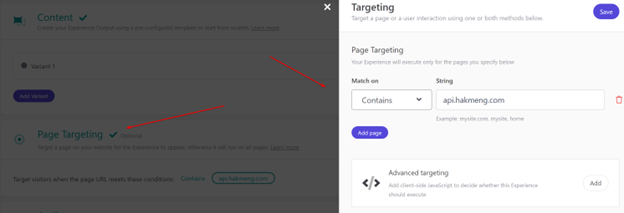
Page Targeting
As a good practice, set page targeting so that the experience only runs on pages you desire especially if you’re working on a shared environment like the Partner Sandbox.
If you preview the experience, you may notice an error regarding the outputs[0] is null or missing. That is because for anonymous users, the guest does not have any city information.
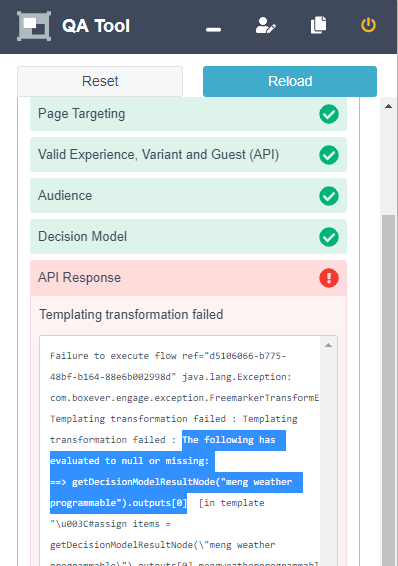
If you click “Include Guest in Preview” and select a guest, you’ll see that the error goes away.
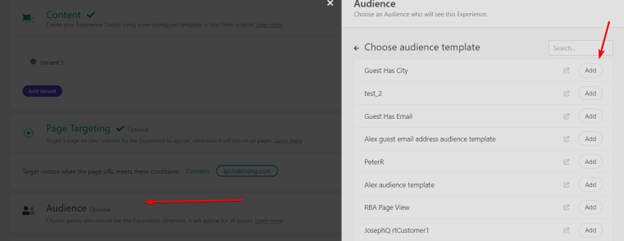
For a long-term solution, you can add a null check in your API. For learning purposes, the approach we’re going to take is to create an audience template that checks for the existence of a city and set that as our audience.
Audience Template
Create an audience template and name it Guest Has City.
Remove the comments around the self executing function and add return !!guest.city;. The complete function:
(function () {
  return !!guest.city;  // the double ! converts to true if city resolves as truthy
})();
Save and publish the audience template.
Go back to your experience and add the Guest Has City audience template.
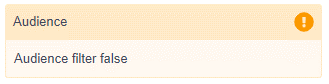
If you preview with no guest info, you’ll see an “Audience filter false” message (which is what we want).
Test again with a guest and we see it still works. We can now publish the experience.