
Meng Hak
Lead Architect, Sitecore Experience
# Import Data Into Item Buckets
Item buckets let you manage a large number of items in a content tree while respecting Sitecore's best practice in keeping the number of children to under 100 items. While you can import to your own data structure, sometimes it is nice to let Sitecore handle that process.
Importing data into an item bucket is surprisingly not straightforward. The item bucket's structure is based upon the item's creation date. This is not the created date that is a field in Sitecore, but the created field that is in the [Item] table in the master/web database!
This method of importing data into an item bucket will require you to have access to your master database. Ensure you backup your database before you begin! We will update the [Created] field in the [Item] table based on another date field (for example a published data field if you're importing news items).
- Create an item that will hold your data. Leave it unbucketed for now.
- Import/create items under the item in Step #1. Ensure the template that you use to create the items has bucketable checked under it's standard value.
- Make a note of this Template ID.
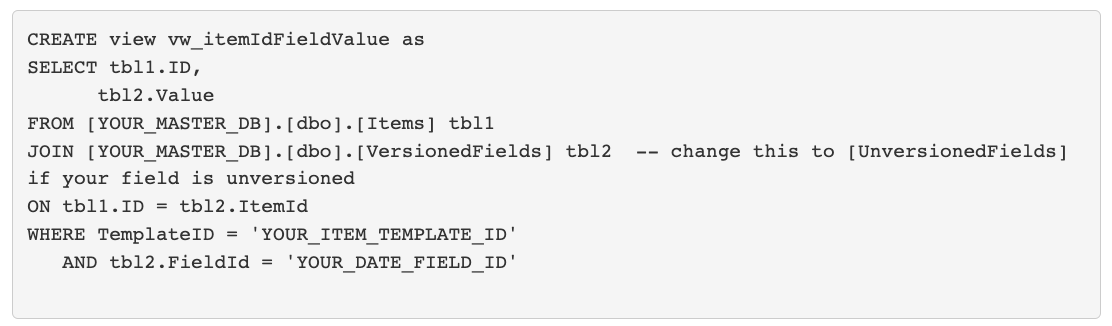
- In the SQL database, we will have to update the [Created] field which is located under the [Item] table based on a field in either the [VersionedFields] or [UnversionedFields] table depending on whether or not your date field is versioned or unversioned.
- Make a note of the ID of your date field
- Create a SQL view with the following(note the IDs are without curly braces):
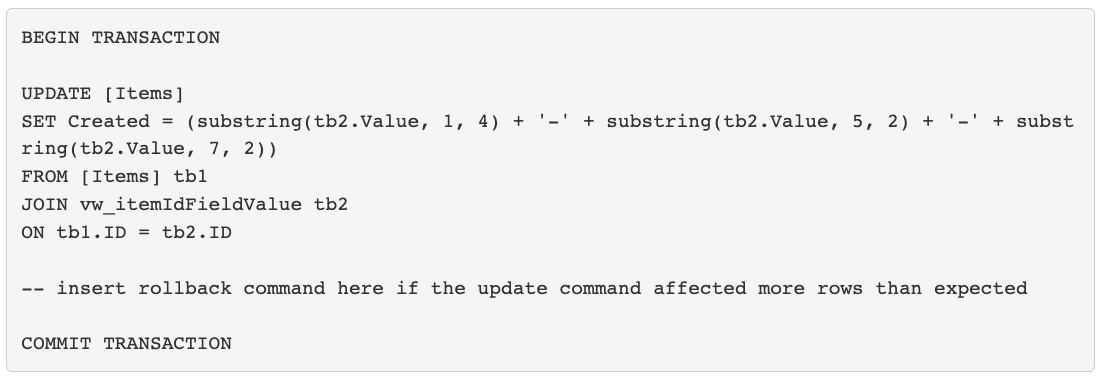
- Now, run the following commands to update the [Created] field in the [Item] table
- Reset your IIS by entering "iisreset" into CMD
- In Sitecore, go to item created on Step #1 and bucket that item. This will take a while.
- After the bucket process, your items should now moved to the appropriate bucket sub items