
Salesforce
Avatax

Mark Moreto
SFCC Lead
Implementing Avalara AvaTax with SFCC PWA Kit
Introduction
This post provides a step-by-step walkthrough on implementing AvaTax for PWA by reusing the SFCC link cartridge for SFRA. Avalara AvaTax is a cloud-based sales tax calculation that determines and calculates the latest rates based on location, item, legislative changes, regulations, and more. There are thousands of businesses around the world that trust Avalara to automate transactional taxes. SFCC Avalara’s link cartridge is available on the Salesforce GitHub repositories and ready to use primarily for SFRA-based Storefronts with backward compatibility for SFCC JS Controllers. In this implementation, we use version 20.1.0, and the effort should be straightforward.
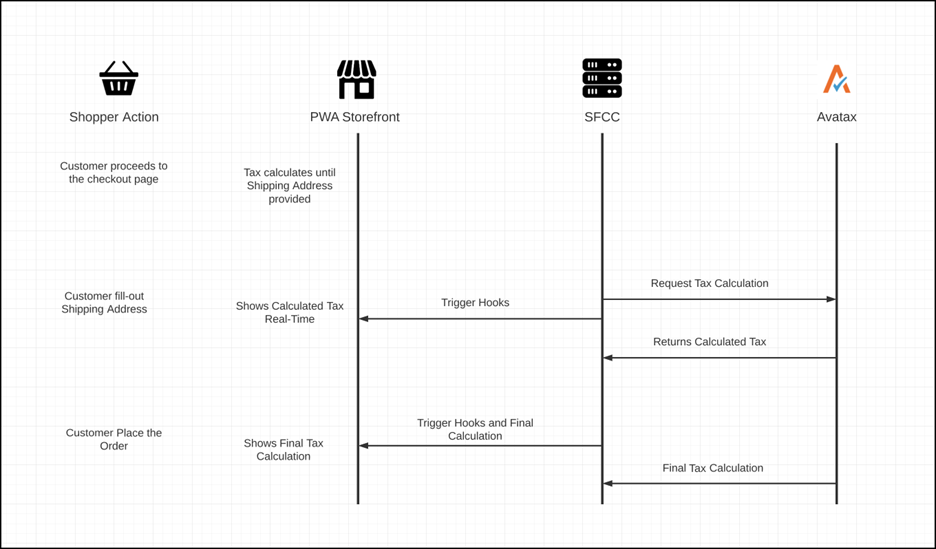
The diagram below shows the interchangeable connection between the SFCC platform and the PWA server using headless API.
AvaTax Configuration
The steps below show the configuration for AvaTax in SFCC Business Manager, assuming there already is a defined Storefront and an active AvaTax account.
- Download and install the Avalara AvaTax cartridge from the SFCC GitHub repository. It is highly suggested to use the latest cartridge version. We will utilize all hooks from the code base to perform the request to Avalara AvaTax and send it to PWA Storefront.
- In Business Manager, add the cartridge path bm_avatax, int_avatax_sfra, and int_avatax_svcclient under the Settings tab from Administration > Sites > Manage Sites > Site Name. The sequence may vary depending on available cartridges and current customizations.
- Upload the code to the currently selected code version in Business Manager and ensure all cartridges are uploaded correctly.
- While still in the Business Manager, proceed to Administration > Organization > Roles > Administrator. Select the Business Manager Modules tab and select the current Site name required then hit apply.
- Depending on the number of cartridges used in the Business Manager modules, look for the AvaTax section, and ensure all settings are enabled, including the AvaTax Settings, Reconcile Orders, and AvaTax Help.
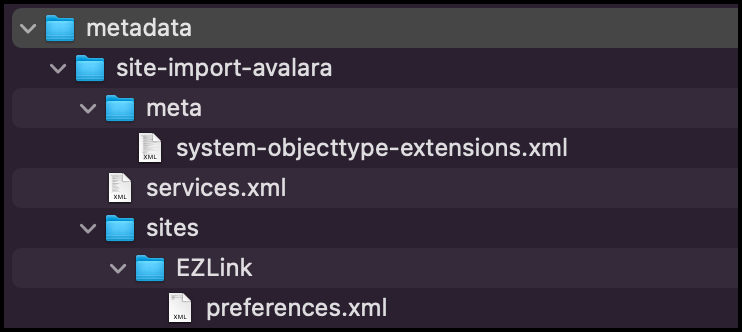
- Under the Avalara metadata folder from the downloaded file from the GitHub repo, confirm all required Business Manager dependencies are complete such as System Object Definitions, Services, and Site Preferences. Upload these to Site Import & Export under Administration > Site Development as a compressed file.
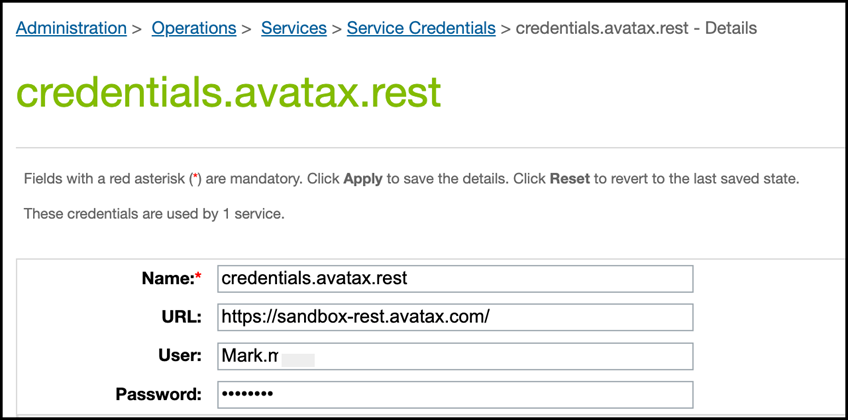
- Once uploaded successfully, go to Administration > Operations > Services > Service Credentials > credentials.avatax.rest - Details. Here configure your URL endpoint (use https://sandbox-rest.avatax.com/ for the testing environment), username, and password for the API.
- Next, we will configure the AvaTax Settings. Under the Merchant Tools, a new module called AvaTax should appear at the bottom of the navigation, and select AvaTax Settings. Select the Account Settings tab and provide all information matched to your AvaTax credentials. For this purpose, we will only enable Tax Calculation and Save Transactions to AvaTax while disabling Address Validation and Committing the transaction to AvaTax. Fill-out other essential fields such as company code (which can be found on your AvaTax Portal under Settings > Company Details), Customer Code, Shipping Tax Code, and complete address details. Note: If the Location Code value is provided, AvaTax prefers it over other address fields for tax calculation.
- To test that the credential and configuration work correctly, select Services under the AvaTax Settings Module. Then click the Test Connection button to validate the credential; this should return a success message when everything is configured correctly or display an error message. On the other hand, this also offers a feature to void transactions, commit transactions, and validate given addresses.


Avalara AvaTax Code Updates
Using the cartridge with PWA requires some code updates. The following files should be present and available to process whenever the hook has been triggered.
Every time the PWA App processes and uses the code base to interact with the configured Business Manager, it calls the native dw.order.calculateTax which automatically looks for the hook “bind” to the event.
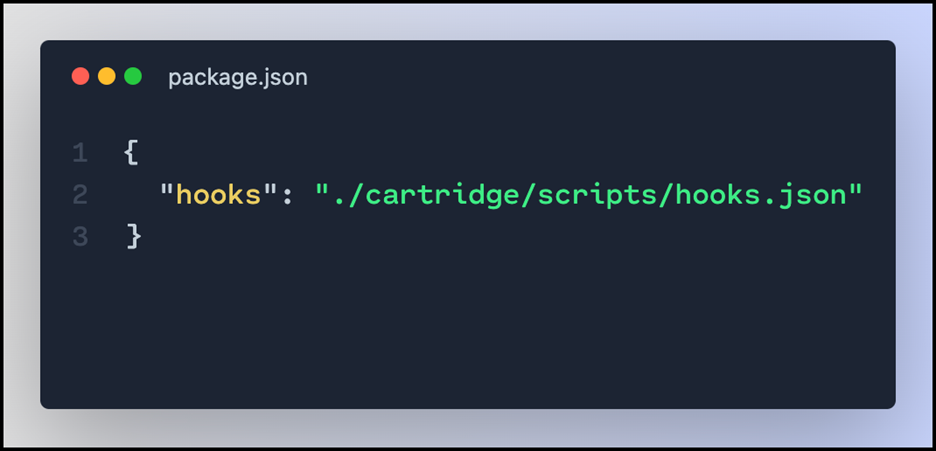
First, under the int_avatax_sfra cartridge, we need to make sure package.json exist with the value of the following:
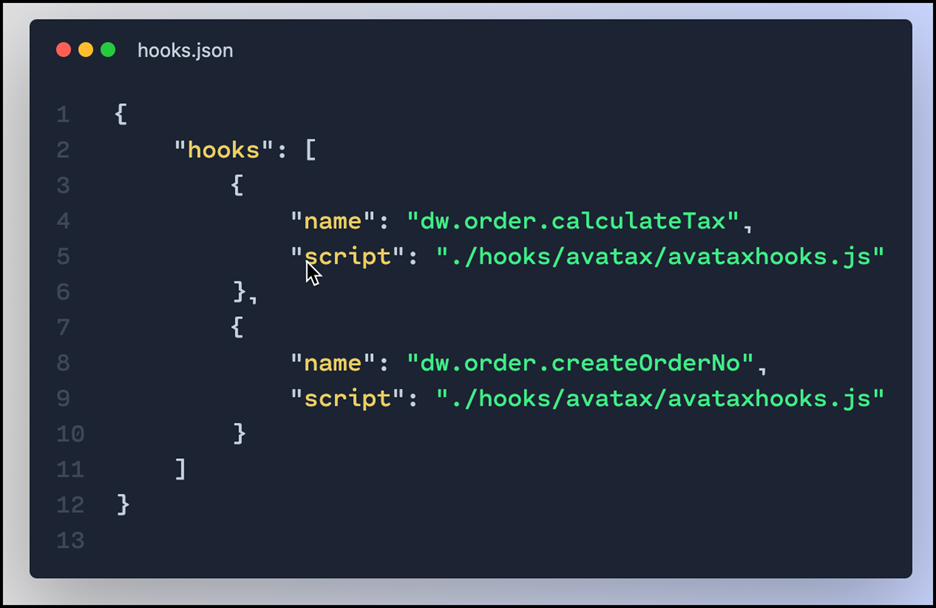
Next, we need to validate that the hooks.json exist on the package.json reference path and that it calls the avataxhooks.js both for calculateTax and createOrderNo hooks.
PWA Configuration
This assumes the PWA Kit headless has been configured correctly and SLAS has been set up. If not, you may need to follow the instruction on the guide from Salesforce: https://developer.salesforce.com/docs/commerce/commerce-api/guide/authorization-for-shopper-apis.html
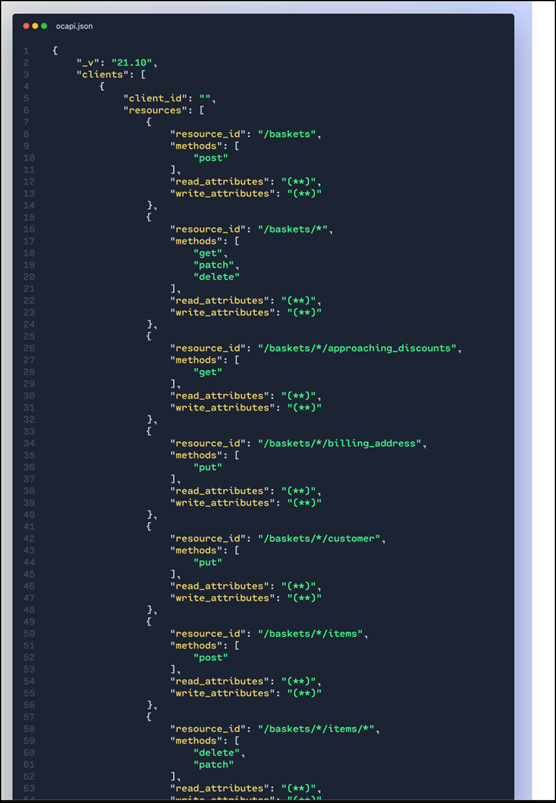
We will also use OCAPI instead of Commerce SDK, therefore we need to make sure OCAPI has been properly configured and allow all the basket resources otherwise this won’t work.
Here’s the sample Shop OCAPI Setting:
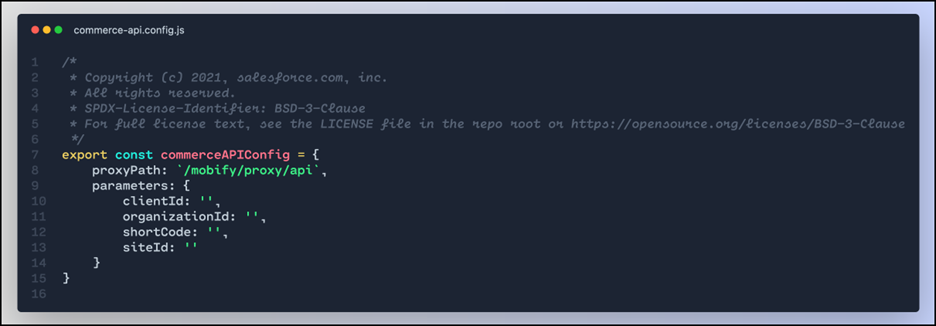
On your PWA code base, using your favorite code editor, open up or create this file commerce-api.config.js from app/root folder.
The Client ID value should be coming from the SF Account Manager configured for PWA Kit. While the organization ID can be found from Business Manager under Administration > Site Development > Salesforce Commerce API Settings. Copy the exact value without extra spaces to ensure this will work correctly.
The shortcode can be accessed as well, where you get your Organization ID. To ensure everything works fine, verify the status is Active to make this work.
Lastly, the Site ID should be the target Storefront Site that will work with your PWA app e.g. RefArch.
Conclusion
Overall, implementing the Avalara AvaTax with PWA should be fairly straightforward. The incremental effort is bridging the gap between the SFRA cartridge and headless API.