
Sitecore

Josh Oliver
Senior Developer
Faster Helix Development with Project Templates
Using Helix templates for a faster and more seamless way of maintaining and building Sitecore Helix solutions.
If you have ever worked with, or set up a Helix Sitecore solution from scratch, you may have noticed how tedious and repetitive it is to create new modules. This process can be expedited by using the Sitecore Helix Module Templates. These templates allow you to build a single layer once and then insert a new project of that type whenever you need a new feature, foundation, or project module.
There are no specific constraints to what tools you have to use for this but, for consistency purposes, this article deals with the following technologies.
-
Sitecore 9.3
-
Visual Studio 2019
-
Unicorn
To create these module templates, you will need two tools.
Firstly you will want to install the Visual Studio Extension. Once that is installed, pull down the git repository for the helix templates.
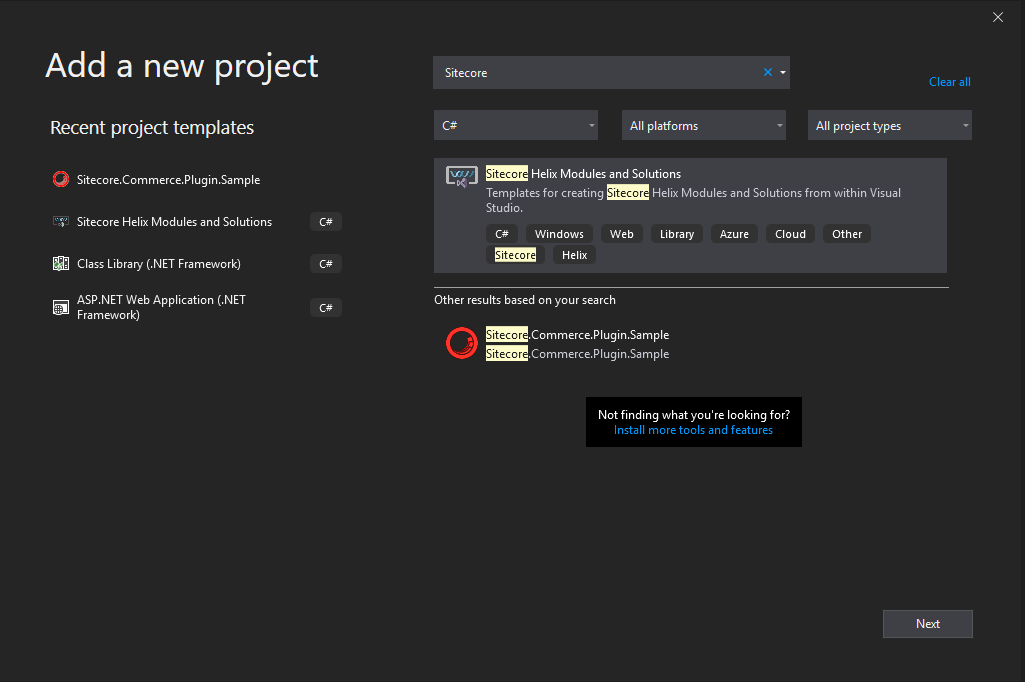
Once both of these are acquired, the fun part starts. Open whatever Sitecore solution you are planning on using and navigate to the feature layer. Right-click the feature solution folder and select “Add New Project.” In the project templates, window to search for Sitecore or Helix until you see Sitecore Helix Modules and Solutions and select it.
If this is the first time creating a project of this template, It should prompt you with the following.
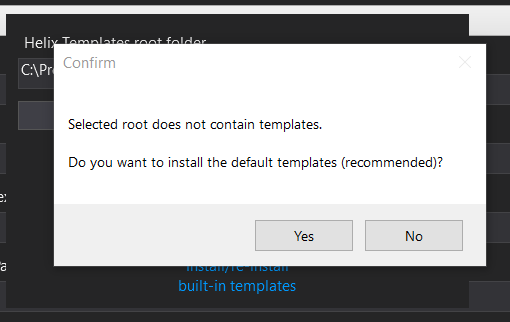
Click yes and put the folder in the root of your solution. You should include these in Source Control so anyone can quickly create project-specific module projects. After you have created a templates folder, don’t continue just yet.
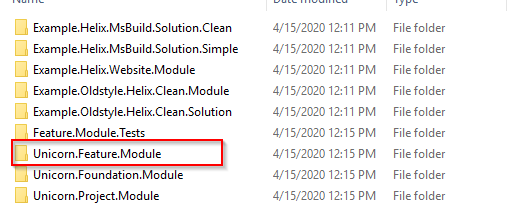
You’ll want to grab the Sitecore Helix templates from the Sitecore repo you pulled down. Find those templates in ~\Helix.Examples\visualstudio-helix-templates and copy them to your helix.templates folder in your solution. Feel free to delete any of the sample templates that came with the Visual Studio Extension or from Sitecore.
For this example, I will be using Unicorn.Feature.Module.
Open this folder and find the .csproj file and open it in visual studio. This project is where you can modify any project-specific requirements for the feature module. You can add new files or configs, and delete anything that is already in there that you will not need.
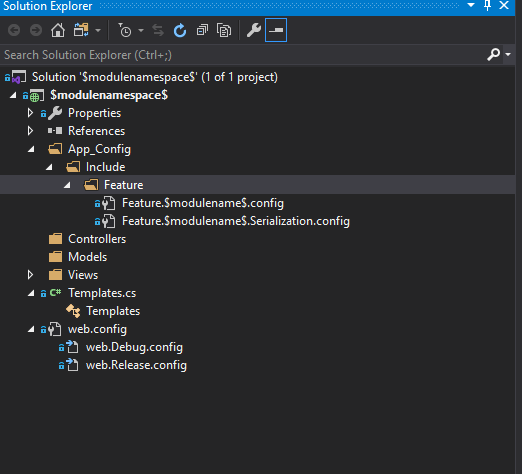
You have access to variables that will be replaced when the project is inserted, such as $moduleName and $moduleNamespace.
For example, if you would like a unicorn configuration for each new feature module added, you can create a configuration file named Feature.$modulename$.Serialization.config.
And in the config file, use the same tokens.
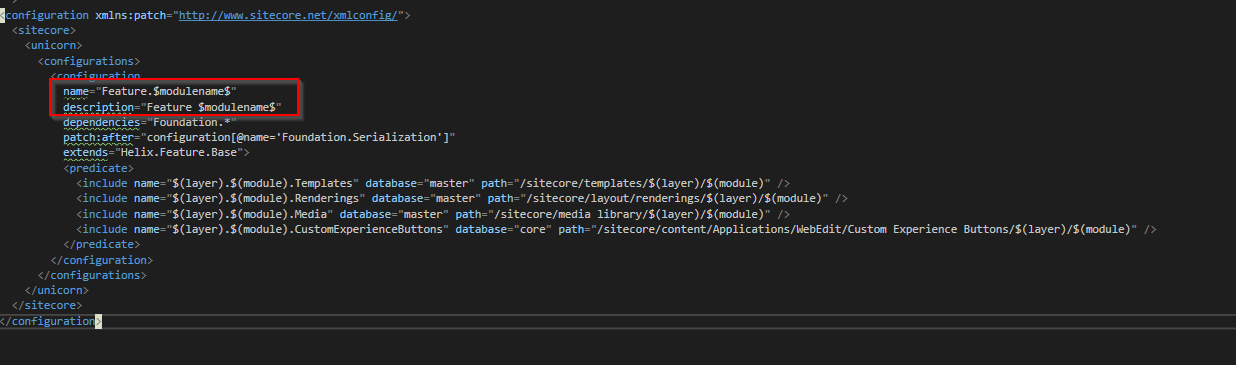
This token replacement will work for any file you can think of, including .cs files. You can add NuGet references and even edit the .csproj properties to include build events.
Once you have edited your template project, return to your Sitecore solution and add a new project of the type Helix Template again.
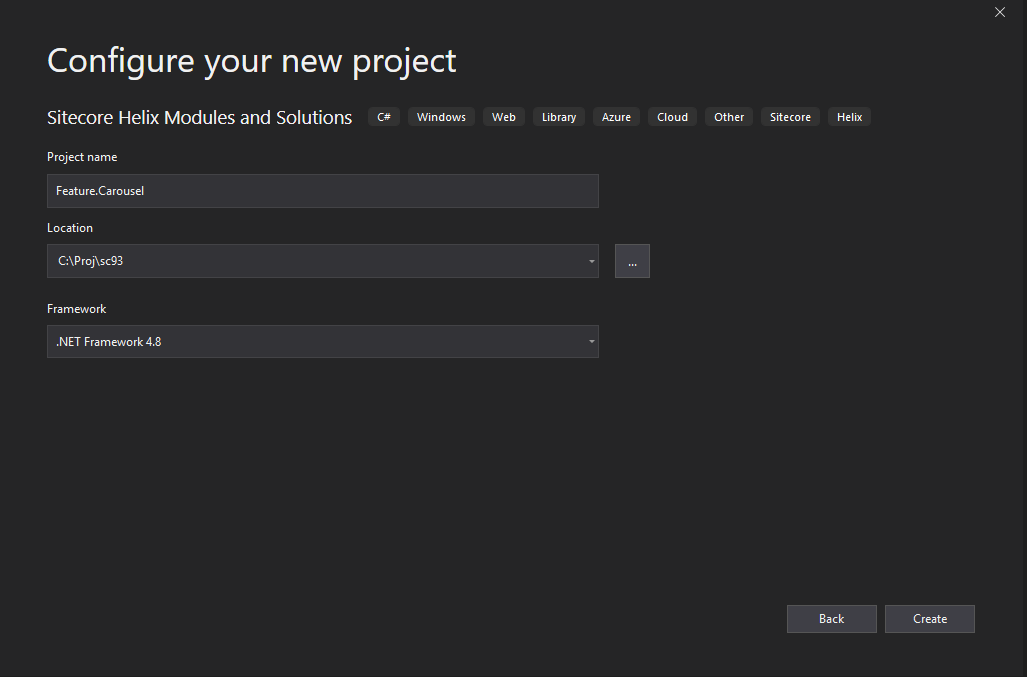
Enter the name of the project and choose the framework version.
Leave the path as the solution root. The template has the folder structure in it so that it will be copied over.
On the next screen, choose the template we just modified and fill out the rest of the information.
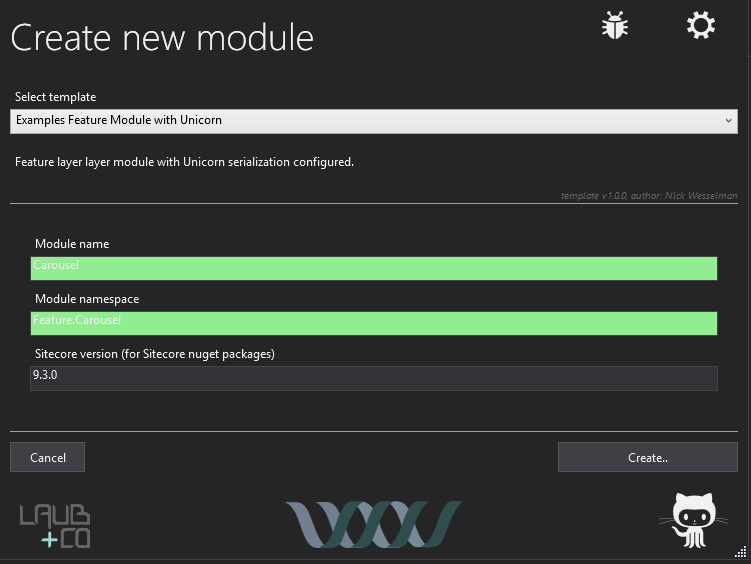
If that is all correct, click create, and you will see a new Feature module created with all the files that you included in the template. All the tokens will be replaced with whatever you named the project.

And that’s it! Now anytime you need to add a new feature, you can use this template we created, and all the busy work is taken care of for you—no more manual adding of folders or changing namespaces.
From here, the possibilities are endless. You can create your templates for each layer, be it Feature, Foundation, or Project, and then check them into source control so that anyone who pulls the solution down in the future can easily create new modules using these templates.
I hope this speeds up your Sitecore development as much as it has mine.