
Type

Brian Hassett
FrontEnd Developer
Customizing the footers in Salesforce B2B
In Salesforce B2B, extending and customizing pages is straightforward. However, when dealing with global elements like headers and footers, the process is a little more complex. As it is now, B2B allows you to edit the out of the box footer, but changes don’t seem to have an effect. We’re still left with the Salesforce blue cloud logo dangling on the bottom of all pages. Which most all clients will want their own custom branded headers and footers for their site. In the case of the footer, we must ignore the out of the box footer and create a custom solution. Here is the best solution we’ve found so far.
The first thing we’ll need to do is create our own custom gross (overall) template for the site. This template basically helps determine the placement of the core layout.
-
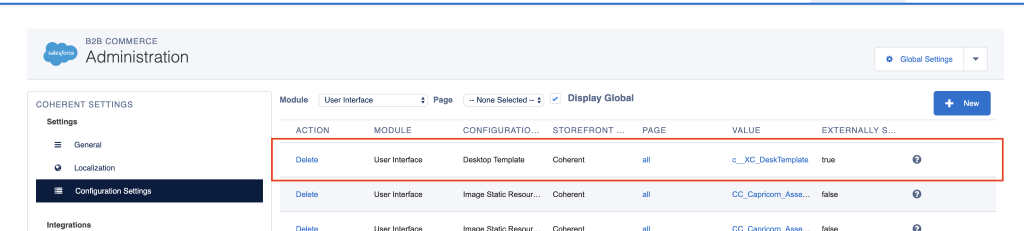
First let’s look at the User Interface configs for the Storefront in Admin to see if we already have the custom gross desktop template specified. It should look like this.
-
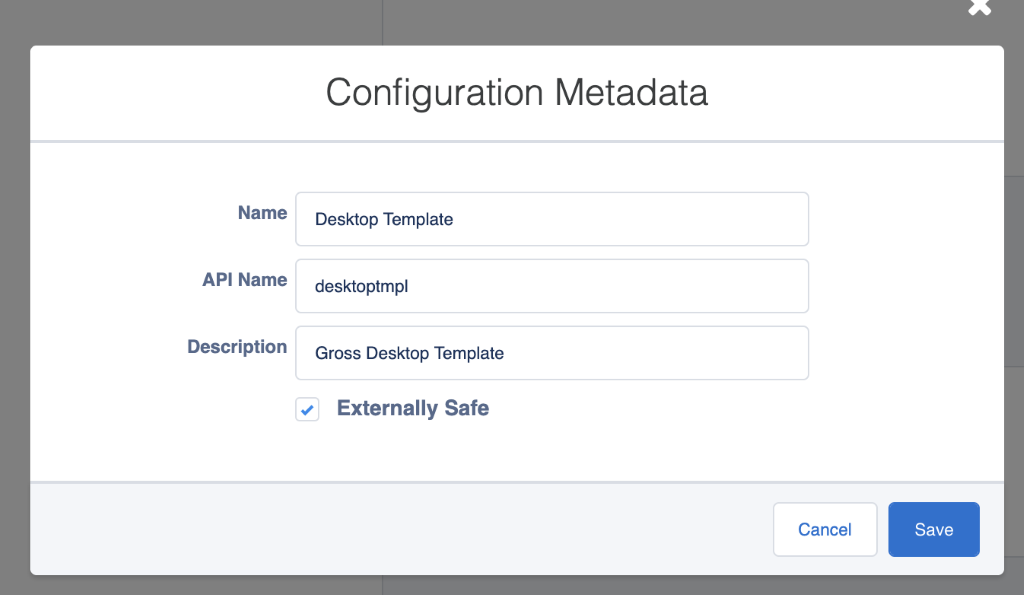
If this doesn’t exist yet, you will want to create the Visualforce page and then specify it here. There is a very good chance that the “Desktop Template” config module may not exist yet. If so, we’ll need to create it. You can do this by going to Global Settings and clicking “Configuration Modules” in the left nav menu. Scroll to the bottom of the Modules, find and click “User Interface”. You’ll want to create a new config module here. Be careful to use the correct API name. The config should look like this:
-
Once you’ve added the config module, “Desktop Template” should be available as a config under User Interface in the config settings. Make sure to prepend the custom flag (c__) to the name of the file you have created. In this case as an example, we used “c__XC_DeskTemplate” for the visualforce page called “XC_DeskTemplate.page”. Make sure to rebuild your config cache.
-
Lastly, in creating our custom gross desktop template, we need our code. The basic template with key elements looks like this.
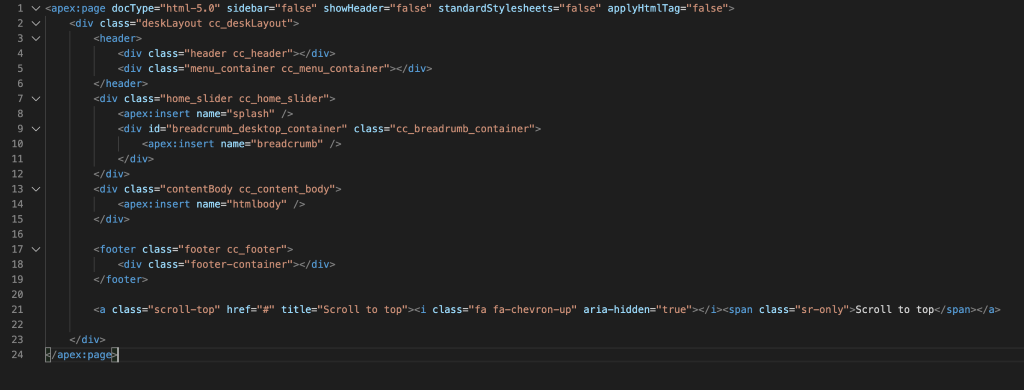
Now we have a place to put our custom footers that affects the entire website. Notice the footer container. That will be the placeholder for our new custom footer template. Now we’re going to create the custom footer template in a new Visual Force component. In this case, we want to turn it into a template to utilize the page labels and any other features we may need.
The template itself is straightforward, just add the HTML to fit your needs.
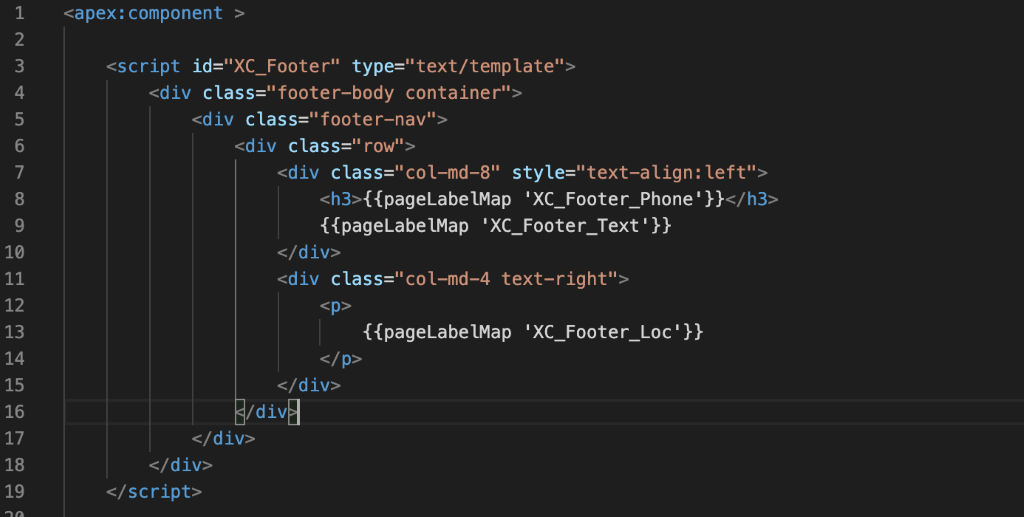
Below this is where we will specify it as a template to the system. The code we use is standard for specifying a new template. It can provide two different templates based on device (phone or desktop), but since we’re using a responsive layout, it’s not needed.
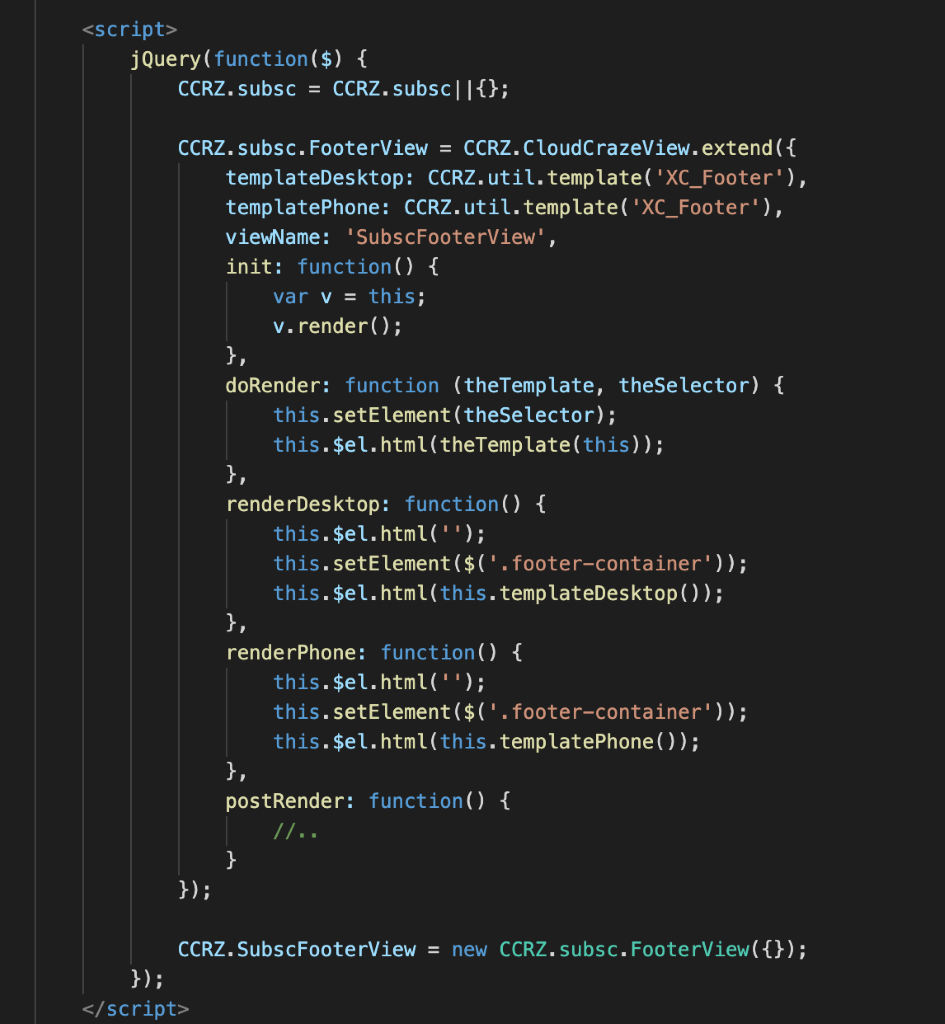
Now Salesforce B2B will know this is a custom template that we wish to display in our footer container. One last thing we’ll need to do is add this component into a global file so that SFB2B will find and include it. So we’re going to create (if you haven’t already) a global file and specify it in configuration settings so that our footer is referenced on every page of our site.
- Create a new Visual Force page and call it Global.page. In this file you can also specify any other components you may need or any global javascript or handlebar helpers. But, our purpose for right now will be to call up our footer component.

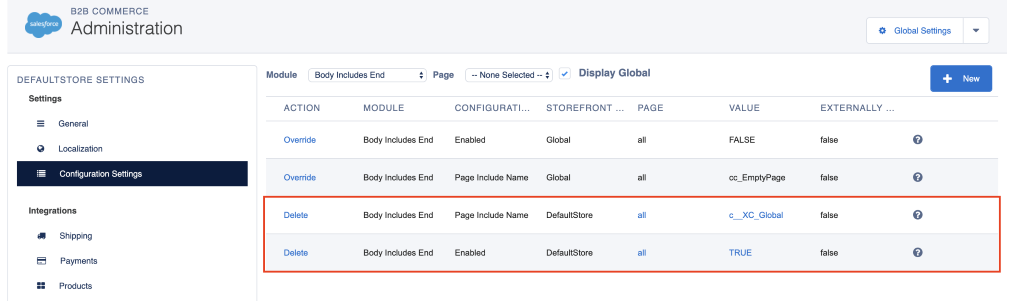
- Now we need to put that global file in our configurations. Head to CC Admin, select your storefront, and go to configuration settings. The best place to add our global is either under the Body Includes Begin or Body Includes End modules. Since it applies to ALL pages, it’s best to add it to the module that DOES NOT contain any individual page overrides since this tends to cause conflicts between the two types of page includes. Add your global page include and add the enabled config like this:
- Last thing to do since we modified our configuration settings is to rebuild the cache. Go back to Global Settings, and go to Configuration Cache Management in the left menu. Rebuild a new cache and activate it.
After that, your new footer component will be recognized and start displaying on the site. Congratulations!