
Sitecore
Customer Data Platform
Personalize

Kevin Melendez
Lead Architect, Sitecore MVP
Creating Custom Events with Sitecore CDP and Personalize
Introduction
Sitecore CDP and Personalize includes a handful of out-of-the-box events, but what if you need to track custom actions within your digital properties? In such cases, we can trigger custom events that are sent to CDP and Personalize. With these events in CDP, we can build powerful decision models, triggered experiences, and much more, to optimize the experience users receive.
Setup
Before we get into creating the custom event, let’s set up a local Next.js environment that we can use to trigger the custom event. If you also have an existing application, you can skip to the next section.
Create a Next.js app following the documentation at https://nextjs.org/docs/getting-started. I’ve opted for using typescript as well.
npx create-next-app@latest –ts
Once the new application is created, create a “MediaDownload” component that has some text and a button.
// components/MediaDownload.tsx
const MediaDownload = (): JSX.Element => {
  const onDownloadClick = () => {
    console.log("Download Clicked!");
  };

  return (
    <div>
      Interested in our white paper?
      <div style={{ marginTop: "10px" }}>
        <button onClick={() => onDownloadClick()}>Download</button>
      </div>
    </div>
  );
};

export default MediaDownload;
Then, update the index page to match mine
// index.tsx
import type { NextPage } from "next";
import Head from "next/head";
import MediaDownload from "../components/MediaDownload";
import styles from "../styles/Home.module.css";

const Home: NextPage = () => {
  return (
    <div className={styles.container}>
      <Head>
        <title>Using CDP and Personalize</title>
        <meta name="description" content="Generated by create next app" />
        <link rel="icon" href="/favicon.ico" />
      </Head>

      <main className={styles.main}>
        <MediaDownload />
      </main>
    </div>
  );
};

export default Home;
Finally, start the Next.js application and confirm the button is triggering our log command.
npm run dev
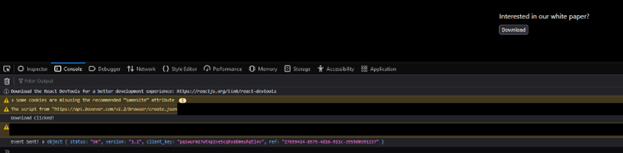
Navigate to http://localhost:3000/ and click the download button. Check the browser console to confirm our button is working as expected.

Custom Event
Now that we have a component, let's set up CDP + Personalize and fire a custom event.
First, make sure you have Sitecore CDP and Personalize installed on your website/nextjs app. You can either do it manually or if you’re using typescript, use the npm package sitecore-cdp-personalize. Since I’m using typescript, I’ll use the sitecore-cdp-personalize package in our example.
Stop the development server we started earlier and install the sitecore-cdp-personalize library.
npm install sitecore-cdp-personalize
Then, let's initialize the library. In our case, we’ll initialize it inside the MediaDownload component, but you could initialize it anywhere else in your application
import { useEffect } from "react";
import { cdpPersonalize } from "sitecore-cdp-personalize";

const MediaDownload = (): JSX.Element => {
  useEffect(() => {
    cdpPersonalize.initialize(
      "[CLIENT_KEY]",
      "[API_TARGET]",
      "[COOKIE_DOMAIN]",
      "[POINT_OF_SALE]",
      "[WEB_FLOW_TARGET]"
    );
  });

  const onDownloadClick = () => {
    console.log("Download Clicked!");
  };

  return (
    <div>
      Interested in our white paper?
      <div style={{ marginTop: "10px" }}>
        <button onClick={() => onDownloadClick()}>Download</button>
      </div>
    </div>
  );
};
Finally, we can fire off our custom event.
Using sitecore-cdp-personalize library:
cdpPersonalize
      .eventCreate({
        type: "DOWNLOAD_CLICK",
      })
      .then((response) => console.log("Event Sent!", response));
Using Boxever (Sitecore CDP and Personalize) JavaScript Library directly:
window._boxeverq.push(() => {
    const viewEvent = {
        browser_id: window.Boxever.getID(),
        channel: "WEB",
        type: "DOWNLOAD_CLICK",
        language: "EN",
        currency: "USD",
        page: window.location.pathname + window.location.search,
        pos: "[POINT_OF_SALE]",
    };

    window.Boxever.eventCreate(
        viewEvent,
        response => console.log(response),
        "json"
    );
});
Since we’re using the sitecore-cdp-personalize library, our final code will look like:
import { useEffect } from "react";
import { cdpPersonalize } from "sitecore-cdp-personalize";

const MediaDownload = (): JSX.Element => {
  useEffect(() => {
    cdpPersonalize.initialize(
      "[CLIENT_KEY]",
      "[API_TARGET]",
      "[COOKIE_DOMAIN]",
      "[POINT_OF_SALE]",
      "[WEB_FLOW_TARGET]"
    );
  });

  const onDownloadClick = () => {
    console.log("Download Clicked!");
    cdpPersonalize
      .eventCreate({
        type: "DOWNLOAD_CLICK",
      })
      .then((response) => console.log("Event Sent!", response));
  };

  return (
    <div>
      Interested in our white paper?
      <div style={{ marginTop: "10px" }}>
        <button onClick={() => onDownloadClick()}>Download</button>
      </div>
    </div>
  );
};

export default MediaDownload;
Make sure you replace all placeholder CDP values with the real values from your CDP instance.
Test
Now that everything is in place, let's start up our local instance and test what we have.
npm run dev
Then, navigate to http://localhost:3000/, click on the download button, and review the console output.
Finally, we should be able to go to CDP and Personalize, find our visitor, and see the custom event in the browser session.
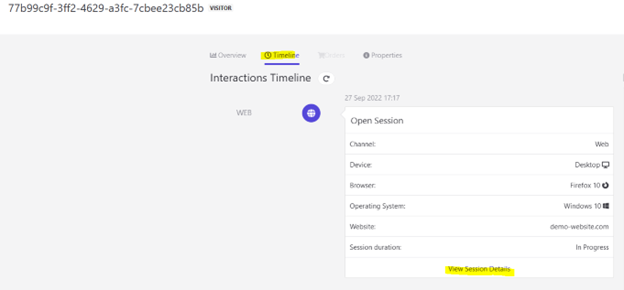

You’ve successfully created and sent a custom event to Sitecore CDP and Personalize!
Conclusion
When we need to track custom actions a user can take on a website, we can leverage custom events. To do so, we integrate with Sitecore CDP and Personalize, then fire off a custom event directly into CDP. Once the custom events are in CDP, we can create meaningful experiences for our users by using decision models, triggered experiences, and more!