
Sitecore
Customer Data Platform
Personalize

Kevin Melendez
Lead Architect, Sitecore MVP
Creating and testing a web experience
What is a web experience?
September 23rd, 2022
Web experiences inside of CDP + Personalize are an easy to create, configure, and execute experiences. Once created, these web experiences are triggered automatically on your website by Boxever (CDP + Personalize) JavaScript library, which means no additional development is required by your website developers!
You just finished integrating Sitecore CDP and Personalize to your website, and now you’re ready to put this new tool to work. One of the easiest ways to start experimenting with Sitecore CDP + Personalize is with web experiences
Web experiences are usually leveraged for “after page load” content, like an alert or banner. Below is an example web experience that is loaded above the navigation to help users contact us.

Creating a web experience
Creating a web experience inside Sitecore CDP and Personalize is extremely easy. The process mainly consists of putting together all the building blocks into one result. If our result is a web experience, then the building blocks would be:
- Content (using a web experience template)
- Page Targeting
- Audiences
- Decision Models
- Goals
If you’re brand new to CDP + Personalize this may sound a bit overwhelming, but I’ll break down each building block in order for you to have a firm understanding of what each one is and how to properly configure it.
Let’s get started!
First, let's navigate over to the web experiences page, which can be found under the Experiences tab


Finally, let's pick a name for the web experience and then hit create.
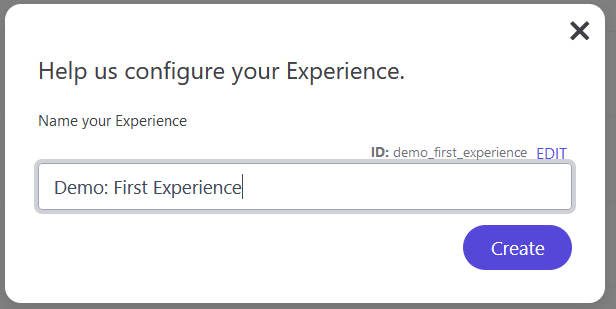
Important: Notice that as you enter a name for your web experience, CDP + Personalize is automatically generating an ID for that experience.
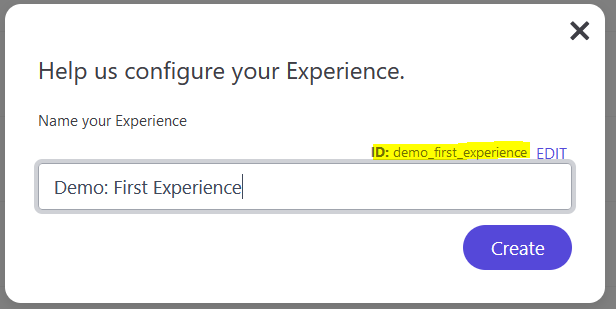
While we won’t be using this ID in this article, it is crucial that this ID looks correct. In the past, I have seen that if the generated ID has multiple underscores next to each other, like “demo__first_experience”, you may have issues triggering this experience through code in more advanced scenarios. To fix this, either change the name of your web experience or click “EDIT” to manually update the ID of your web experience.
Content (choosing a template)
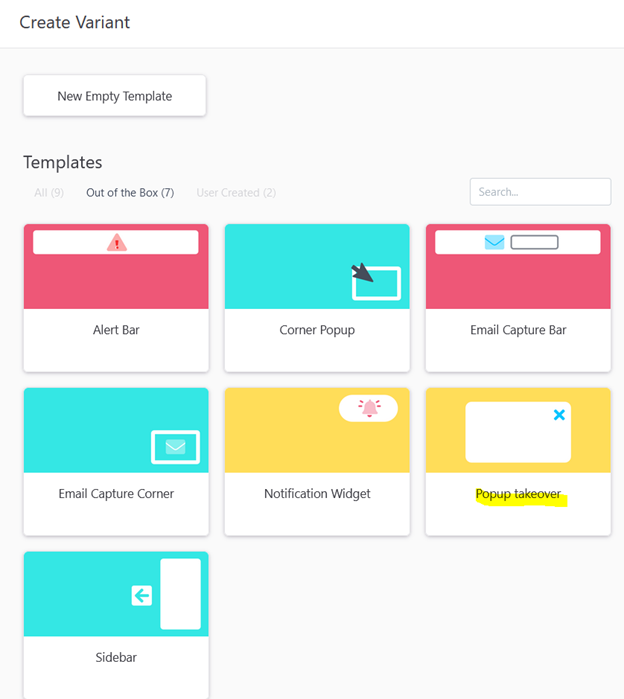
When creating a new web experience, you will be prompted to select a template for your web experience. Inside of Sitecore CDP and Personalize, you will find Out of the Box and User Created templates. I will go over creating a custom template in a different article, for now we’ll be choosing one of the out-of-the-box templates for our web experience.
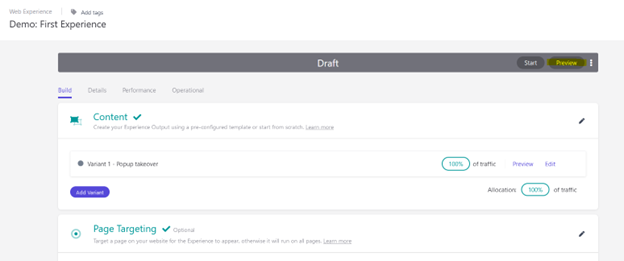
For our web experience, let's choose the “Popup takeover” template.
Next, we’ll have to configure the content the template requires. Each template can have different fields, so if you choose a different template for your web experience you will see different fields.
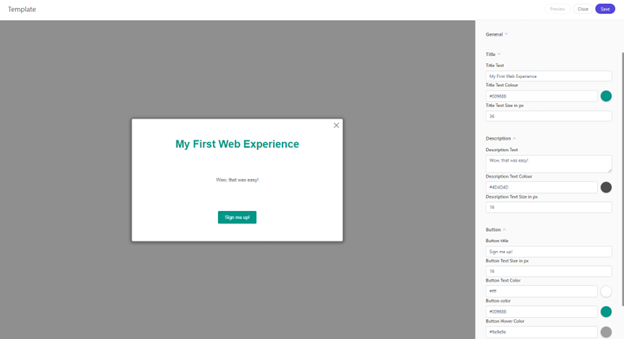
Important: The preview panel on the left works best in chromium-based browsers like Chrome, Edge, Brave, etc. If you do not see the preview panel correctly, your browser may not support it.
Once we’re done with changing the content to our heart's desire, we can click “Save” on the top right, and then “Close” if the panel does not close automatically.
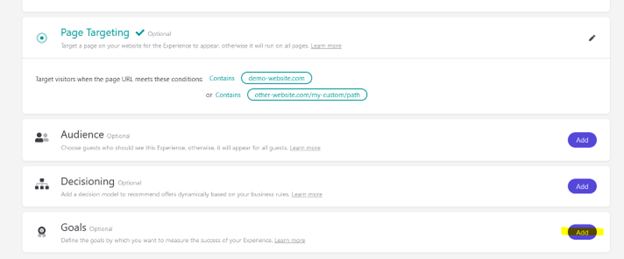
Next, let's configure which pages should trigger this experience with Page Targeting.
Page Targeting
Page Targeting is optional, but you’ll quickly understand why it’s used in most cases. Your singular CDP and Personalize instance can be integrated into many websites and applications. If you configure a web experience without any page targeting, all your pages and applications will trigger that web experience. While that scenario applies to some cases, it is more common that a web experience should only appear on specific pages or websites. With Page Targeting, we get all the flexibility needed to ensure that a web experience only shows up where we want it to.
To configure Page Targeting, let's click on “Add” on the page targeting section.
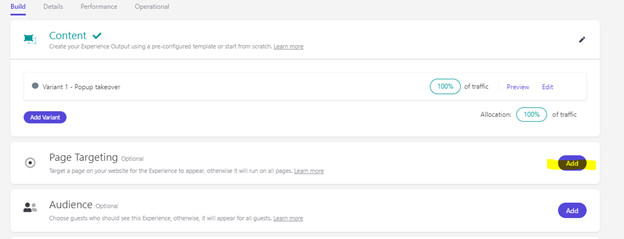
With the targeting panel now open, we can begin to configure which pages and/or websites will trigger our web experience. Page Targeting operates at the full URL level, so that we can target specific domains, paths, or a combination of both. We can also configure multiple criteria, all of which will be “OR’d”.
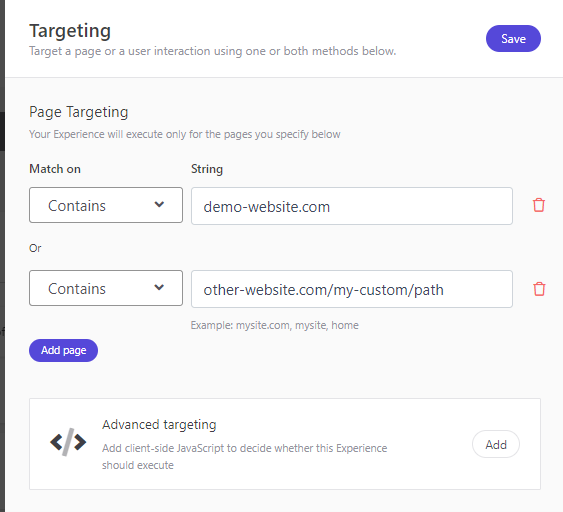
When you’re done configuring which pages/applications should trigger the experience, click on “Save” at the top right and then close the panel.
Audience
The audience’s section is like Page Targeting, where the experience will need to meet certain criteria before it is displayed, but audiences operate at the user level. We won’t be selecting an audience for this demo, but I still want to show you what is possible.
If you click on “Add” on the Audience section, you will be prompted to select a Segment or Real-Time Audience.
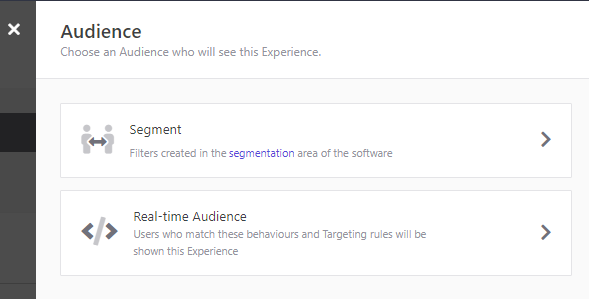
Segments and real-time audiences will be covered in depth in a separate article, but below is an overview of both.
- Segment: A segment is a group of users. The key takeaway for segments is that they must be created in advance and users are only grouped into these custom segments nightly, not in real-time. You can select a segment or a grouping of users, and only users in that segment will see your web experience.
- Real-time Audience: A real-time audience is like segments, where you are targeting groups of users, but this time we’re doing it in real-time. If real-time audience is happening in real-time and segments isn’t, why would you ever use segments? Real-time audiences shine brightest when the grouping of users is easy to determine and compute. In more complex scenarios, where the grouping process may be computationally intensive, segments are better suited. Remember, personalization works best when it is fast for the user, and it is not slowing down their experience. If a real-time audience is becoming slow, consider using a custom segment instead.
Decisioning (decision models)
Decision models is a topic for a different time, but in summary, they allow you to configure several inputs and how those inputs get transformed into outputs. Then, those outputs can be used within many things, one of those being web experiences. For example, you may have a decision model that outputs the user’s top-most interest, say “Running shoes”, and then you can use that output to further personalize your web experience.
Goals
Goals is how CDP and Personalize determine the performance of a specific web experience. To begin, let's click on “Add” in the Goals section.
We’ll be prompted to select a goal type. Our choices are Revenue, Page Views, and Custom Goal. To keep things simple, we’ll select Page views.

Then, we’ll need to configure our Page view goal.
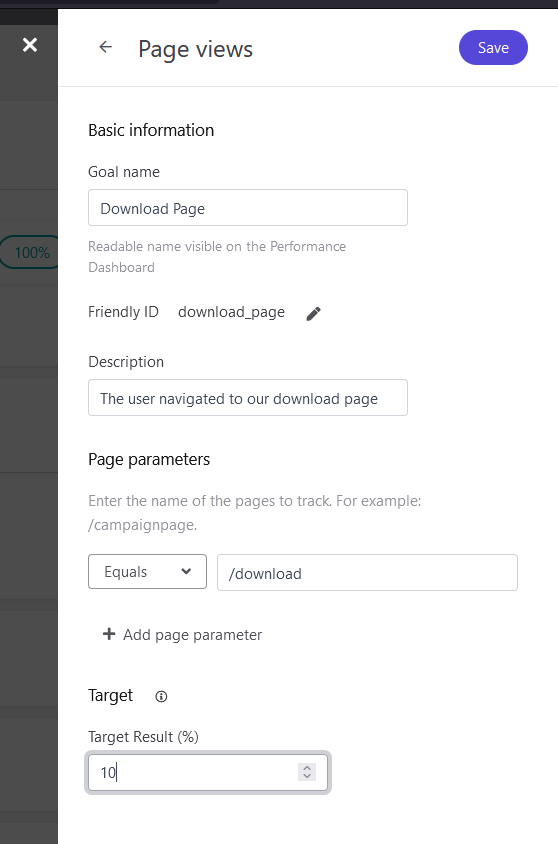
The important fields here are Page parameters and Target.
- Page parameters: This is how we can filter which pages trigger the goal. You can use Equals, Regex, or starts with.
- Target: It is the uplift in the goal you’re expecting. This number will be used as a baseline vs your actual result in the performance tab.
Click save and close the panel when finished.
Testing a web experience
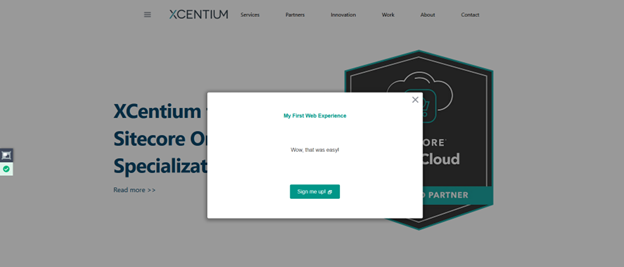
Our web experience is fully configured and ready to be used, but how do we know it is working properly? Let’s use the preview feature and QA tool to test our experience. To begin, go to your web experience and click “Preview”
A window will pop up asking for the URL you want to test the experience on. Enter the URL of the website CDP and Personalize is integrated with, and click “Save and Go”
If everything is configured correctly you should see your web experience displayed!
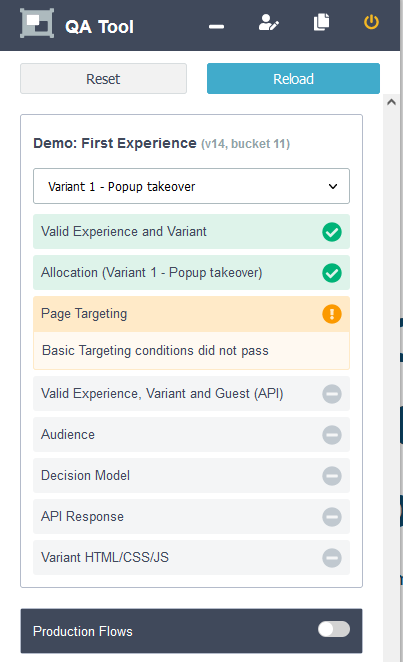
Notice on the left of our page we have a little widget called the QA tool. This widget is displayed when we preview a web experience and can help us understand what is happening behind the scenes. Clicking on the widget shows us all the checks it did before displaying our experience.
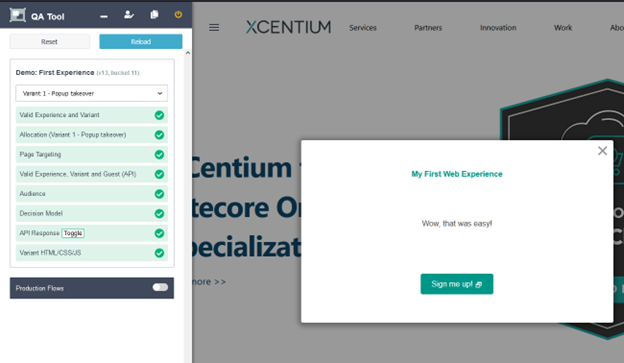
Here is how it may look if we land on a website/page that shouldn’t display the web experience:
Publishing the Web Experience
Once you’ve tested and are happy with your web experience, we can make it live for all our users!
First, let's go back to our web experience. Then, click on “Start”
You have the option to either start it immediately or to start it at the time of your liking. We’ll select “Run immediately” for our example. Finally, click “Run Experience”. Publishing may take a minute or two, but once that is complete, your experience should be live on your website!
Congratulations! You’ve created and published a web experience!
Conclusion
We created a web experience inside of CDP and Personalize and reviewed all configuration options and what each option does. For our web experience we configured the content, page targeting, and set up a goal to track the performance. We also learned how to preview and test a web experience and finally publish it for the world to see!