Sitecore
QA

Priya Sekar
Principal Consultant
Copying Production Data to Lower environment in Sitecore
Introduction
Test Data
The input feed required for testing a software application is the test data. The quality of a software application is entirely dependent on the test data that is entered while testing. If an ideal set of data is used by the tester while executing the software application, then there would be virtually no issues with the quality of the software being assured at 90%. By giving specific test data inputs, the software application can be tested for field and data validations.
Test data is used for a variety of purposes, including software development, quality assurance, and training.
Importance of Data for QA
Generally, QA engineers create fake data for their testing. There could be production incidents due to data edge cases that were not present in the QA data created by the QA engineers. To mitigate this, regular copy over of production data to the QA is important.
How to copy PROD data to QA in Sitecore
Data copy-back could be delayed or stopped due to other dependencies such as Time, Resources, Parallel testing by other team members etc. In such cases, copying only the required data (after careful consideration) manually from PROD to Test environment can be done.
In this blog, we’ll go over how we can copy the content from PROD to QA manually.
Creating a package (from higher environment)
Steps:
-
Login to Sitecore
-
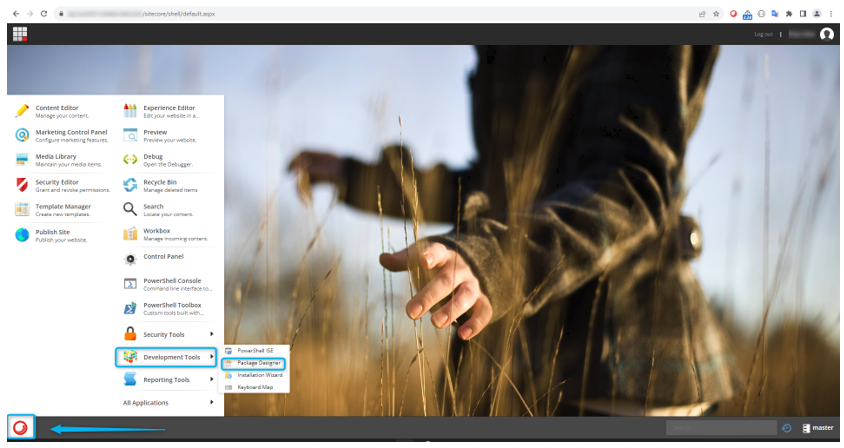
Click on Desktop
-
Click on ‘Development tools’ and then click ‘Package Designer ‘
-
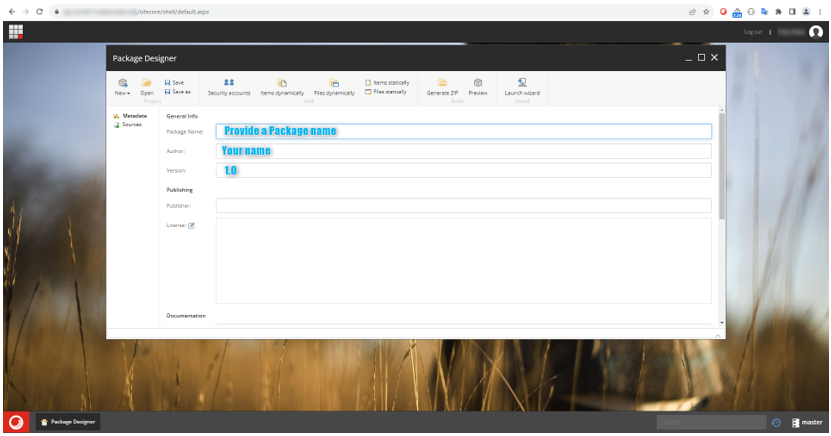
On the opening window provide information as required
-
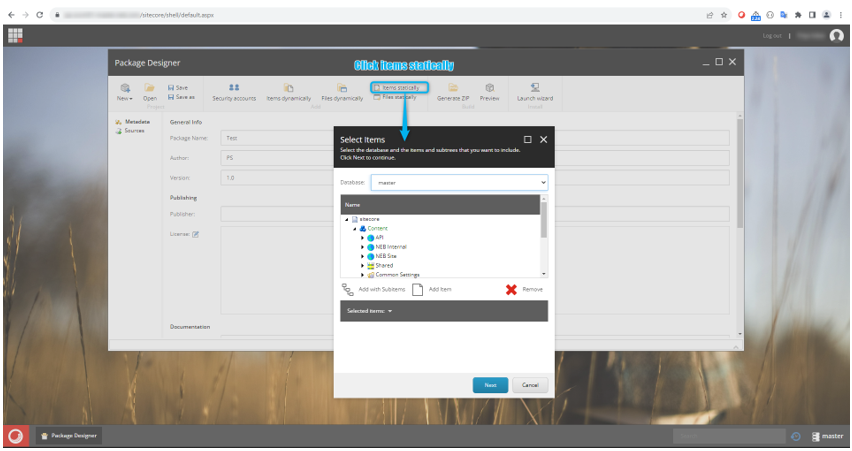
Click on Items statistically
-
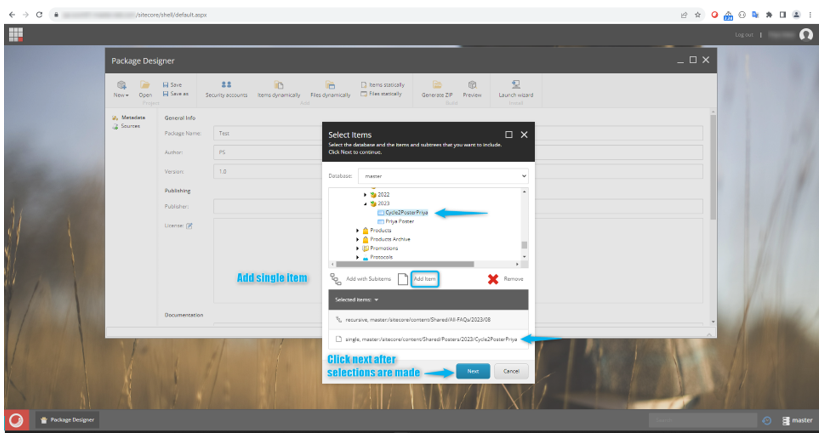
Note: Ensure Master is selected in the database field
-
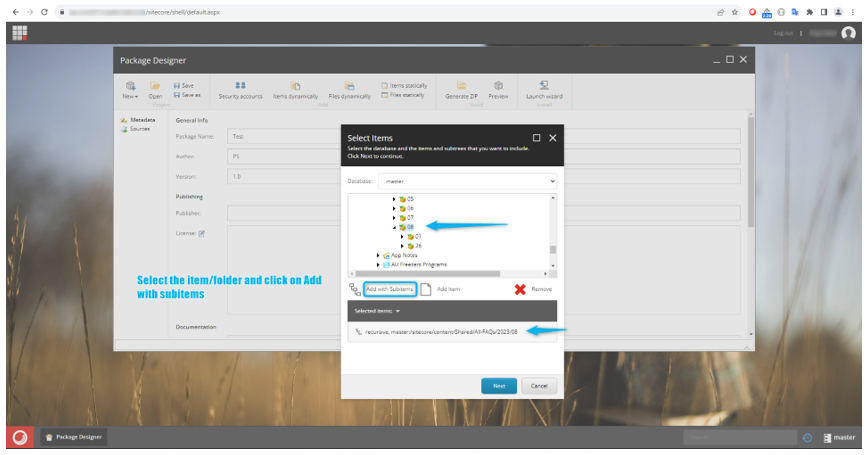
Select items at folder lever or individual items and click on ‘Add with Subitems’ or ‘Add Items’ accordingly *Note: you can add multiple items (with subitems) in one package
-
Click ‘Next’ after the selections are made
-
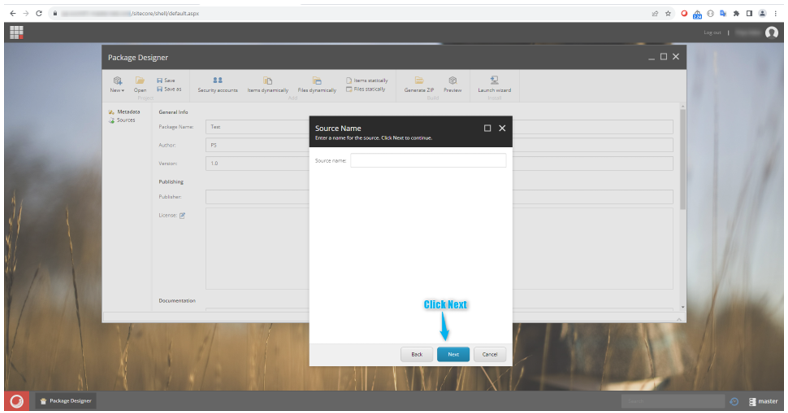
Provide ‘Source Name’ (optional)
-
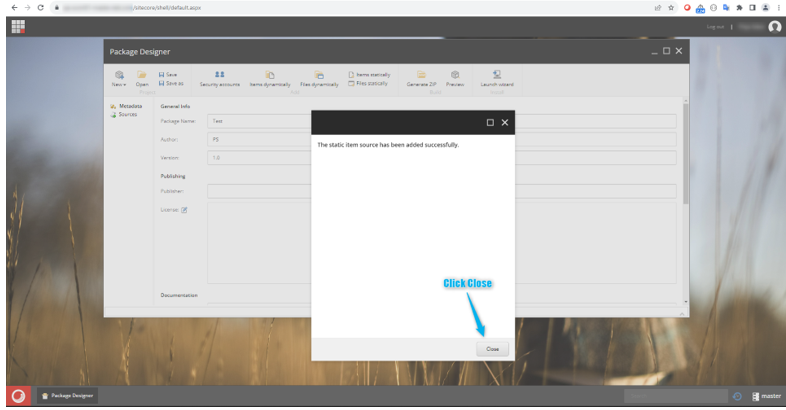
Click on ‘Next’ and then Close
-
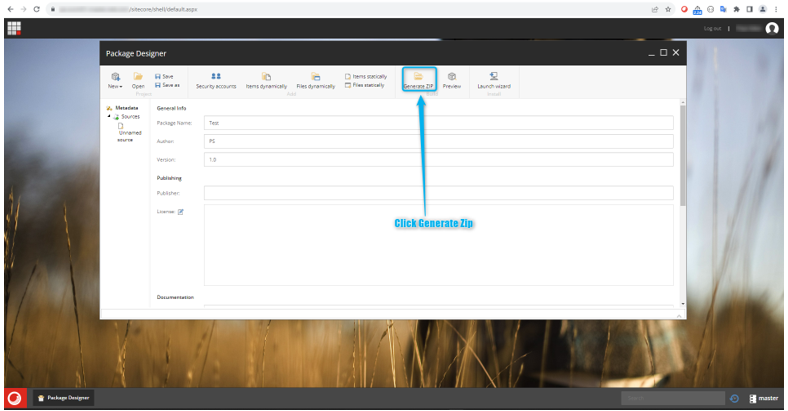
- Source will be added on the left pane under Metadata
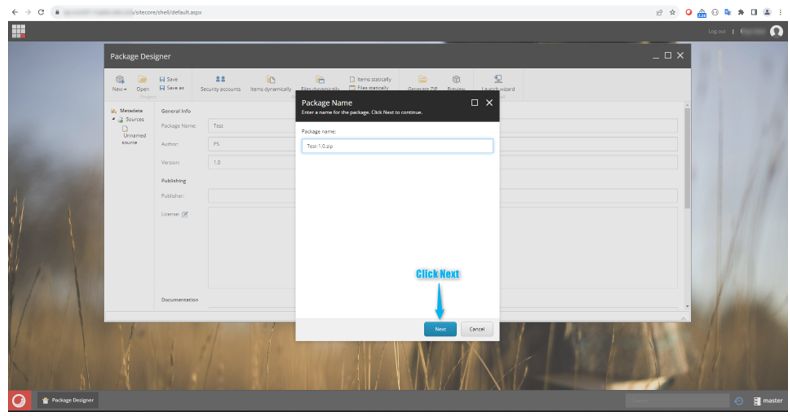
- Click on ‘Generate Zip’ button on top, provide a name and then click ‘Next’
-
Click on the world icon with green arrow (Download)
-
The package will be downloaded (to Download folder)
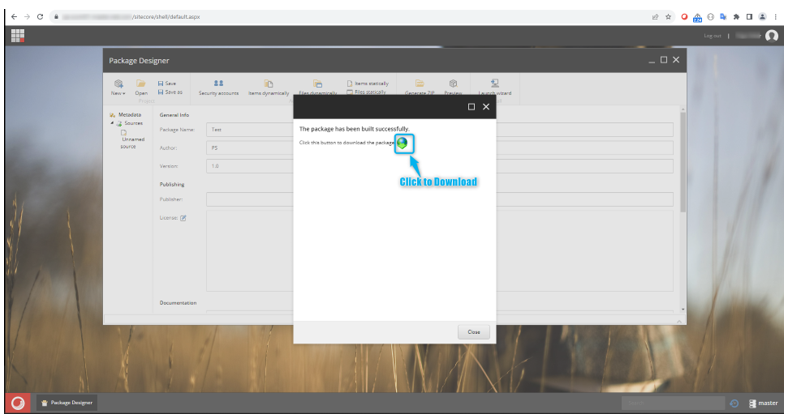
- Note: If the file size is huge (like media files), it may take longer time to complete the download
Installing the package
Steps:
-
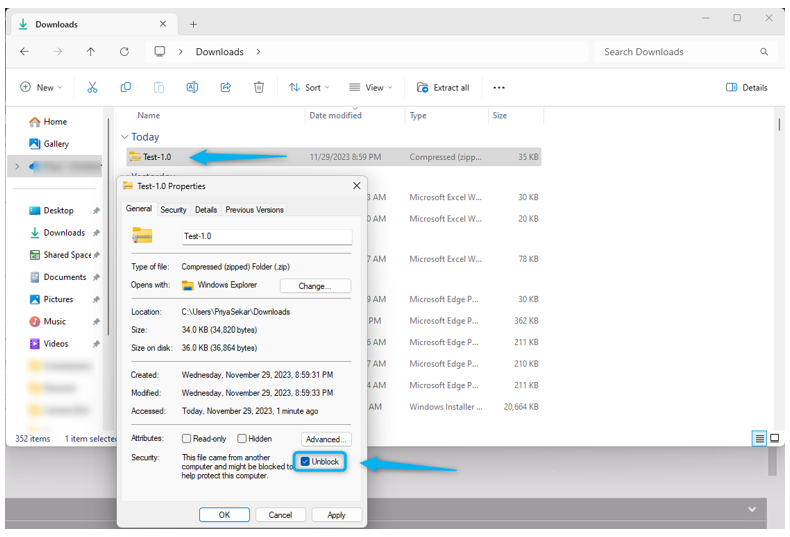
Go to Downloads Right click on the zip file go to properties make sure the Unblock is checked (This is an auto-security feature to prevent downloading files with unknown content)
-
Login to the Lower Environment as required
-
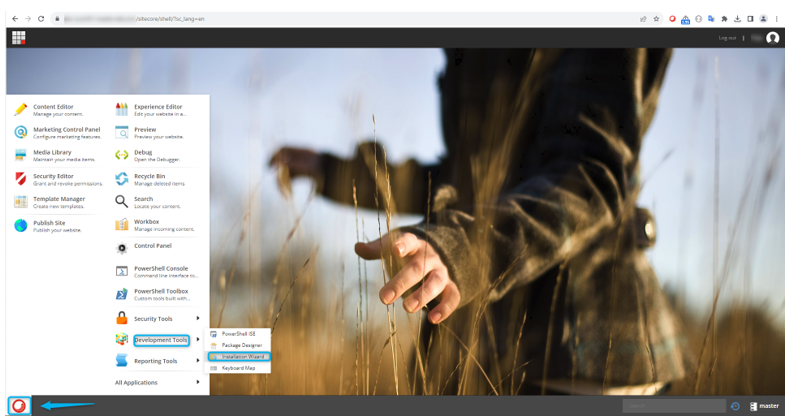
Click on Desktop >> Development Tools >> Installation Wizard
-
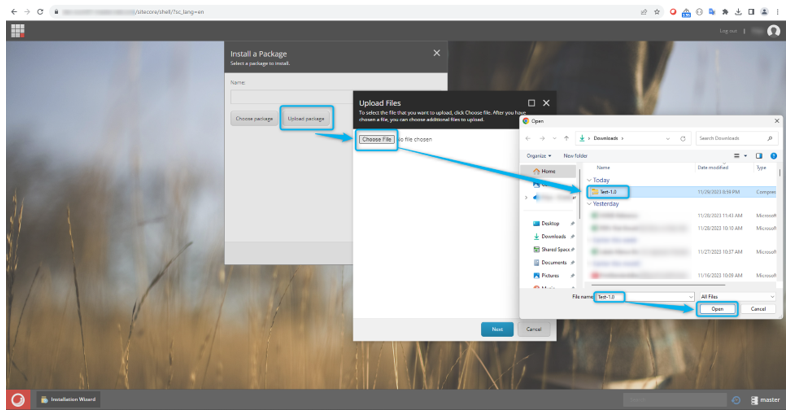
Click on ‘Upload Package’ and click ‘Choose File’
-
Select the file from the Downloads folder and click ‘Open’
-
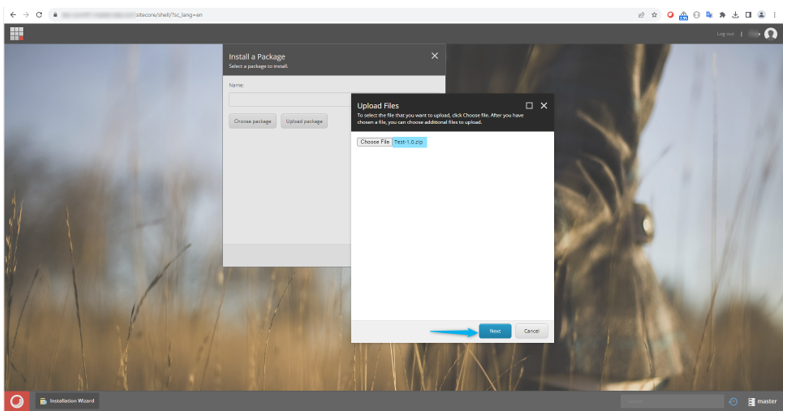
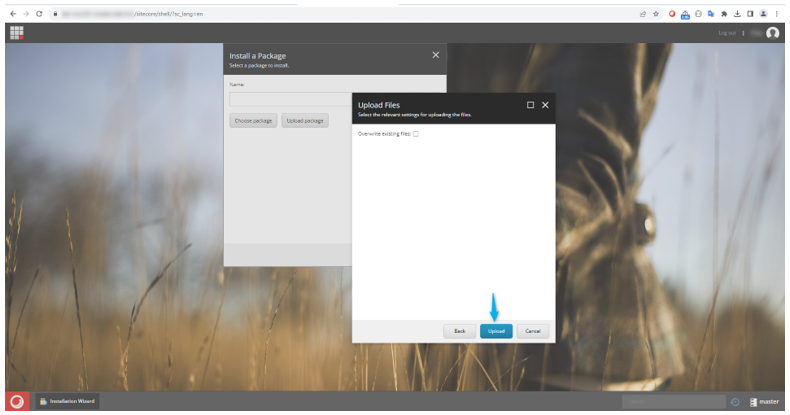
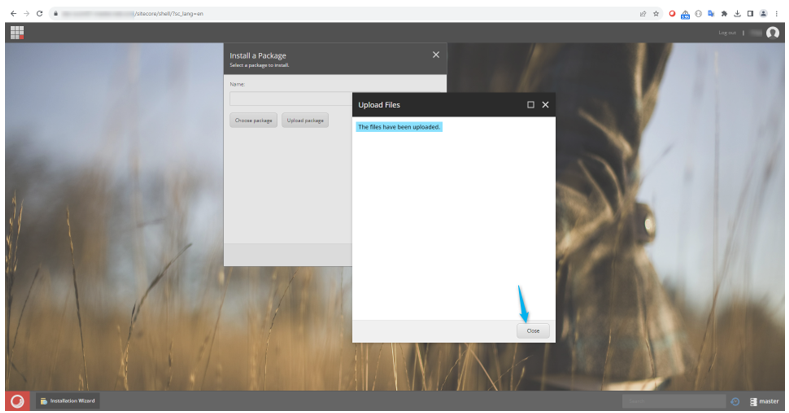
Click ‘Next’, then click ‘Upload’ and then click on ‘Close’
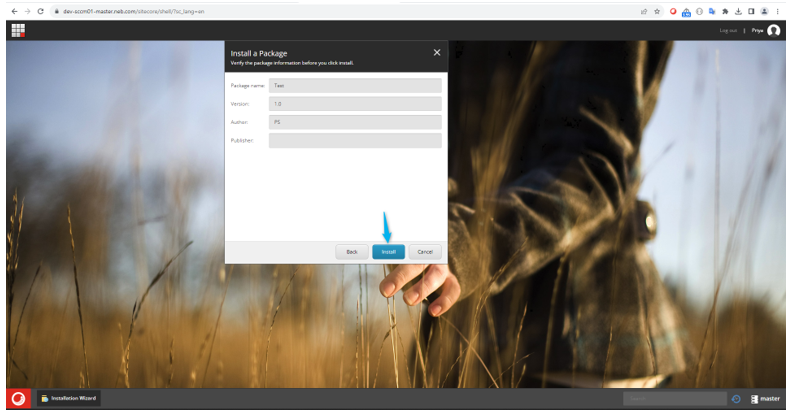
- Package name will appear
- Click ‘Next’ and Click ‘Install’


-
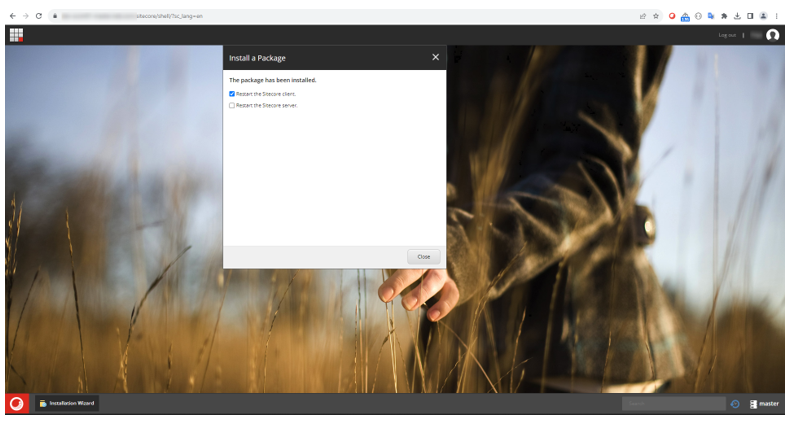
Once Installation is complete, click on ‘Restart the Sitecore client’ and then close
-
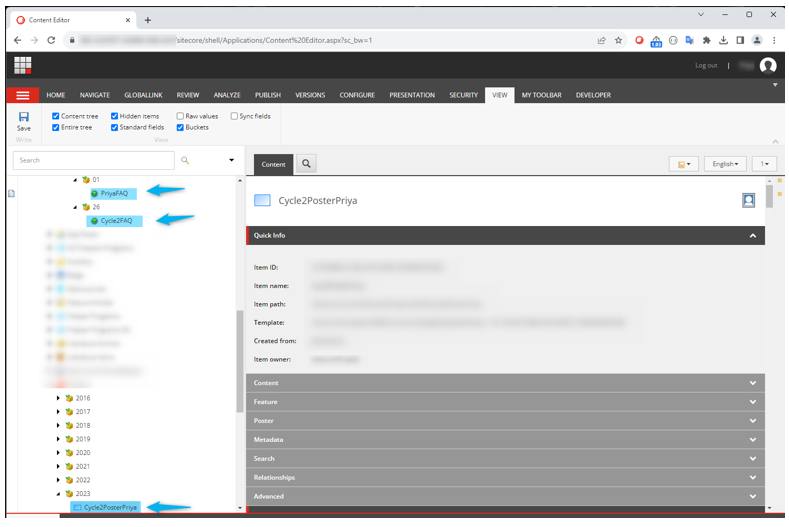
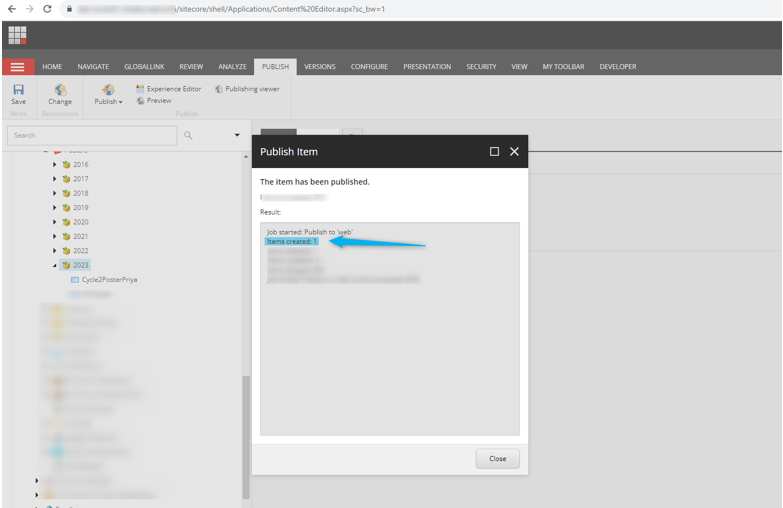
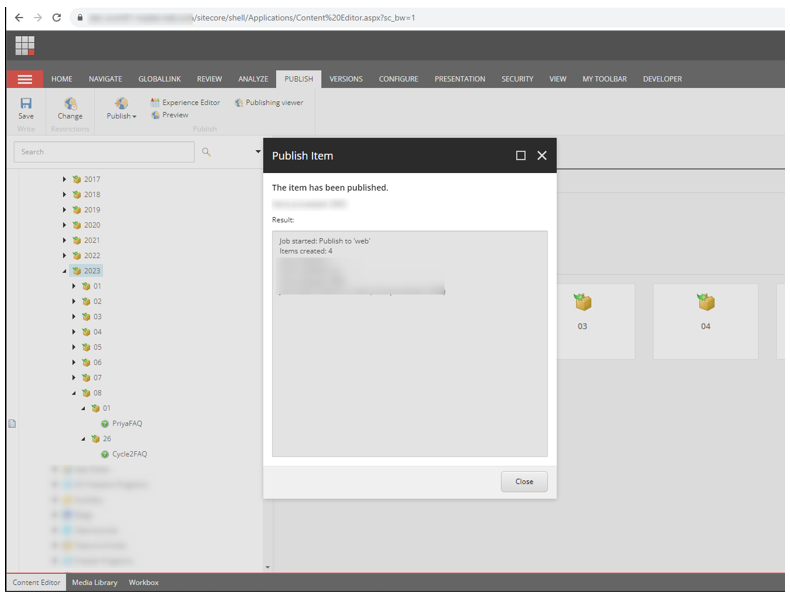
Publish the changes in content editor. When item is published you will see new item(s) created