
Sitecore
Customer Data Platform
Personalize

Kevin Melendez
Lead Architect, Sitecore MVP
Adding Sitecore CDP and Personalize to your website
Introduction
You’ve been given the task to implement CDP + Personalize to your website and need to hit the ground running. Well, you’re in luck! In this blog, we’ll cover how to gather all the needed information for the implementation, and then we’ll use that acquired information to implement CDP + Personalize into the website using Google Tag Manager (GTM) or by directly adding it to the HTML. Boxever, now known as CDP + Personalize, was acquired by Sitecore. While reading through this blog, you may see references to Boxever, you can assume that it will be renamed to CDP + Personalize in the future. Now that we have that out the way, let’s get started!
Preparing to implement CDP and Personalize
To start implementing CDP + Personalize to the website, we’ll need to configure a few things inside CDP + Personalize and gather some information.
The CDP + Personalize JavaScript library will need the following values to work properly
- Client Key
- Point of Sale
- Cookie Domain
- Target
- Web Flow Target
Client Key
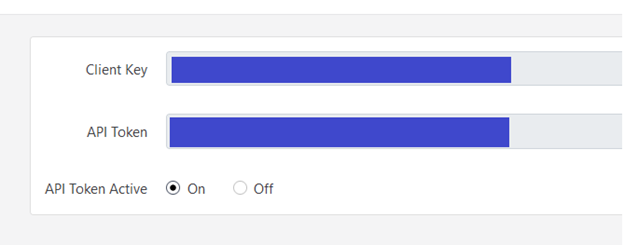
The client key is what connects the CDP + Personalize JavaScript library to your CDP + Personalize environment. The client key can be found by going to your CDP instance, hovering over the company name, then system settings, and finally clicking on API access.
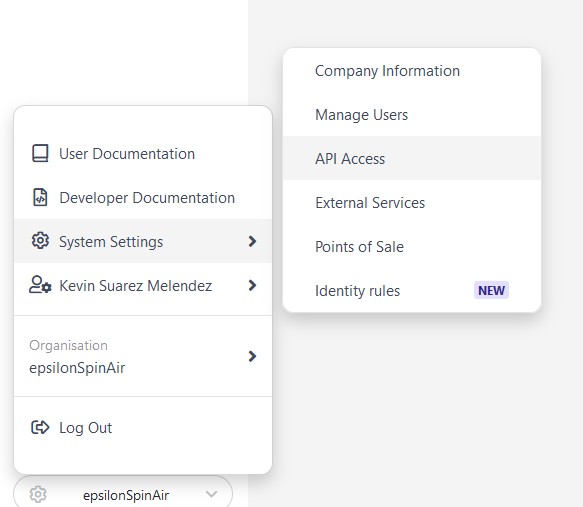
You should now see your Client Key. Copy this value since we’ll need it in the implementation section.
Point of Sale
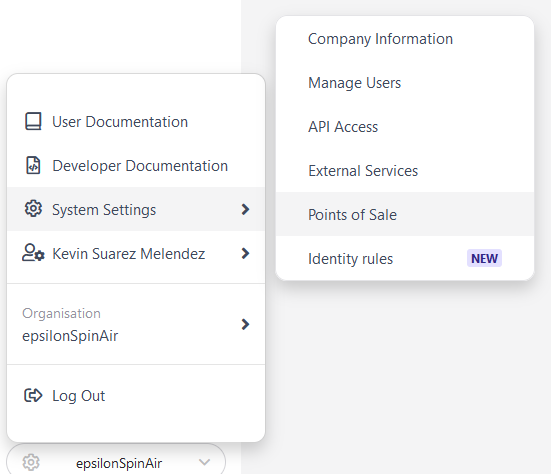
You can think of Point of Sale inside of CDP + Personalize as a specific property or website. In our case, we’ll create a Point of Sale named “demo-website.com”. To create a new point of sale, hover over the company name, then system settings, and finally click on Points of Sale.
Then, click on “Create” at the top right and fill out the required details.
- Name of Point of Sale (POS): The name of our new POS
- Market: The market for the POS; the value is typically geographical
- Brand: The brand associated with the POS
- Language: The language for the POS
- Timeout: Number of minutes before a session is closed during inactivity
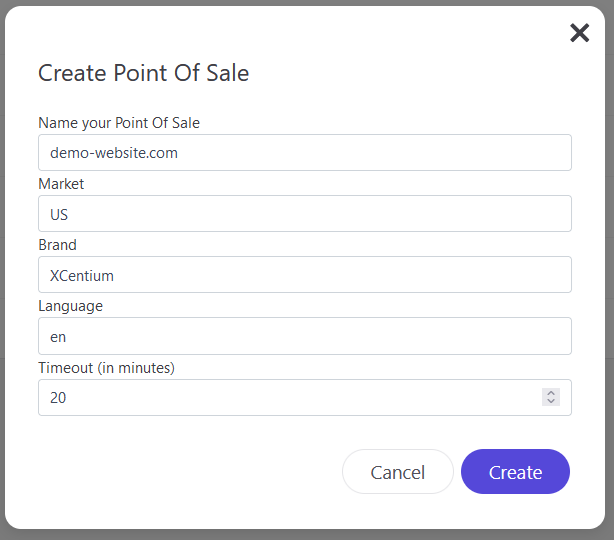
Note the value you entered for the name of the POS since we’ll use it in the implementation section.
Cookie Domain
Sitecore CDP and Personalize will attempt to create multiple cookies to track the user. For these cookies to work properly, we need to tell the JavaScript Library what domain to use for these cookies.
In our case, the website we’re adding CDP and Personalize to is demo-website.com, so our cookie domain will be “demo-website.com”.
Note what the cookie domain value you’ll be using since we’ll use it during the implementation section.
Target
The CDP + Personalize JavaScript Library sends data to CDP + Personalize through their Stream API. At the time of writing, CDP + Personalize has 3 different URLs that can be used for the Stream API. The URL you use is determined by the location of your CDP + Personalize instance. You can quickly tell which Steam API target endpoint you’ll need based on the URL you see in your browser when you access your CDP + Personalize instance.
Sitecore CDP application URL
Server location
Stream API target endpoint
app.boxever.com
Europe
https://api.boxever.com/v1.2
app-ap.boxever.com
Asia Pacific (APAC)
https://api-ap-southeast-2-production.boxever.com/v1.2
app-us.boxever.com
United States
https://api-us.boxever.com/v1.2
Take note of which Stream API target endpoint your instance correlates to, since we’ll need this information in the implementation section.
Web Flow Target
The web flow target is the CDN used by Sitecore Personalize. If you’re using Sitecore Personalize, the value you’ll use for Web Flow Target is https://d35vb5cccm4xzp.cloudfront.net. If you’re not using Sitecore Personalize, then you can leave this value as an empty string (“”).
Take note of the web flow target value that applies to you, since we’ll need it in the implementation section.
Implementing CDP and Personalize JavaScript Library
Now that we have all the required values needed for the CDP and Personalize JavaScript Library, we can finally implement it to the website! At this point, you have many options, but I’ll cover the two most common paths. Implementing CDP and Personalize with Google Tag Manager (GTM) and implementing it directly within the HTML.
Google Tag Manager
Many projects use GTM to inject 3rd party libraries into a website, and the CDP and Personalize JavaScript Library is no exception. Before going down the GTM path, make sure you have access to the GTM instance used on the website and that GTM is already integrated on the website.
Inside of GTM, create a new tag with a Custom HTML tag type. Paste in the Boxever (CDP + Personalize) JavaScript Library script snippet and replace the client_key, target, cookie_domain, pointOfSale, and web_flow_target with the values previously acquired.
Set the trigger as desired. If the GTM container is used on multiple websites, you may want to limit which pages fire this tag for this specific POS, but in our case, we’ll just select “All Pages”.
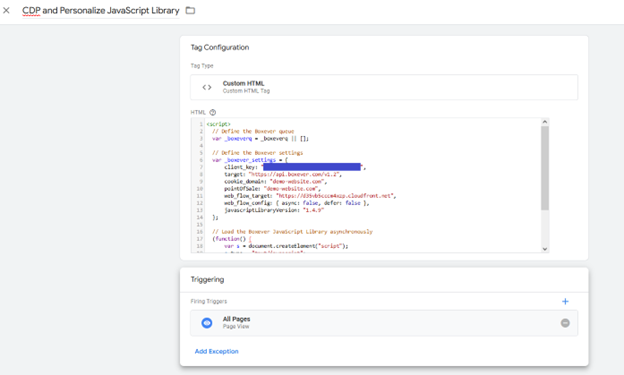
Raw JavaScript snippet:
<script>
  // Define the Boxever queue
  var _boxeverq = _boxeverq || [];

  // Define the Boxever settings
  var _boxever_settings = {
      client_key: "{client_key}",
      target: "{stream_api_target_endpoint}",
      cookie_domain: "{cookie_domain}",
      pointOfSale: "{name_of_point_of_sale}",
      web_flow_target: "{web_flow_target}",
      web_flow_config: { async: false, defer: false },
      javascriptLibraryVersion: "1.4.9"
  };

  // Load the Boxever JavaScript Library asynchronously
  (function() {
      var s = document.createElement("script");
      s.type = "text/javascript";
      s.async = true;
      s.src = "https://d1mj578wat5n4o.cloudfront.net/boxever-" + window._boxever_settings.javascriptLibraryVersion + ".min.js";
      var x = document.getElementsByTagName("script")[0]; x.parentNode.insertBefore(s, x);
  })();
</script>
Make sure to confirm that this tag is being fired on the website before moving forward.
Directly inside the HTML
If your organization doesn’t use GTM to manage 3rd party dependencies, or if you prefer to put the script directly into the HTML, just use the JavaScript template and place it at the bottom of the <body> element.
<script>
  // Define the Boxever queue
  var _boxeverq = _boxeverq || [];

  // Define the Boxever settings
  var _boxever_settings = {
      client_key: "{client_key}",
      target: "{stream_api_target_endpoint}",
      cookie_domain: "{cookie_domain}",
      pointOfSale: "{name_of_point_of_sale}",
      web_flow_target: "{web_flow_target}",
      web_flow_config: { async: false, defer: false },
      javascriptLibraryVersion: "1.4.9"
  };

  // Load the Boxever JavaScript Library asynchronously
  (function() {
      var s = document.createElement("script");
      s.type = "text/javascript";
      s.async = true;
      s.src = "https://d1mj578wat5n4o.cloudfront.net/boxever-" + window._boxever_settings.javascriptLibraryVersion + ".min.js";
      var x = document.getElementsByTagName("script")[0]; x.parentNode.insertBefore(s, x);
  })();
</script>
Confirm Implementation
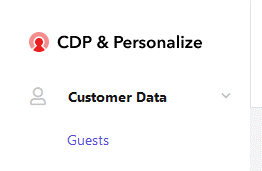
Once the CDP + Personalize JavaScript Library is on the page, you can confirm the integration is working as expected by opening the website it was implemented on and then navigating to the CDP + Personalize guest dashboard.
Then, change the guest type to “Visitor”
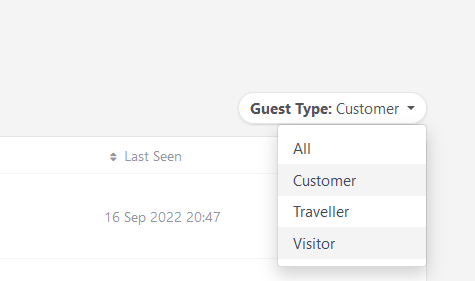
You should see your browsing session in the list of visitors.

Clicking on the visitor should show you that they are currently online.
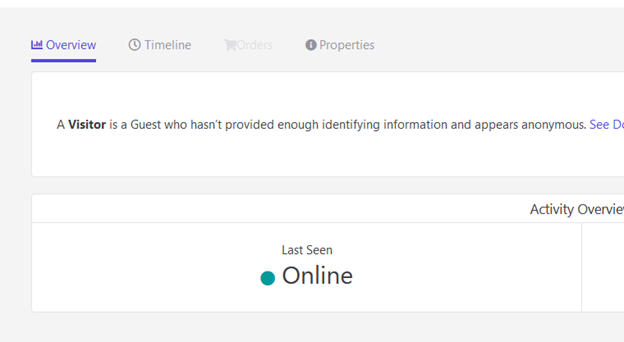
Congratulations! You’ve successfully implemented Sitecore CDP and Personalize on your website.
Conclusion
You should now have a working Sitecore CDP and Personalize implementation on your website. We configured CDP + Personalize with a new Point of Sale (POS), gathered the required information, and then added the CDP + Personalize JavaScript library onto our website using Google Tag Manager or with a direct HTML edit.
If you have any questions about Sitecore implementation, please don’t hesitate to reach out for a no-cost, no-commitment consultation and a member of our team will contact you shortly.