
Search
Next.js

Sergey Yatsenko
Sr. Director, Sitecore MVP
Getting Started with Sitecore Search on Next.js stack
Introduction
I found Sitecore Search to be very performant and simple enough to master in 2-3 weeks’ time. With this post, I’m attempting to provide a super high-level “getting started” guide, which would allow someone to get 1st working version in a matter of hours and then further fine-tune and update as needed.
A Super Quick Into to Sitecore Search
Sitecore Search portal
Sitecore Search comes with a portal, which resides at https://cec.sitecorecloud.io/. It needs to be provisioned by Sitecore, who will then provide admin login credentials.
Crawling website content with Sitecore Search
This document article provides all the details necessary for creating, managing, and configuring sources of content in Sitecore Search.
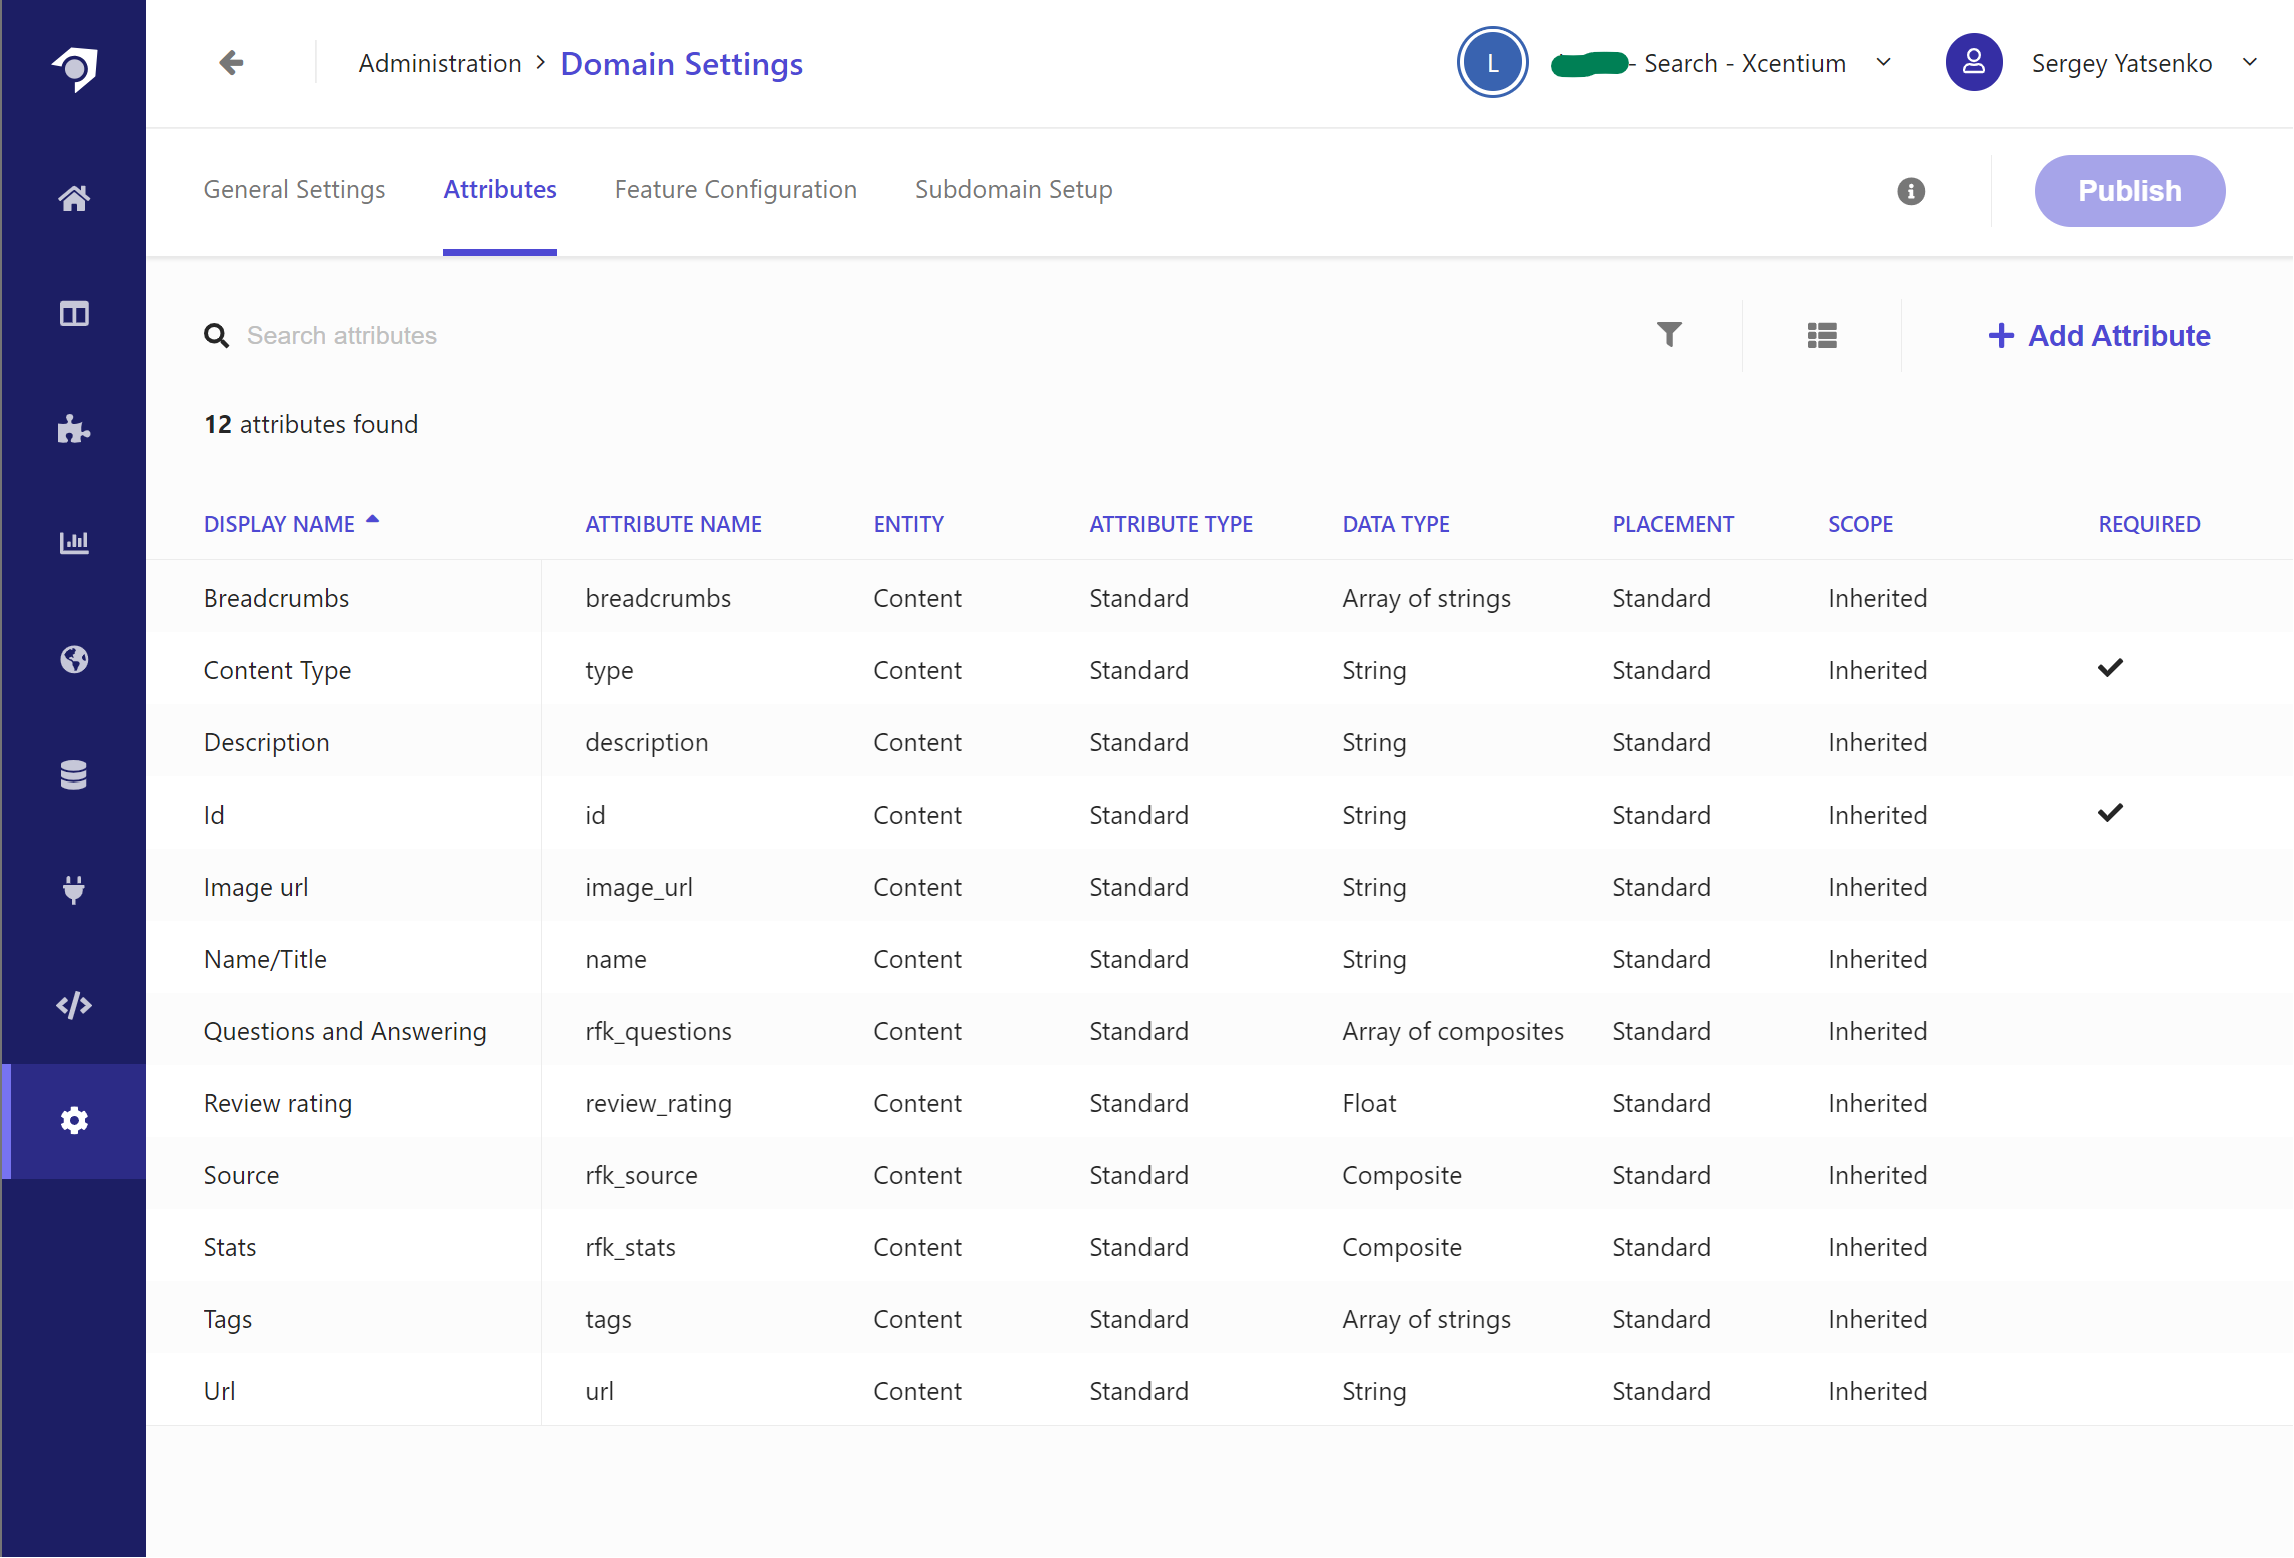
Custom Search Attributes
To enable custom facets/filters and sorts in search implementation, they need to be added as attributes in the Admin section. In this case, I added description, image_url, and type attributes. See this document for more details on search attributes.
Crawlers and document Extractors
For website crawler configuration I would usually choose sitemap.xml. And if site pages are not providing enough metadata about themselves, then we have an option to create a custom JavaScript-based document extractor: a small piece of code which will read page content and create metadata fields using some custom logic. Here’s an example of such document extractor, populating the above-defined description, image_url, and type attributes.
function extract(request, response) {
    $ = response.body;
    const pageType = (request.url ?? '').toLowerCase().includes('/en/news/20') ? 'news' : 'others';
    var imageUrl = ''
    var firstImgContainer = $('.img-container:first');
    if (firstImgContainer.length > 0) {
        var firstImg = firstImgContainer.find('img:first');
        if (firstImg.length > 0) {
            imageUrl = firstImg.attr('src');
        }
    }

    return [{
        'description': $('meta[name="description"]').attr('content') || $('meta[property="description"]').attr('content') || $('p').text(),
        'name': $('title').text(),
        'url': request.url,
        'type': pageType,
        'image_url': imageUrl
    }];
}
Once the search crawler configuration is defined, we need to actually run the site crawler, which can be done manually for each source in the sources section of the portal or triggered on schedule if configured in Crawler Schedule.
Once the first crawl has been completed, the search API is ready to use.
Querying Search API
Sitecore Search provides a REST API, which takes JSON-based payload to define the search querying and sorting. This article provides more specifics on the search query syntax.
Here’s an example of simple search query:
{
    "context": {
        "page": {
            "uri": "https://discover.sitecorecloud.io/discover/v2/[YOUR INSTANCE ID]"
        }
    },
    "widget": {
        "items": [
            {
                "entity": "content",
                "rfk_id": "rfkid_6",
                "search": {
                    "content": {},
                    "facet": {
                        "all": true
                    }
                }
            }
        ]
    }
}
Same query, with filtering and sorting added:
{
    "context": {
        "page": {
            "uri": "https://discover.sitecorecloud.io/discover/v2/[YOUR INSTANCE ID]"
        }
    },
    "widget": {
        "items": [
            {
                "entity": "content",
                "rfk_id": "rfkid_6",
                "search": {
                    "content": {},
                    "filter": {
                        "name": "type",
                        "type": "eq",
                        "value": "news"
                     },
                    "facet": {
                        "all": true
                    },
                    "sort": {
                        "value": [
                        {
                            "order": "desc",
                            "name": "name"
                        }
                        ]
                    }
                }

            }
        ]
    }
}
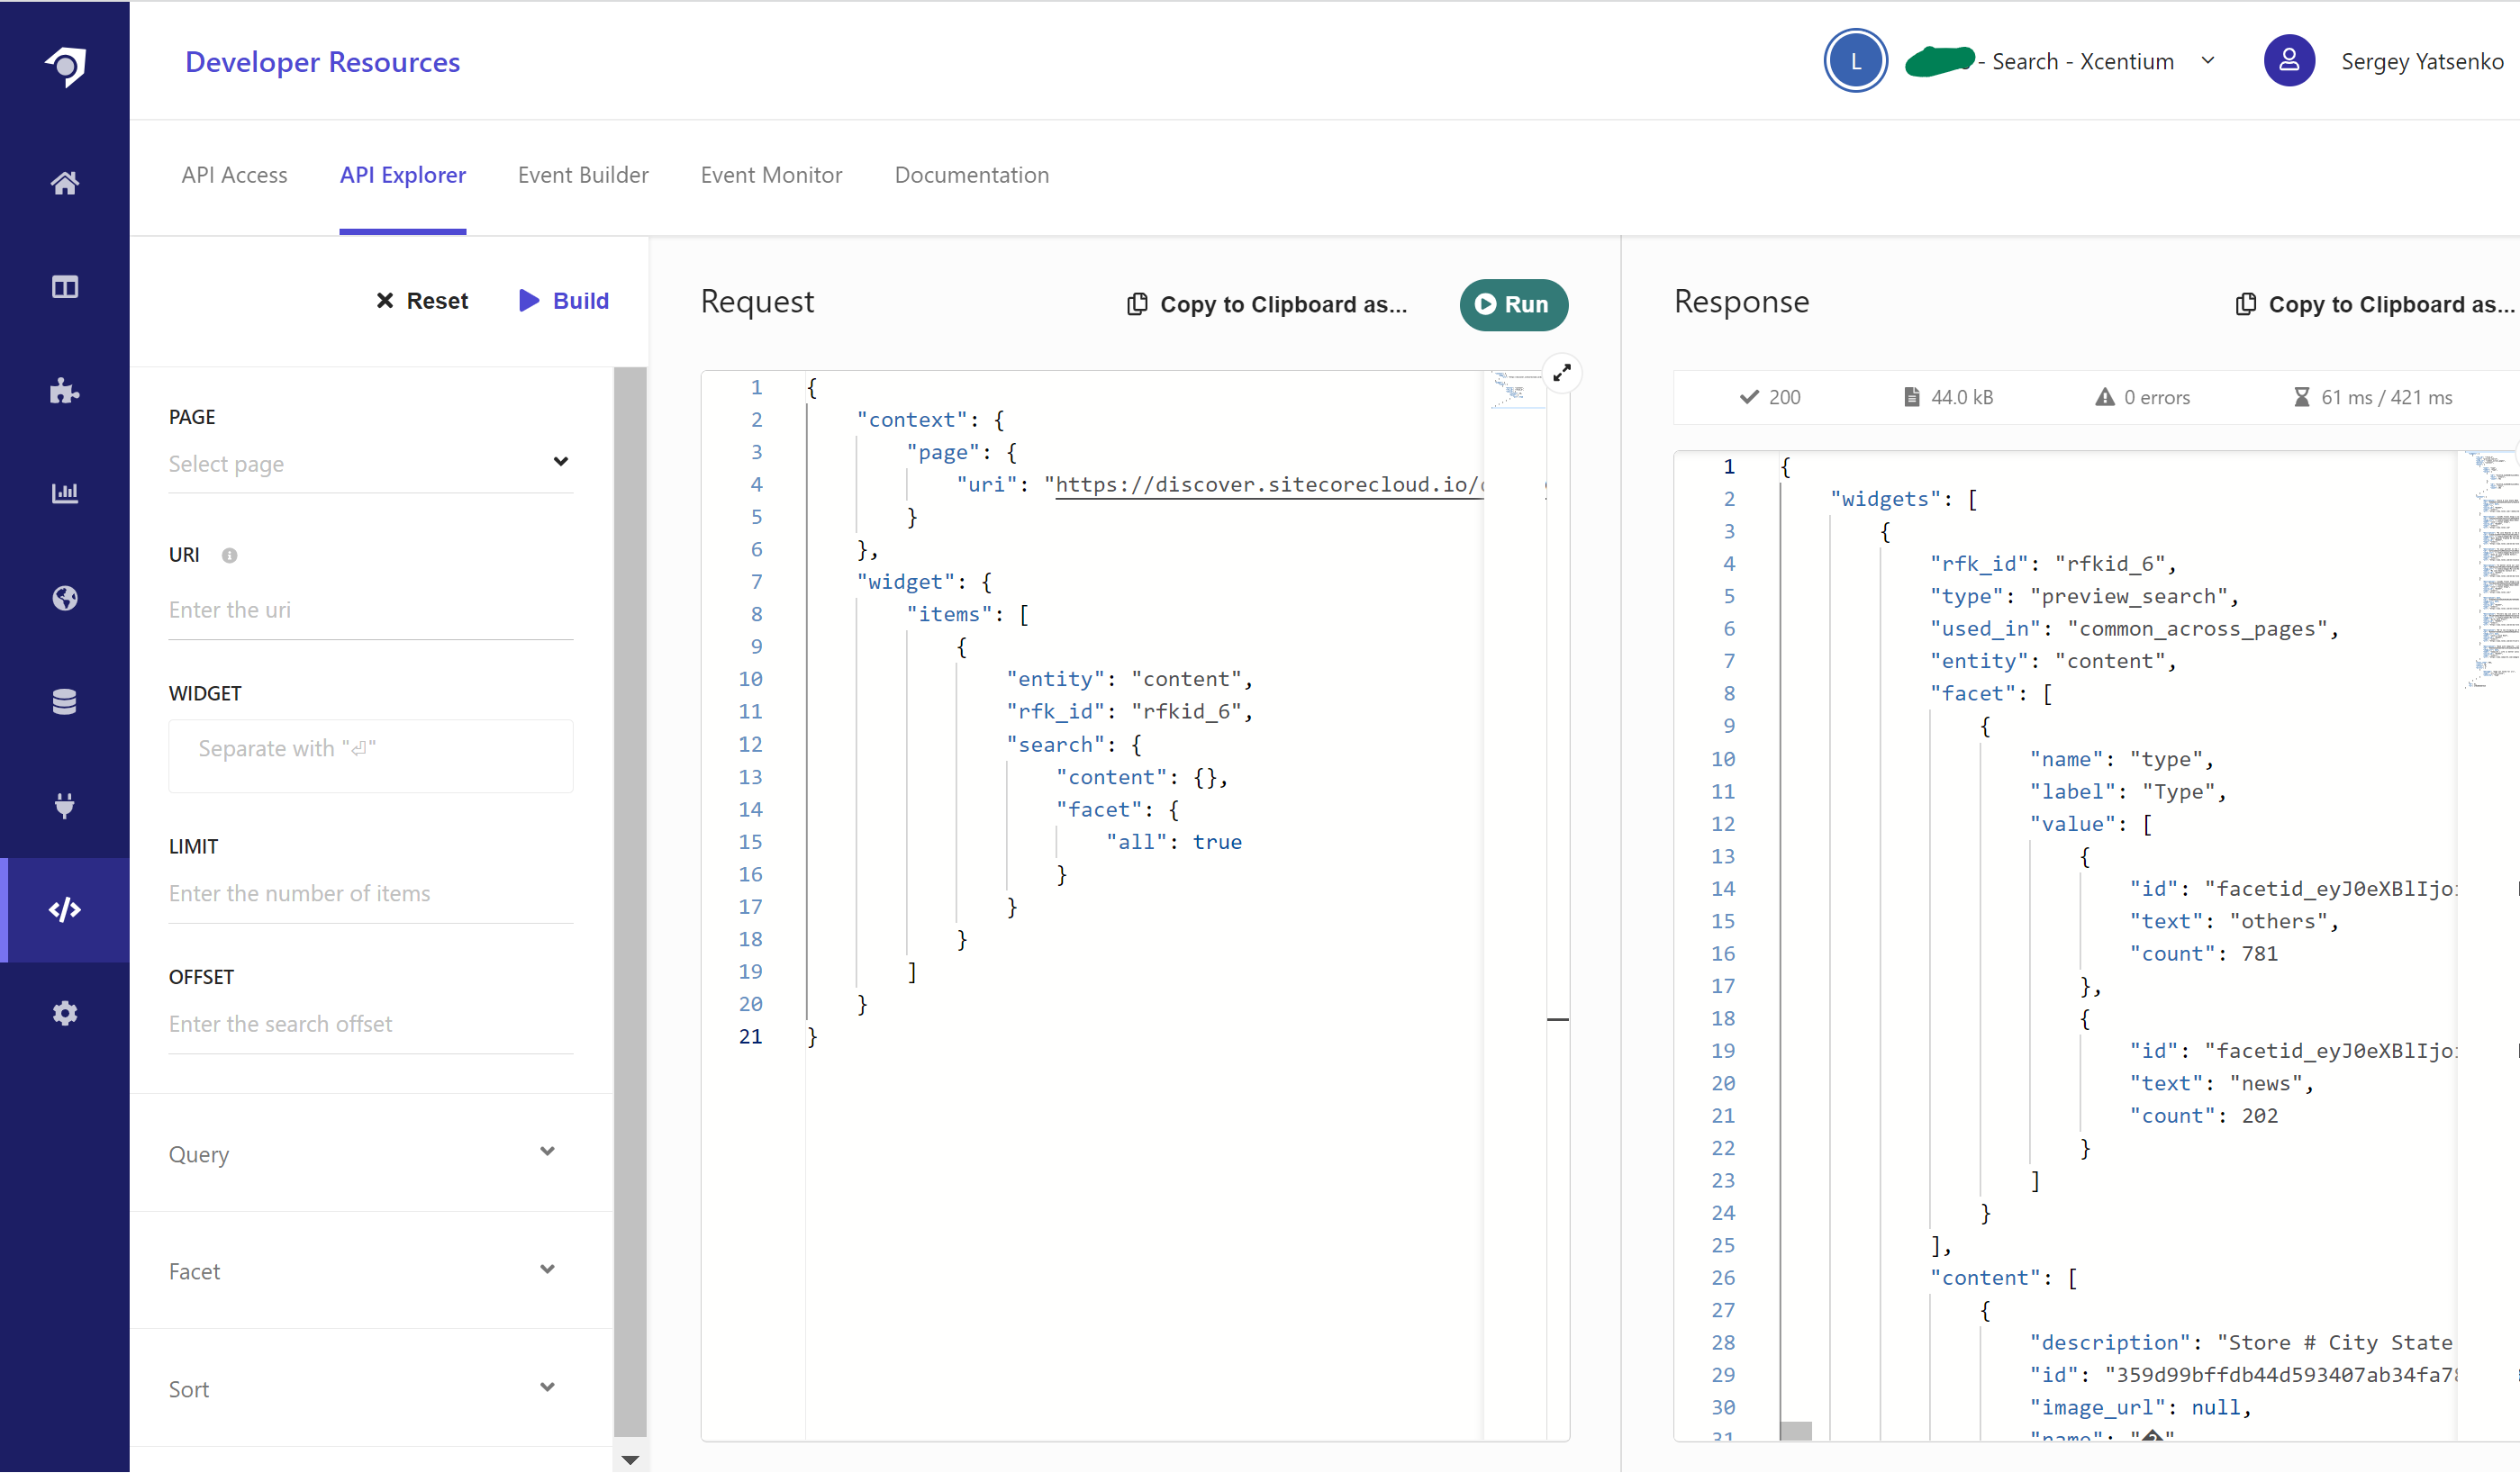
Postman is a tool of choice for many to test REST APIs, but Sitecore Search also provides an API Explorer - a very handy tool for crafting and testing search queries:
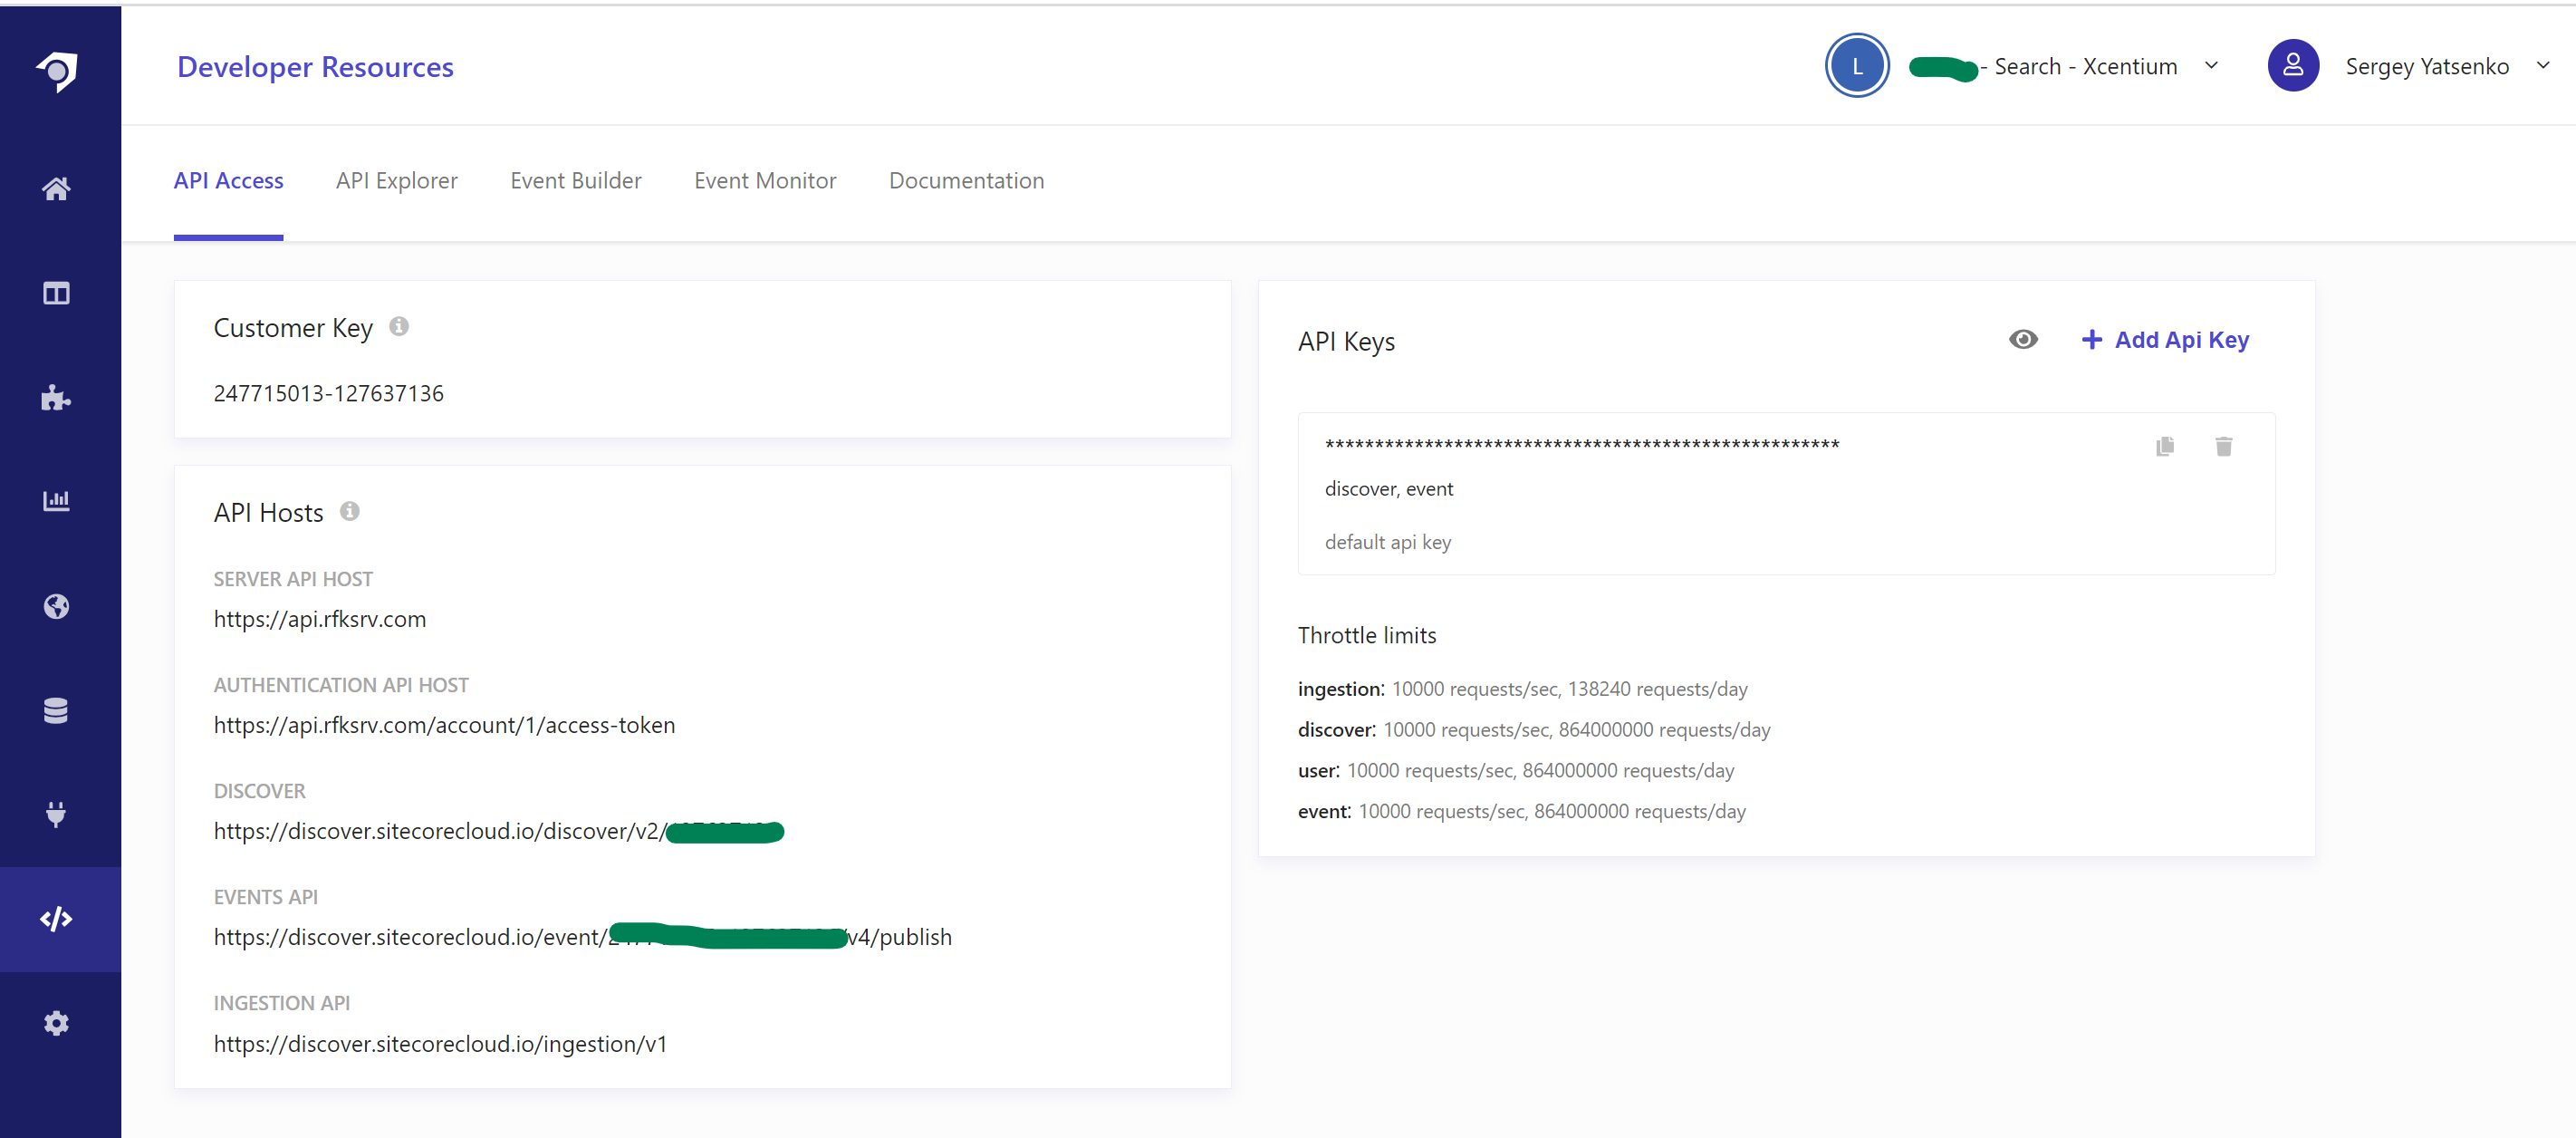
API Endpoints
This is the last essential piece of information before we move on to integrating Sitecore Search into the Next.js application: all API endpoints and security keys can be found under the API Access in the admin screen.
Using Sitecore Search in Next.js/React App
Search API Helper
I abstracted away the search logic into its own Search API helper class. Below are its main functional elements…
Define search request payload
const requestData = {
      widget: {
        items: [
          {
            rfk_id: 'rfkid_7',
            entity: 'content',
            sources: ['[YOUR SOURCE NAME]'],
            search: {
              content: {},
              query: {},
              offset: offsetValue,
              limit: limitValue,
              facet: {
                all: false,
                max: 100,
                types: [
                  {
                    name: 'type',
                  },
                ],
              },
            },
          },
        ],
      },
    }
Add search facets and filters
if (facet) {
      if (facet.facetName === 'tags') {
        const facetData: FacetWithValue = {
          all: false,
          max: 100,
          types: [
            {
              name: 'authors',
            },
            {
              name: facet.facetName,
              filter: {
                type: 'and',
                values: [facet.selectedValue],
              },
            },
          ],
        }
        requestData.widget.items[0].search.facet = facetData
      } else {
        const facetData: FacetWithValue = {
          all: false,
          max: 100,
          types: [
            {
              name: facet.facetName,
              filter: {
                type: 'or',
                values: [facet.selectedValue],
              },
            },
          ],
        }
        //console.log('facetData', facetData)
        requestData.widget.items[0].search.facet = facetData
      }
    }
    if (filter) {
      requestData.widget.items[0].search.filter = {
        name: filter.name,
        type: 'eq',
        value: filter.value,
      }
    }
Fire up the request against Search REST API and get the results back
const response = await fetch(process.env.NEXT_PUBLIC_SEARCH_APP_URL!, {
      method: 'POST',
      headers: {
        'Content-Type': 'application/json',
        Authorization: process.env.NEXT_PUBLIC_SEARCH_APP_API_KEY!,
      },
      body: JSON.stringify(requestData),
    })

const jsonData = await response.json()
    console.log('response data', jsonData)
    const contentResults = jsonData.widgets[0].content
    const fetchedFacets = jsonData.widgets[0].facet
    const itemsPerPage = jsonData.widgets[0].limit
    const offset = jsonData.widgets[0].offset
    const page = Math.ceil(offset / limitValue) + 1
    const totalItems = jsonData.widgets[0].total_item

return {
  contentResults,
  fetchedFacets,
  itemsPerPage,
  totalItems,
  page,
}
SearchResults Next.js Component
With all that search logic abstracted away, the search component can be made fairly straightforward…
import { getSearchResults } from './SearchApi'

//...

const [contentResults, setContentResults] = useState<SearchResult[]>([])

//...

useEffect(() => {
//...
	searchResults = await getSearchResults(offset, '', limit, null, { name: 'type', value: type })
	setContentResults(searchResults)
//...
}

return (
    <div className={css.search} id="searchComponent">
			<ul>
        {contentResults && contentResults.length > 0 ? (
          contentResults.map((result, index) => {
            return (
							<li key={index}>
                <div className={css.row}>
                  <div className={css.thumbnail}>
                    {result.image_url && (
                      <img src={'https://[YOUR SITE ROOT]' + result.image_url} />
                    )}
                  </div>
                  <div className={css.description}>
                    <h3>
                      <Link href={result.url}>{result.name}</Link>
                    </h3>
                    {result.description && (
                      <p>
                        {result.description.slice(0, 500)}
                        {result.description.length > 500 && '...'}
                      </p>
                    )}
                  </div>
                </div>
              </li>
						)}
					)}
		</div>
Conclusion
In this post, I left out many implementation details (e.g., sorting, filtering, full-text search, highlights, etc.) in order to keep things high-level and simple. Hopefully this will be helpful to someone just starting on Sitecore Seaarch.